IN THIS ARTICLE
Photo Overlays
To set up a photo overlay:
- Go to Settings, then under the Inventory tab, select Media.
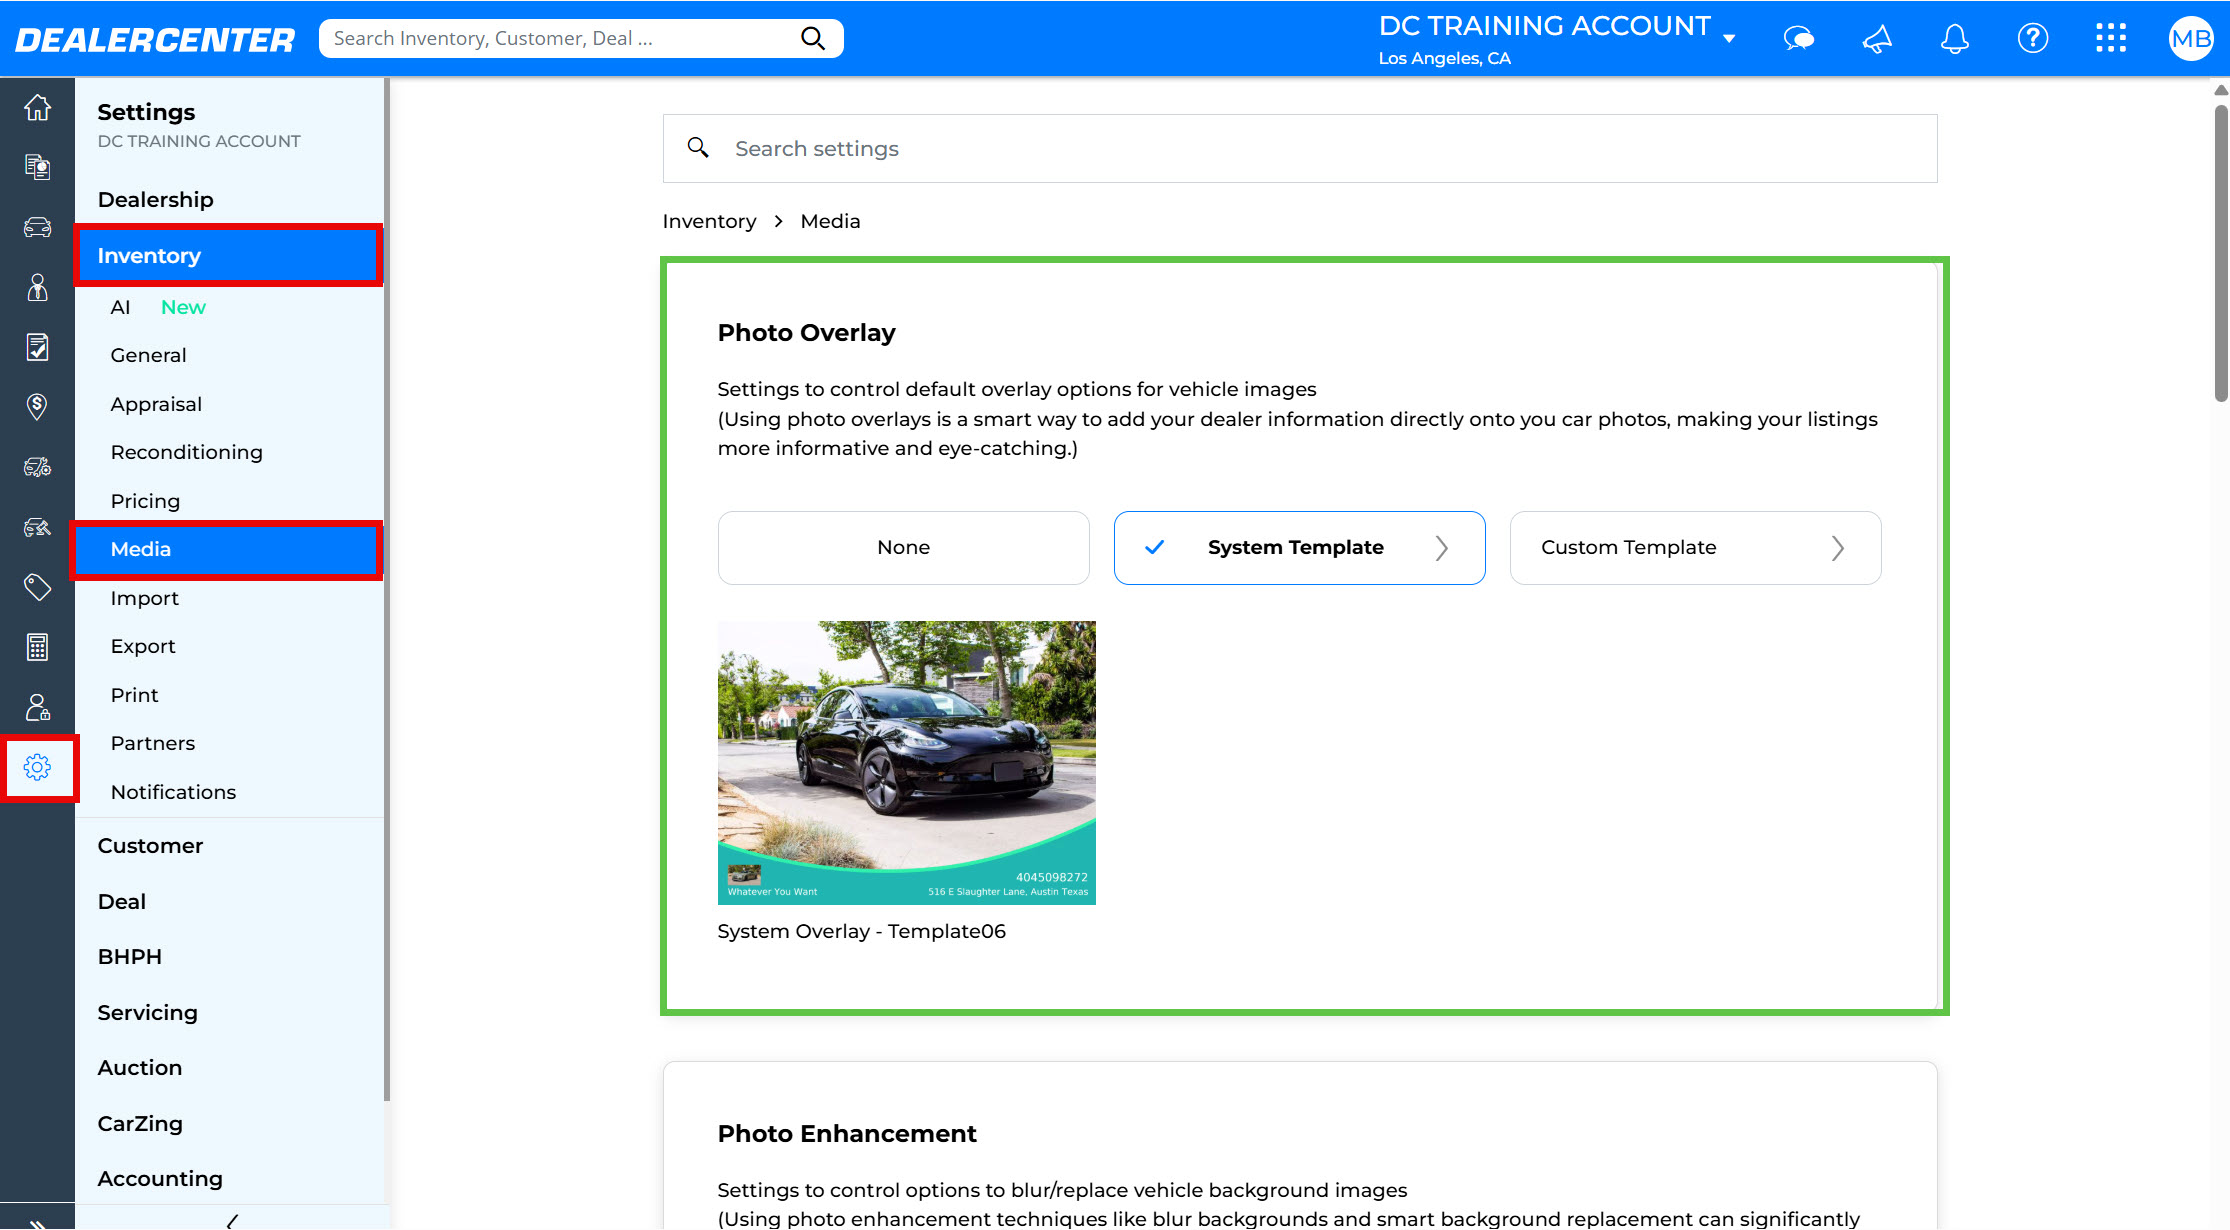
- Under Photo Overlay, select either System template or Custom template.
-
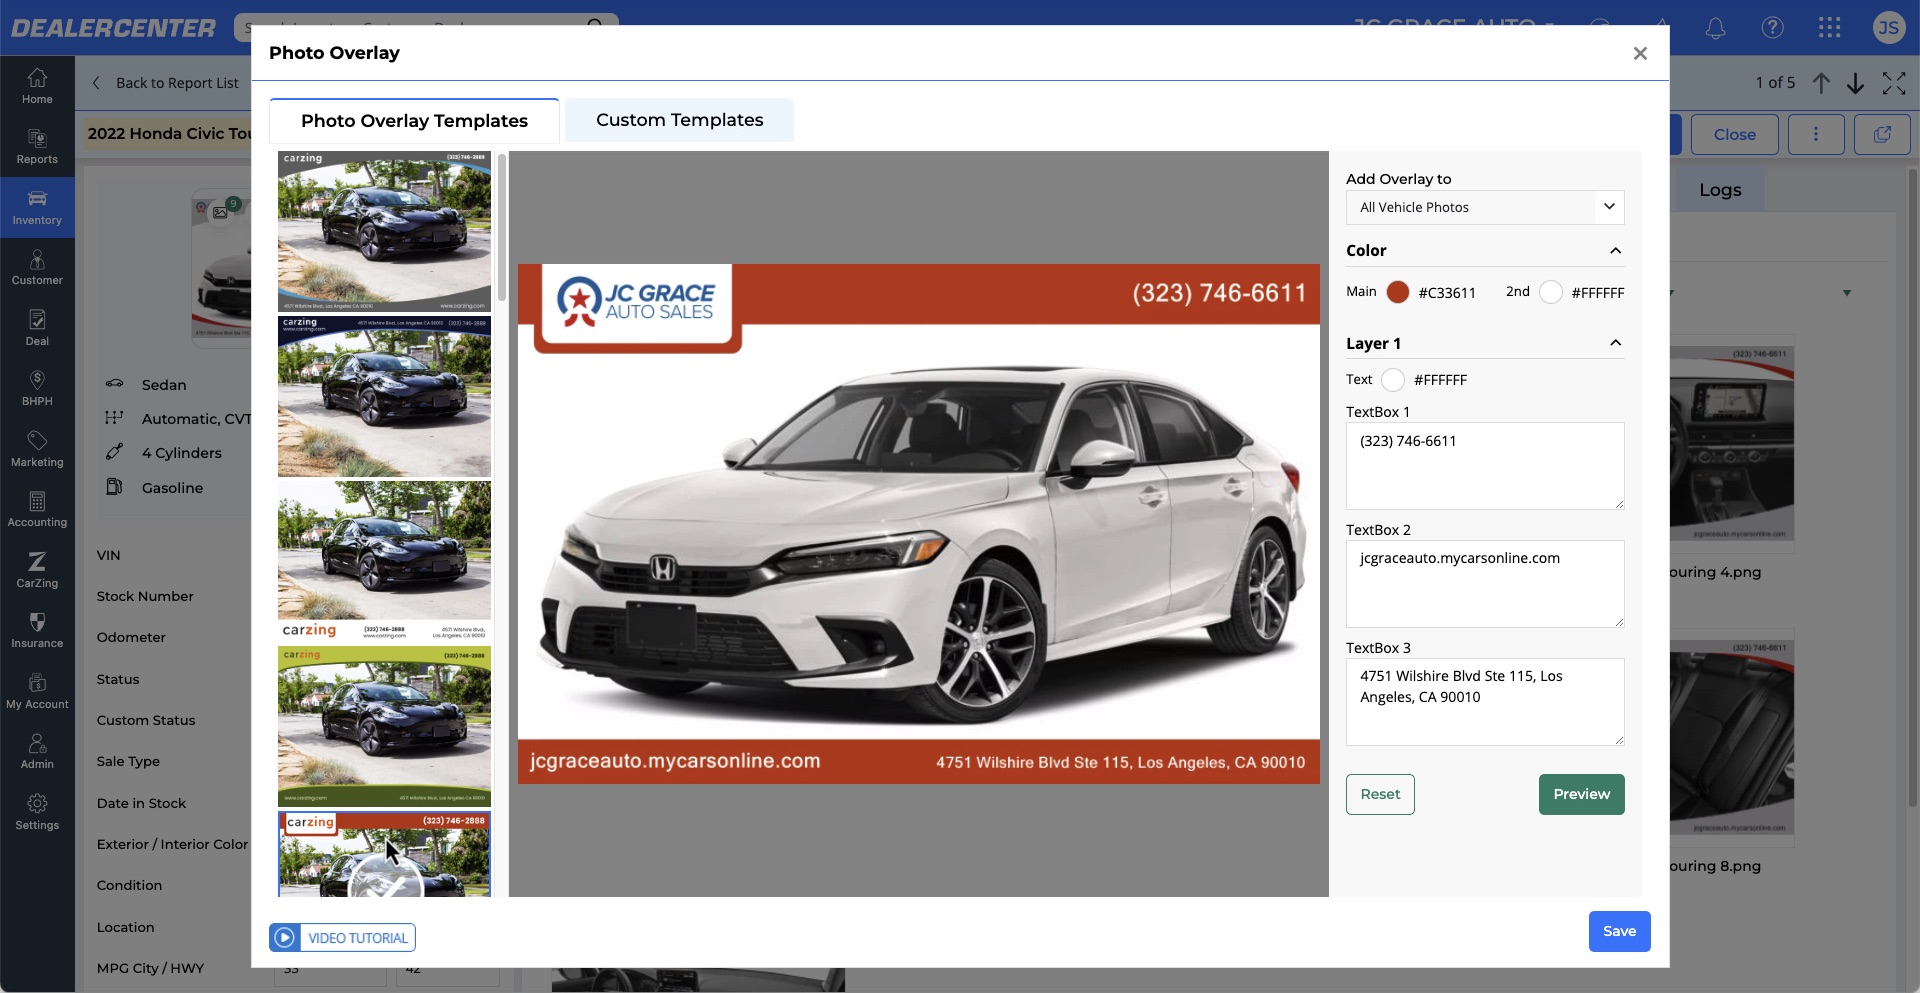
Select your desired overlay template from the gallery and customize colors as needed. Click the Preview button to preview the selected template and edits to color/text etc.
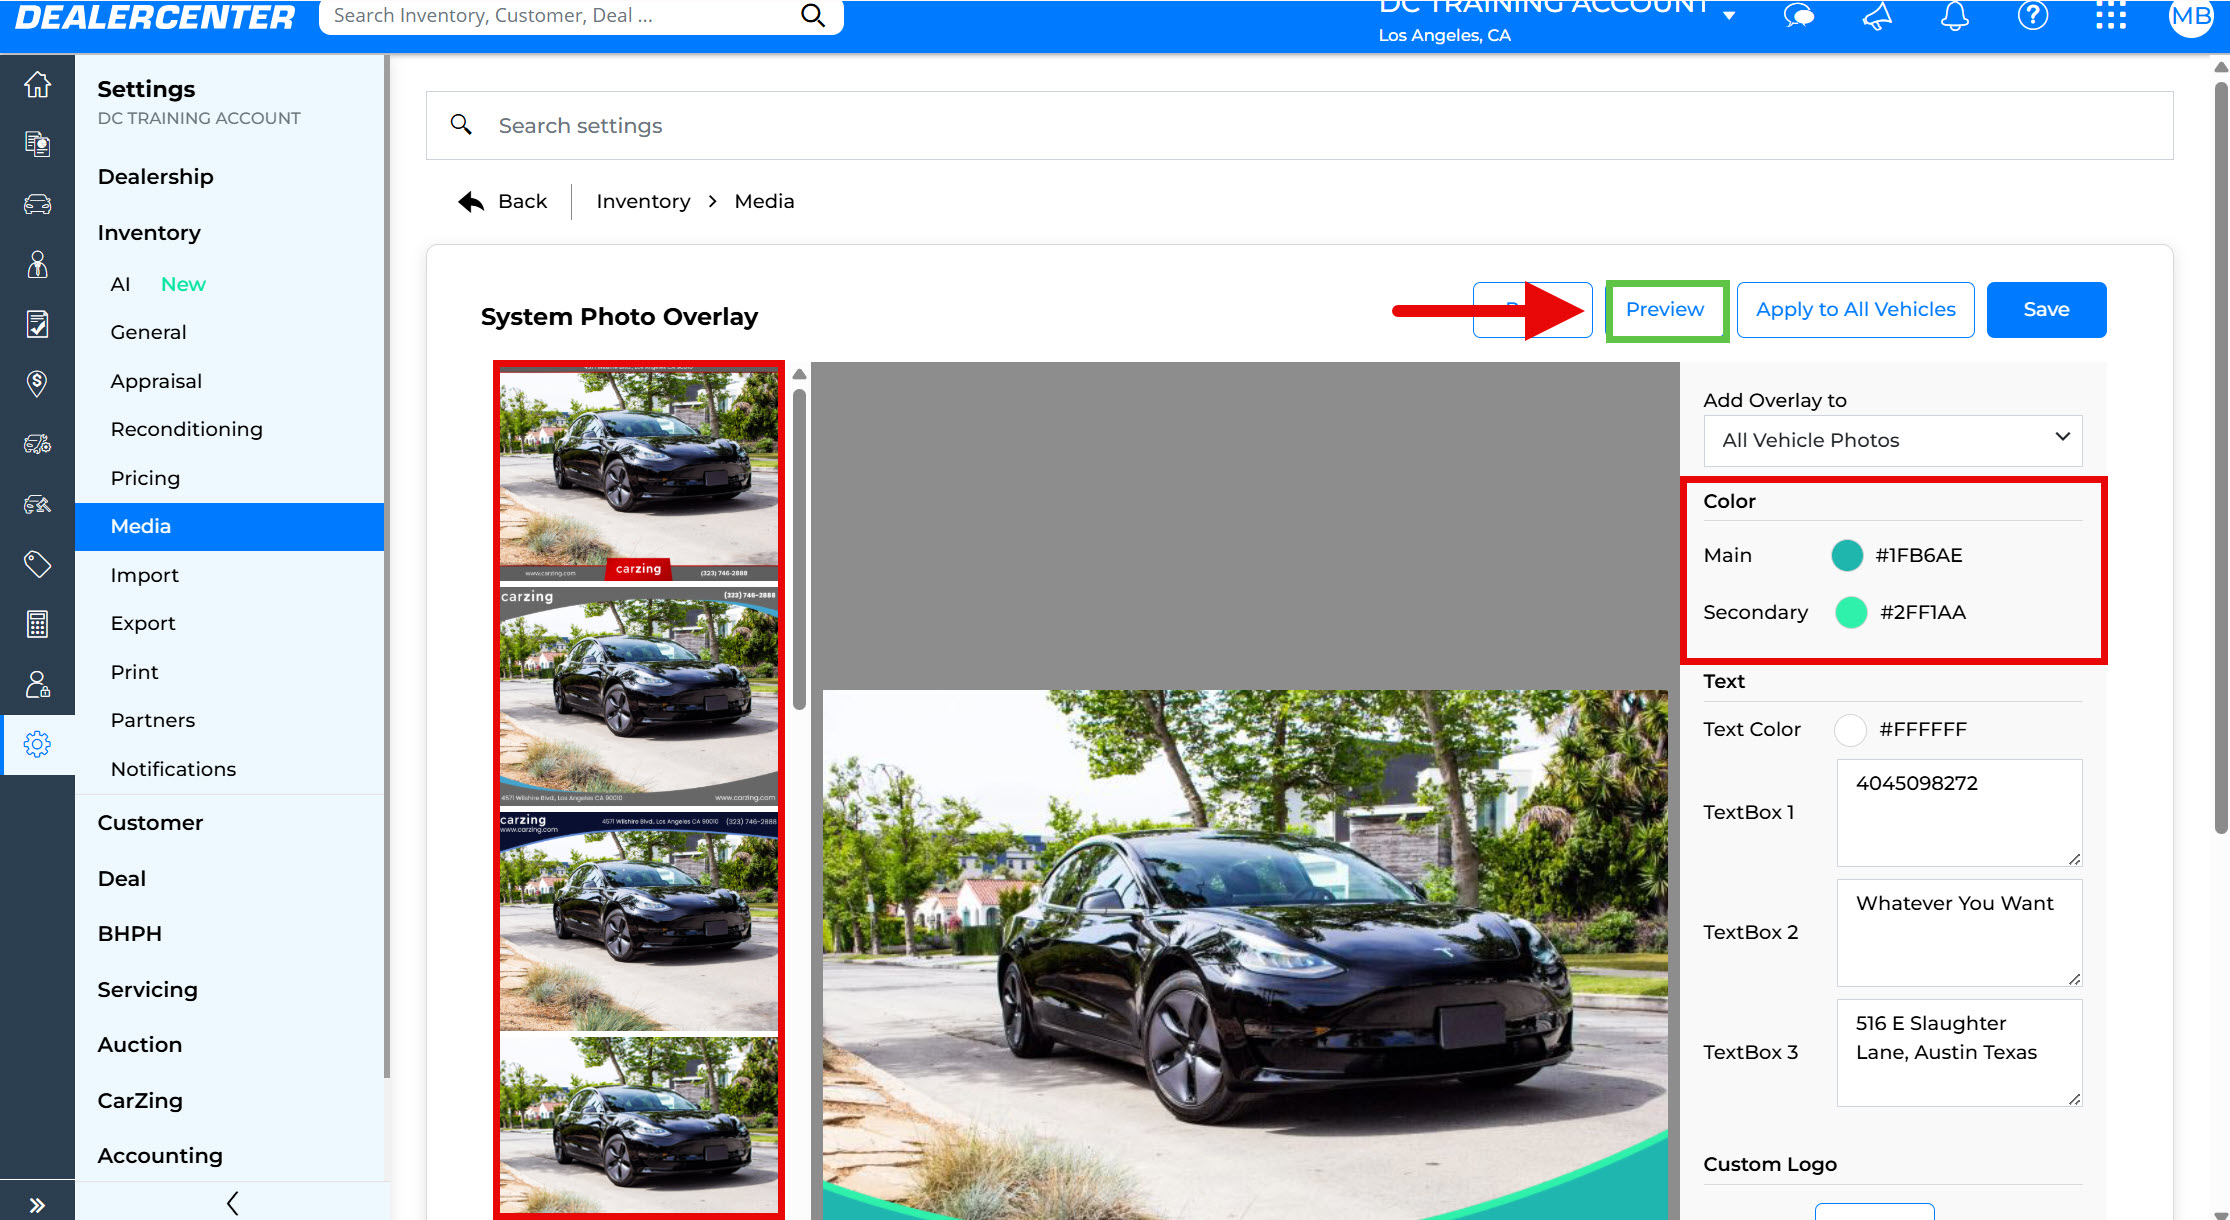
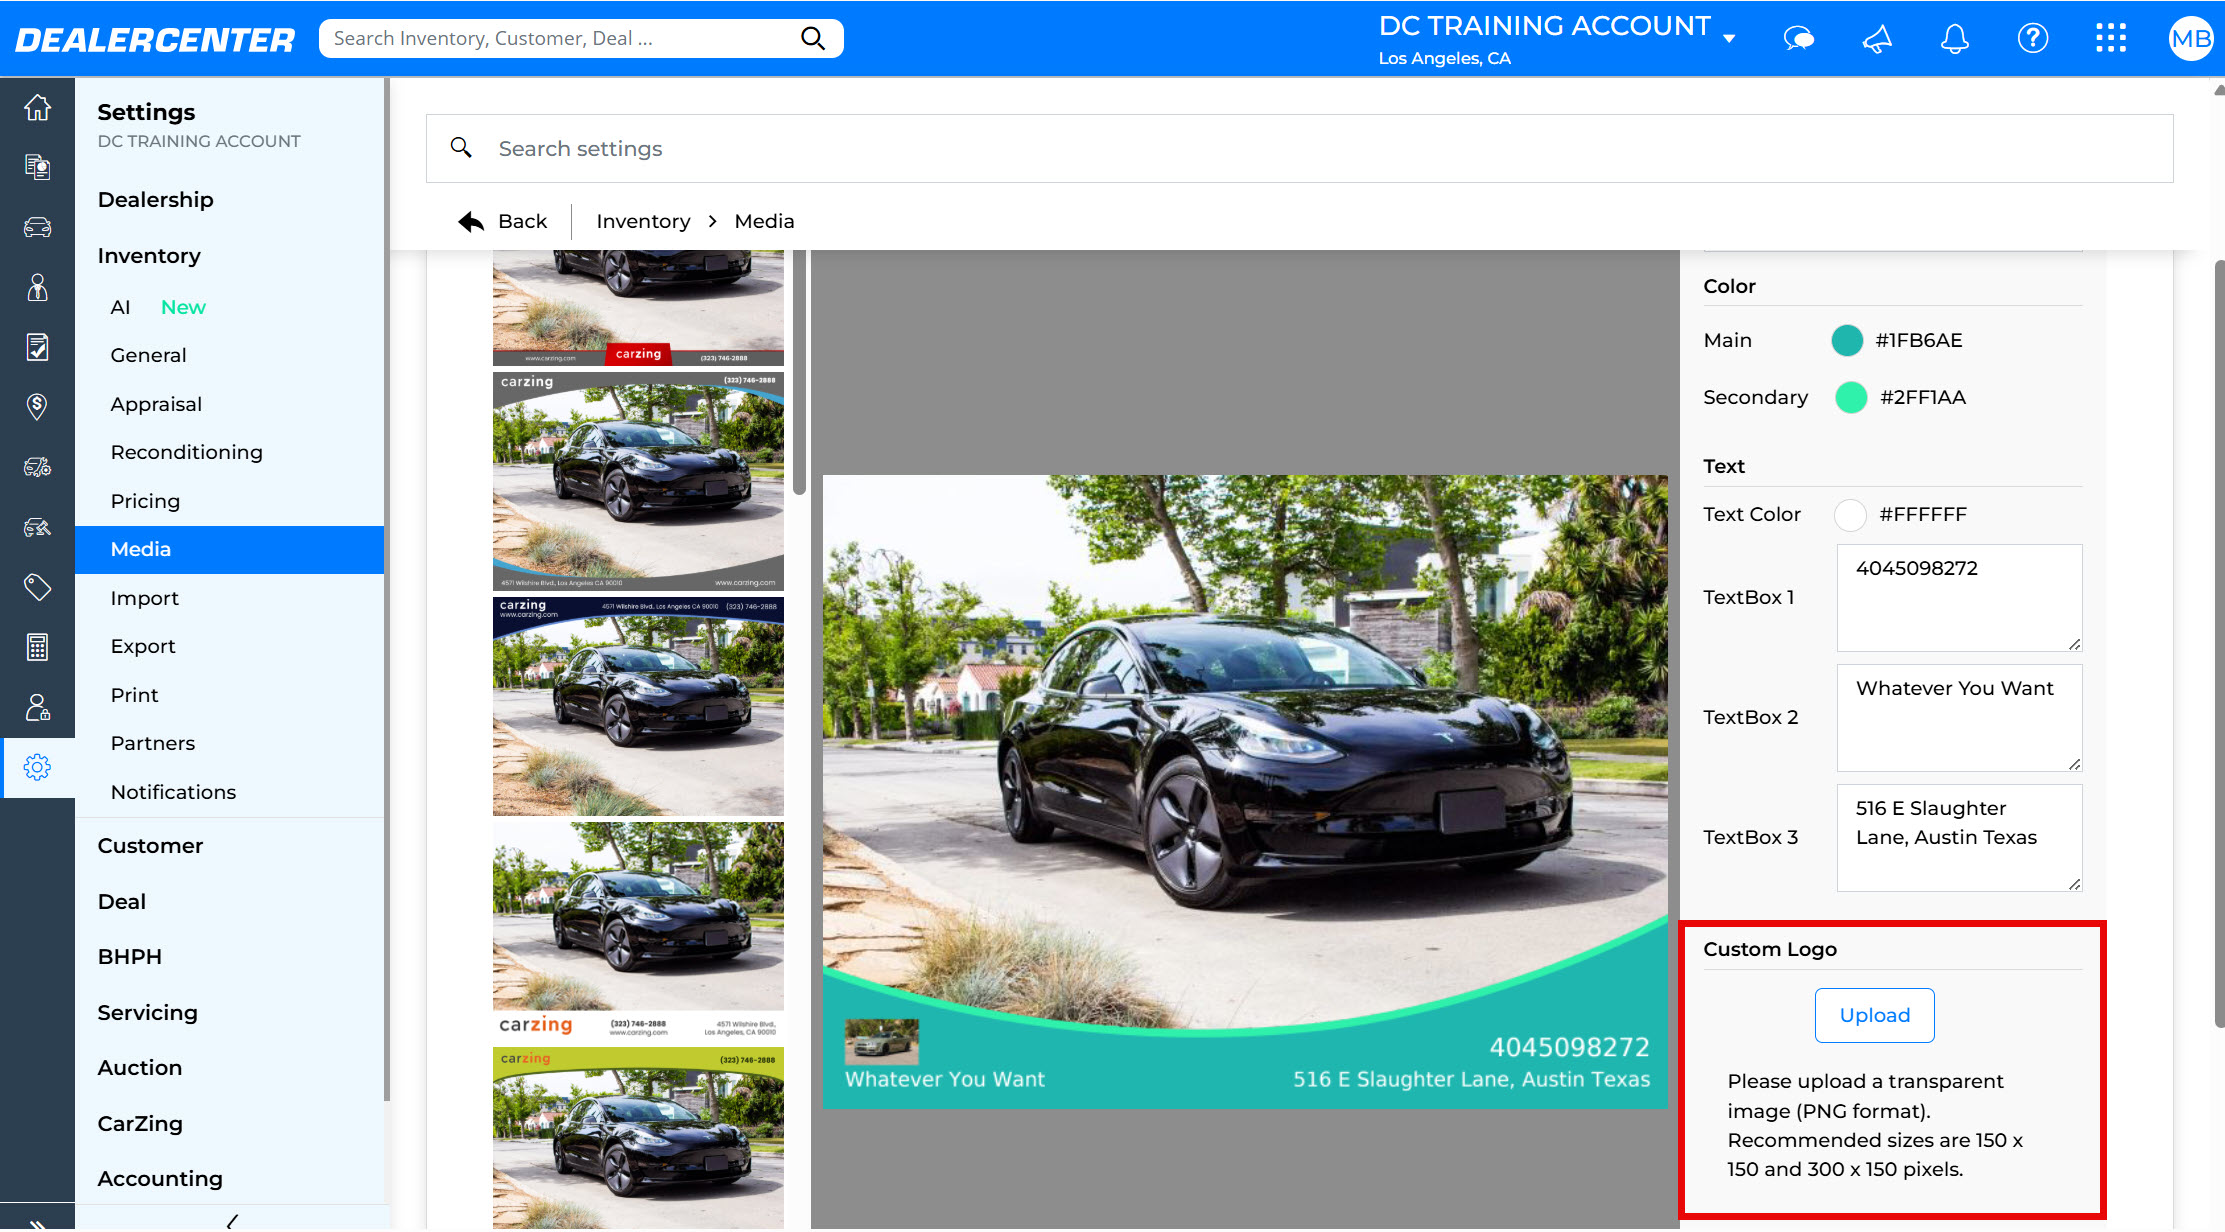
- If your dealership logo is already uploaded under General Settings, it will automatically be applied. If not, click Upload to add your logo.
- Choose how you'd like to apply the overlay: All photos, Just first photo, or First and last photos.

- Click Save to apply your changes immediately.
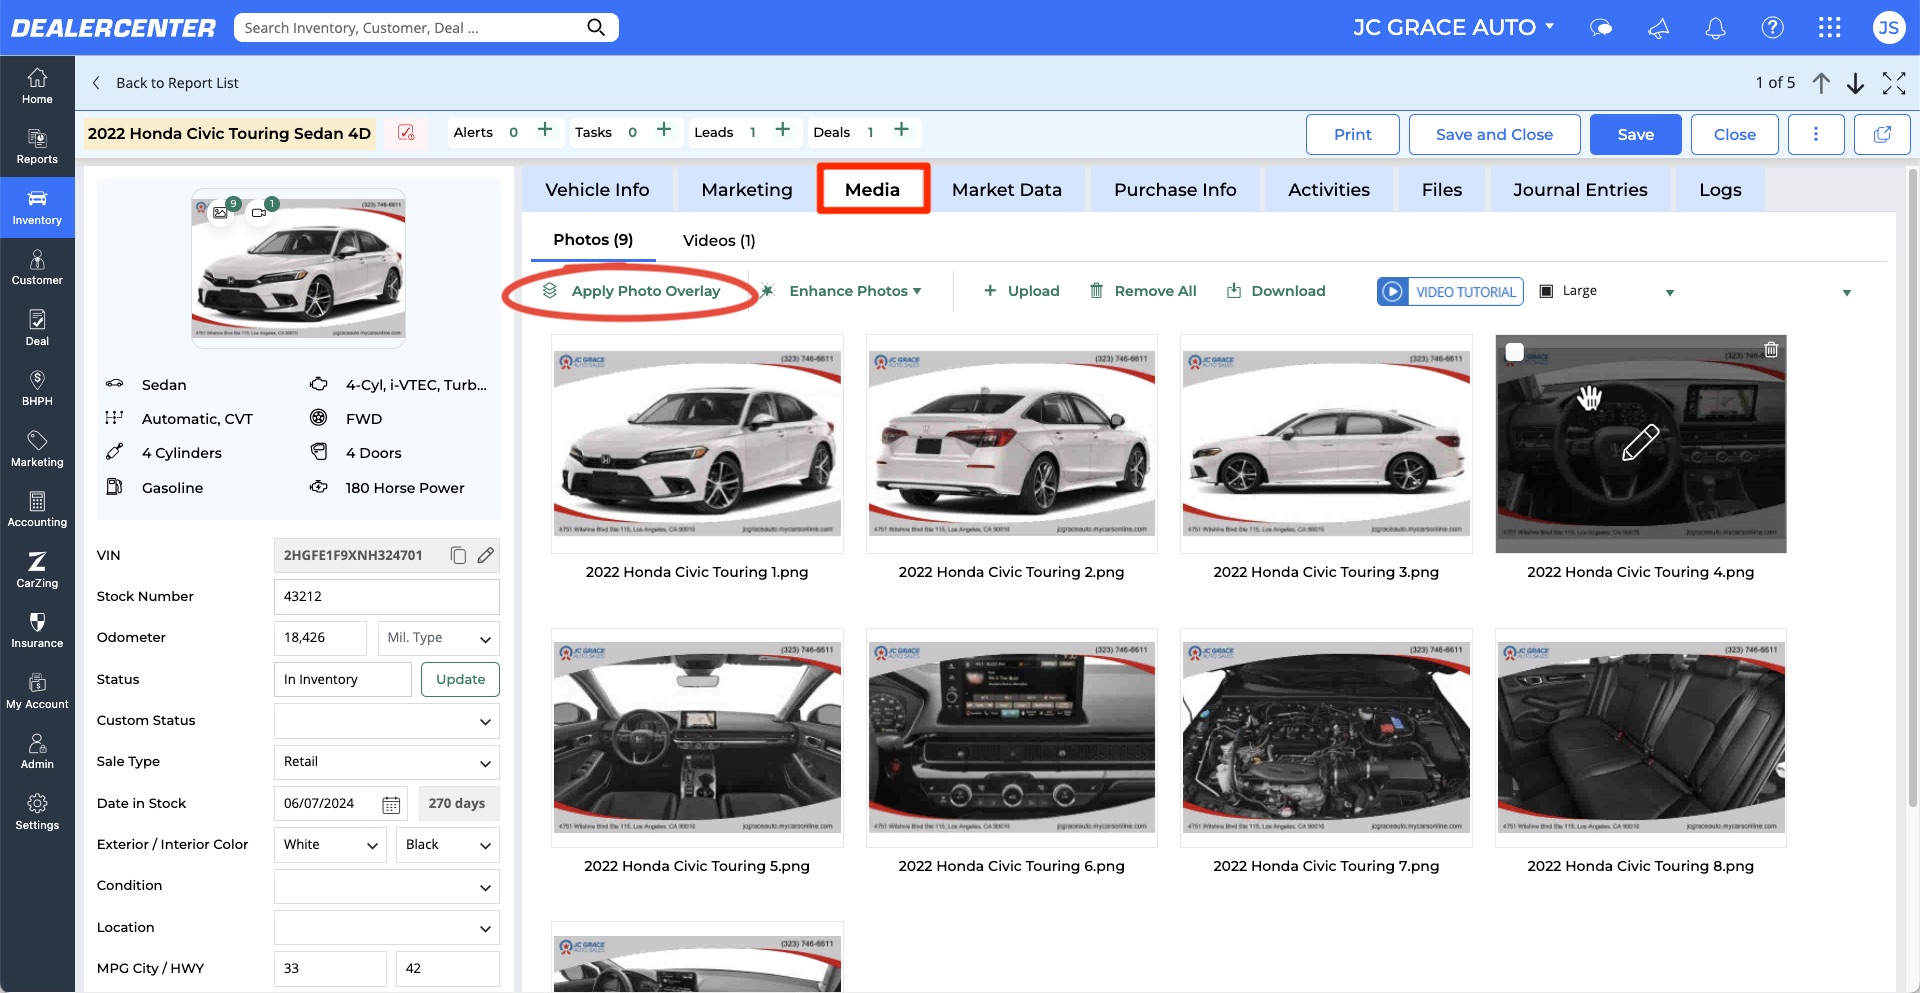
You can also apply unique overlays directly from a vehicle record. On the vehicle page, select the Media tab, then click Apply Photo Overlay.
AI-Powered Vehicle Photo Enhancements
Enhance your vehicle photos globally by using blur or background replacement:
- Navigate to Settings, then under the Inventory tab, select Media.
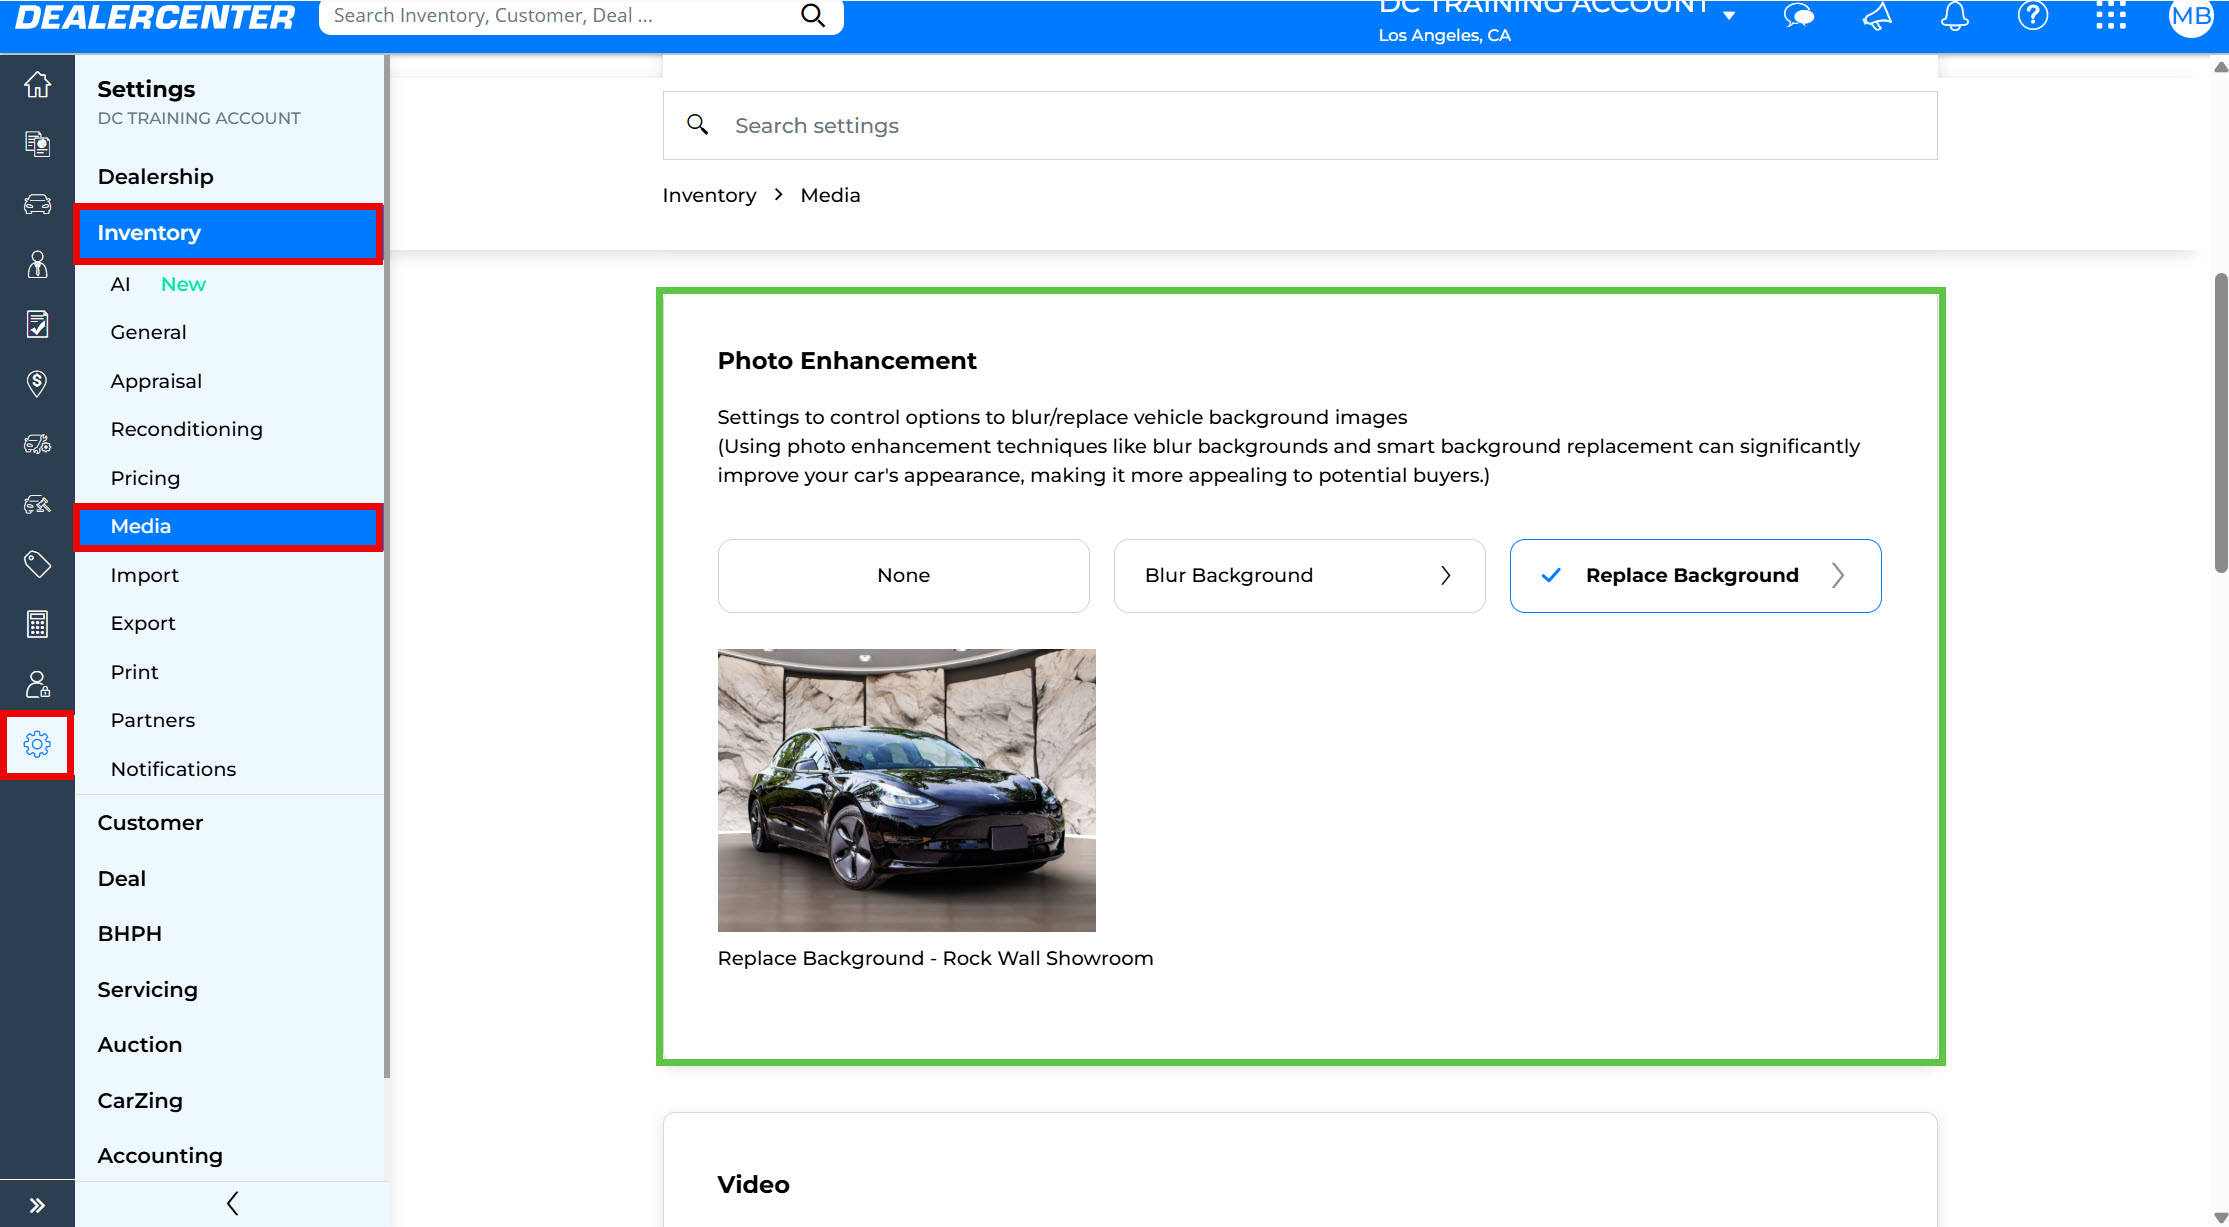
- Scroll to Photo Enhancement, select Blur Background or Replace Background:
-
Blur Background: Softens the existing background.
-
Replace Background: Uses AI technology to replace the existing background with a professional preset.
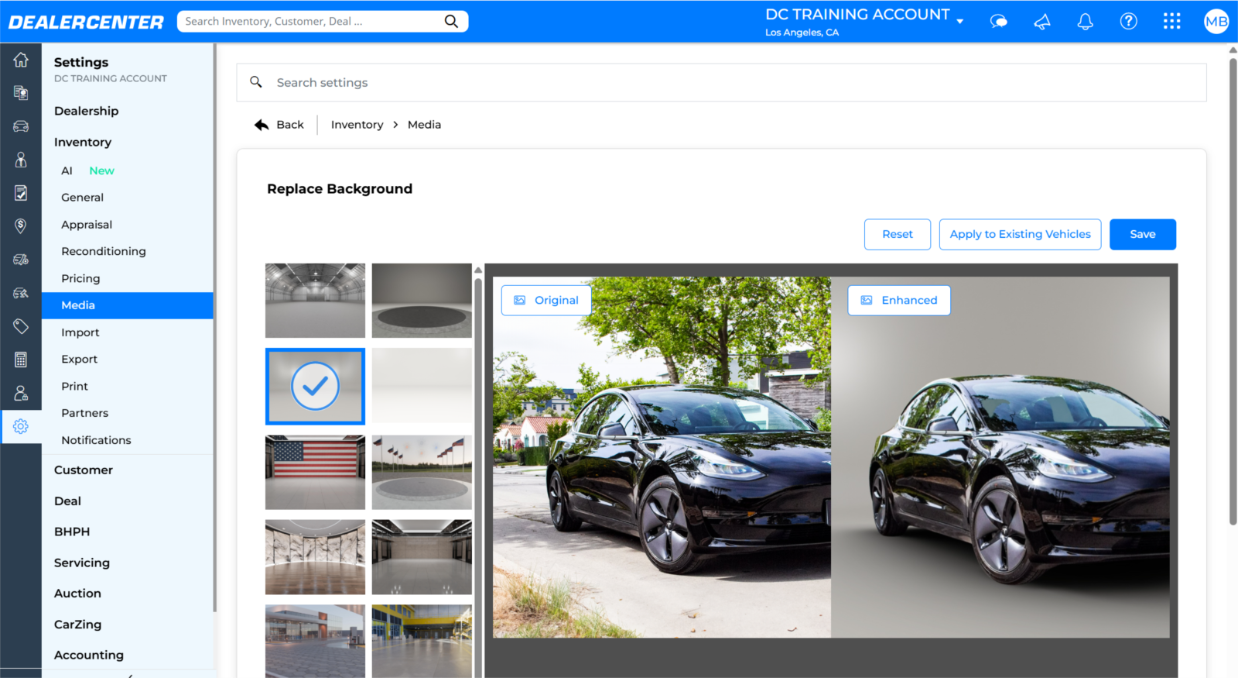
- Preview the selected enhancement, then click Save.
Enhancements apply globally but can be adjusted per vehicle:
- Go to the vehicle’s Media tab.
- Click Enhance Photos to customize settings for individual vehicles.

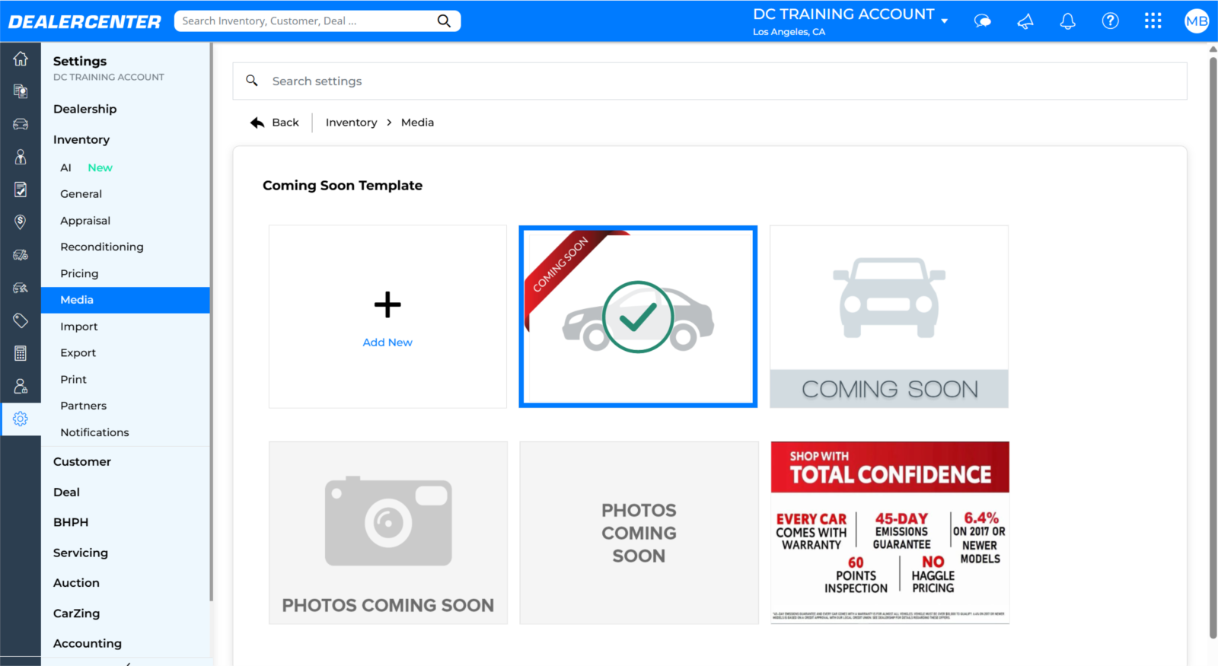
Coming Soon Images
Set a "Coming Soon" image for vehicles without uploaded photos:
- Navigate to Settings, then under the Inventory tab, select Media.
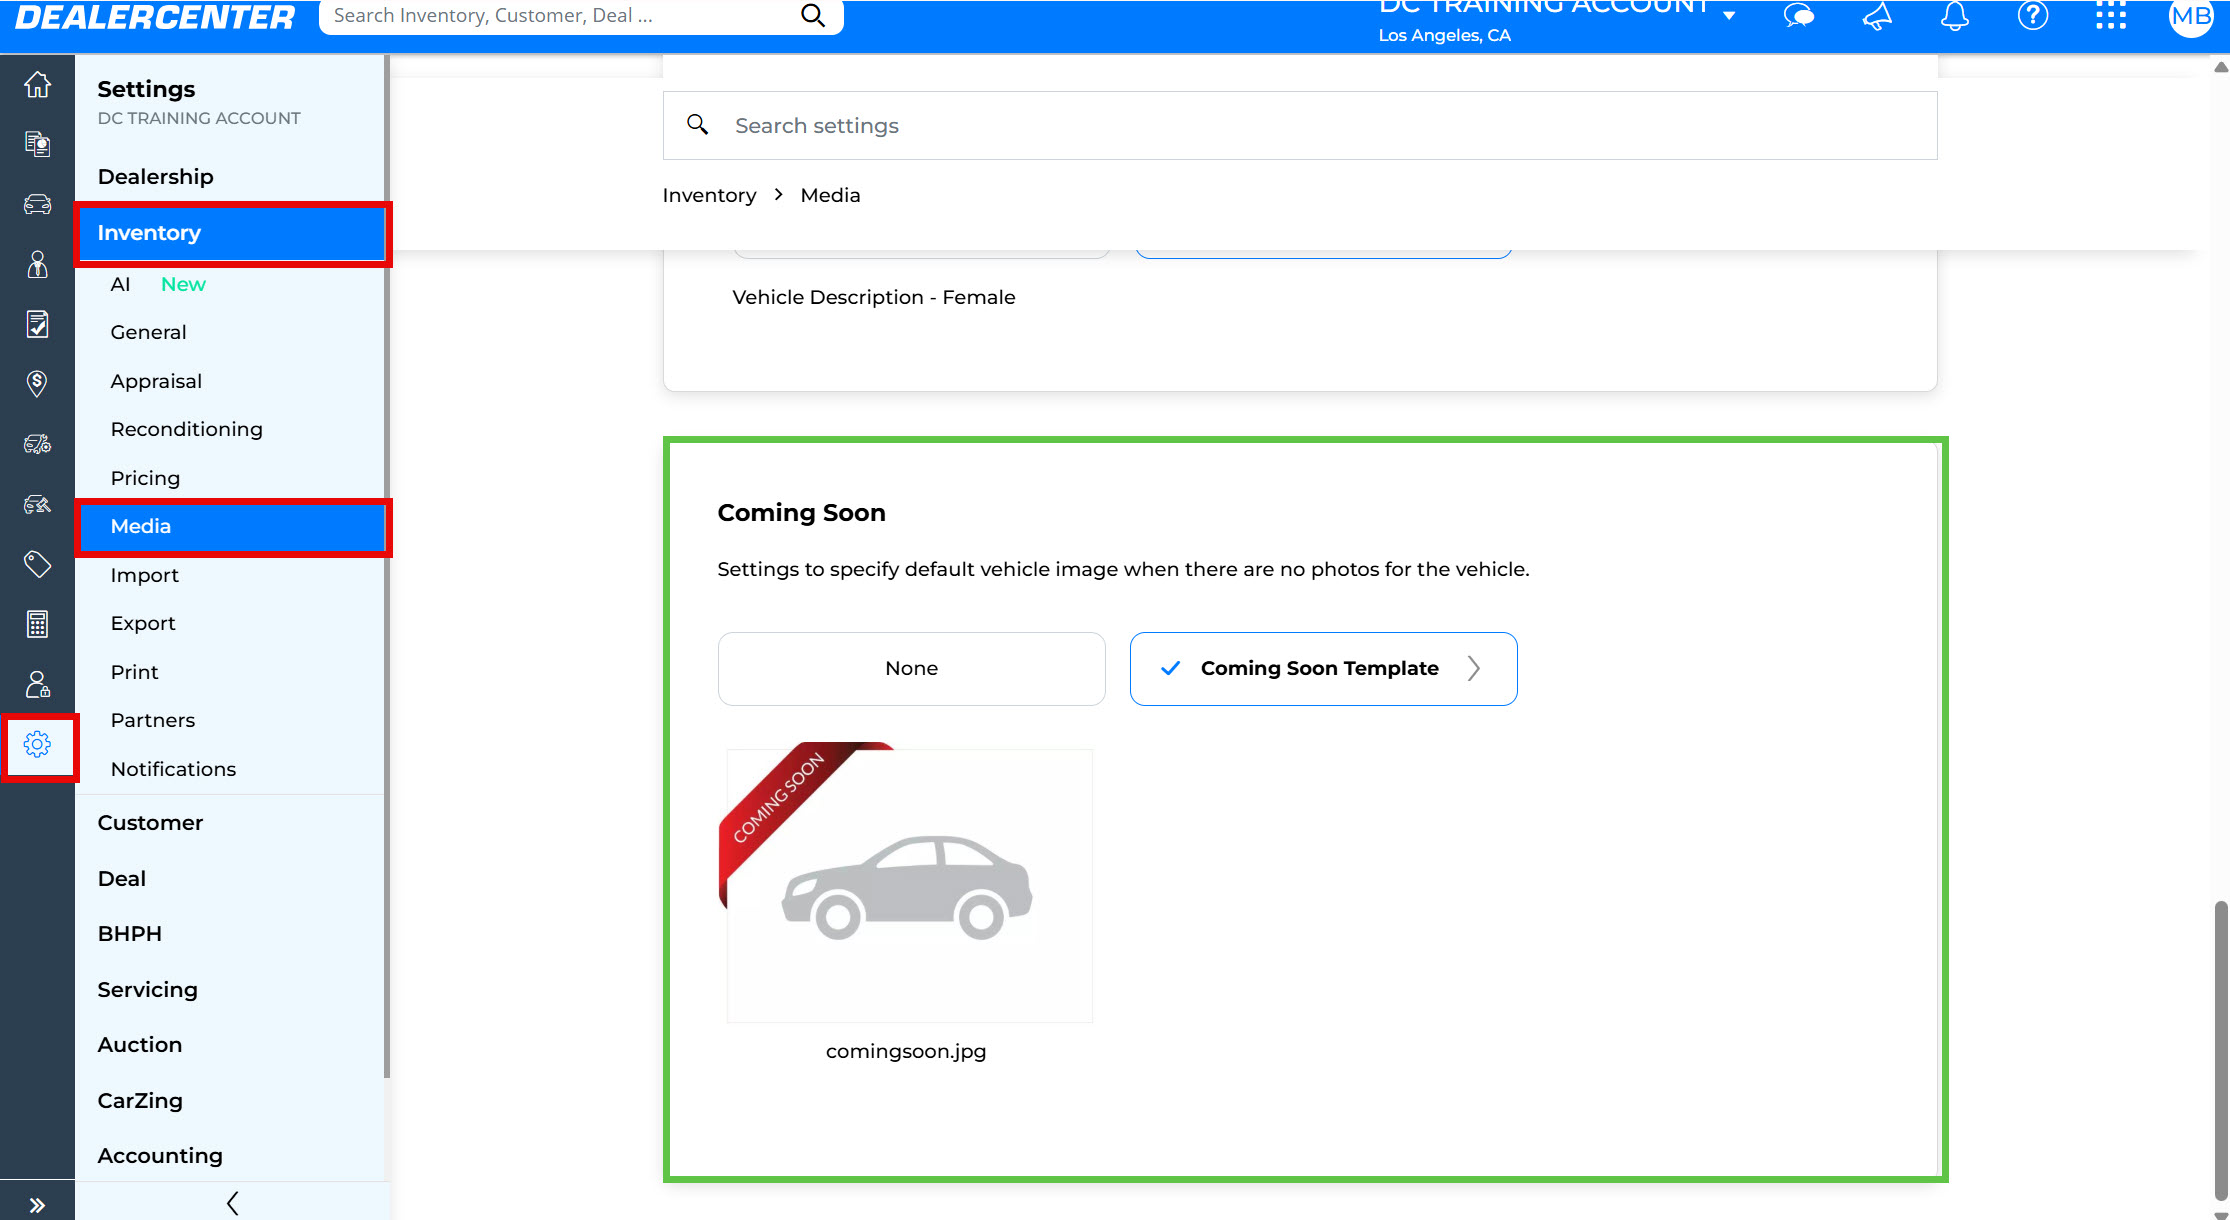
- Scroll down to the Coming Soon section and select the Coming Soon Template option.
- Choose your preferred template.
Individual Photo Editing Tools
Edit individual vehicle photos directly within DealerCenter:
- Go to the vehicle page and select the Media tab.
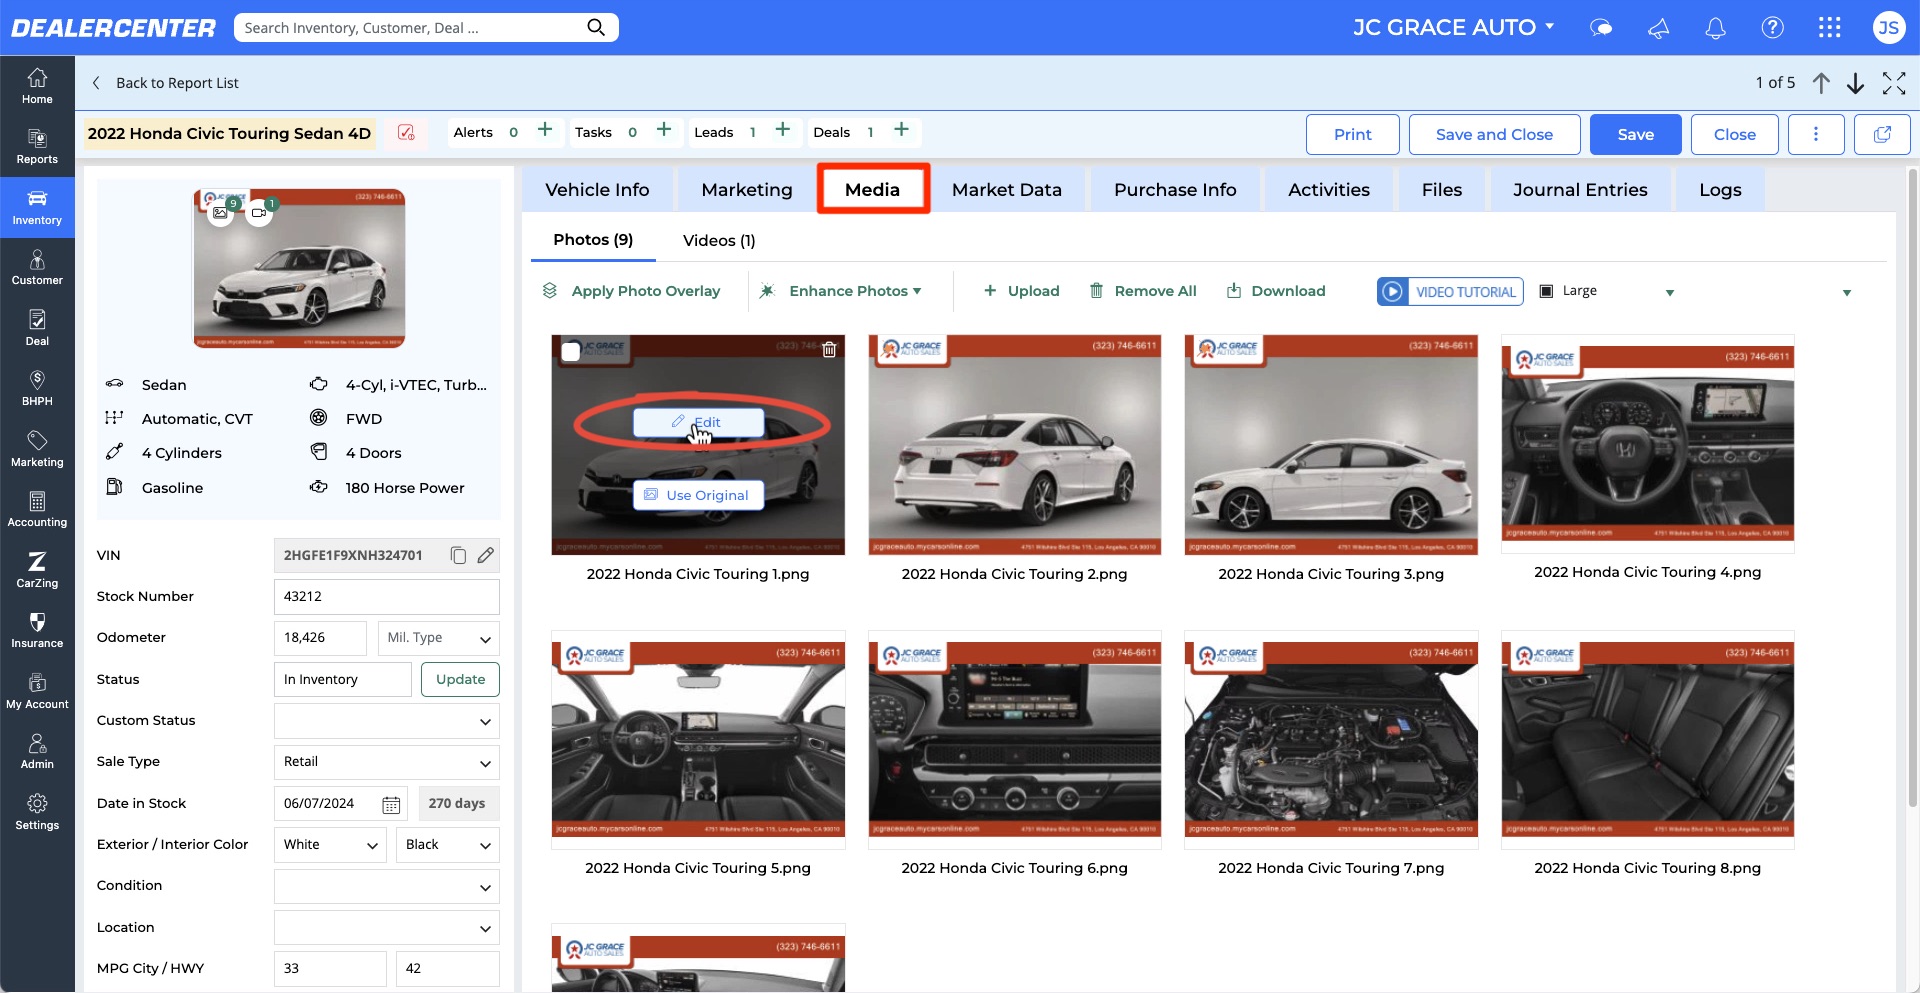
- Click on the photo you want to edit.
- Use the available editing tools, including:
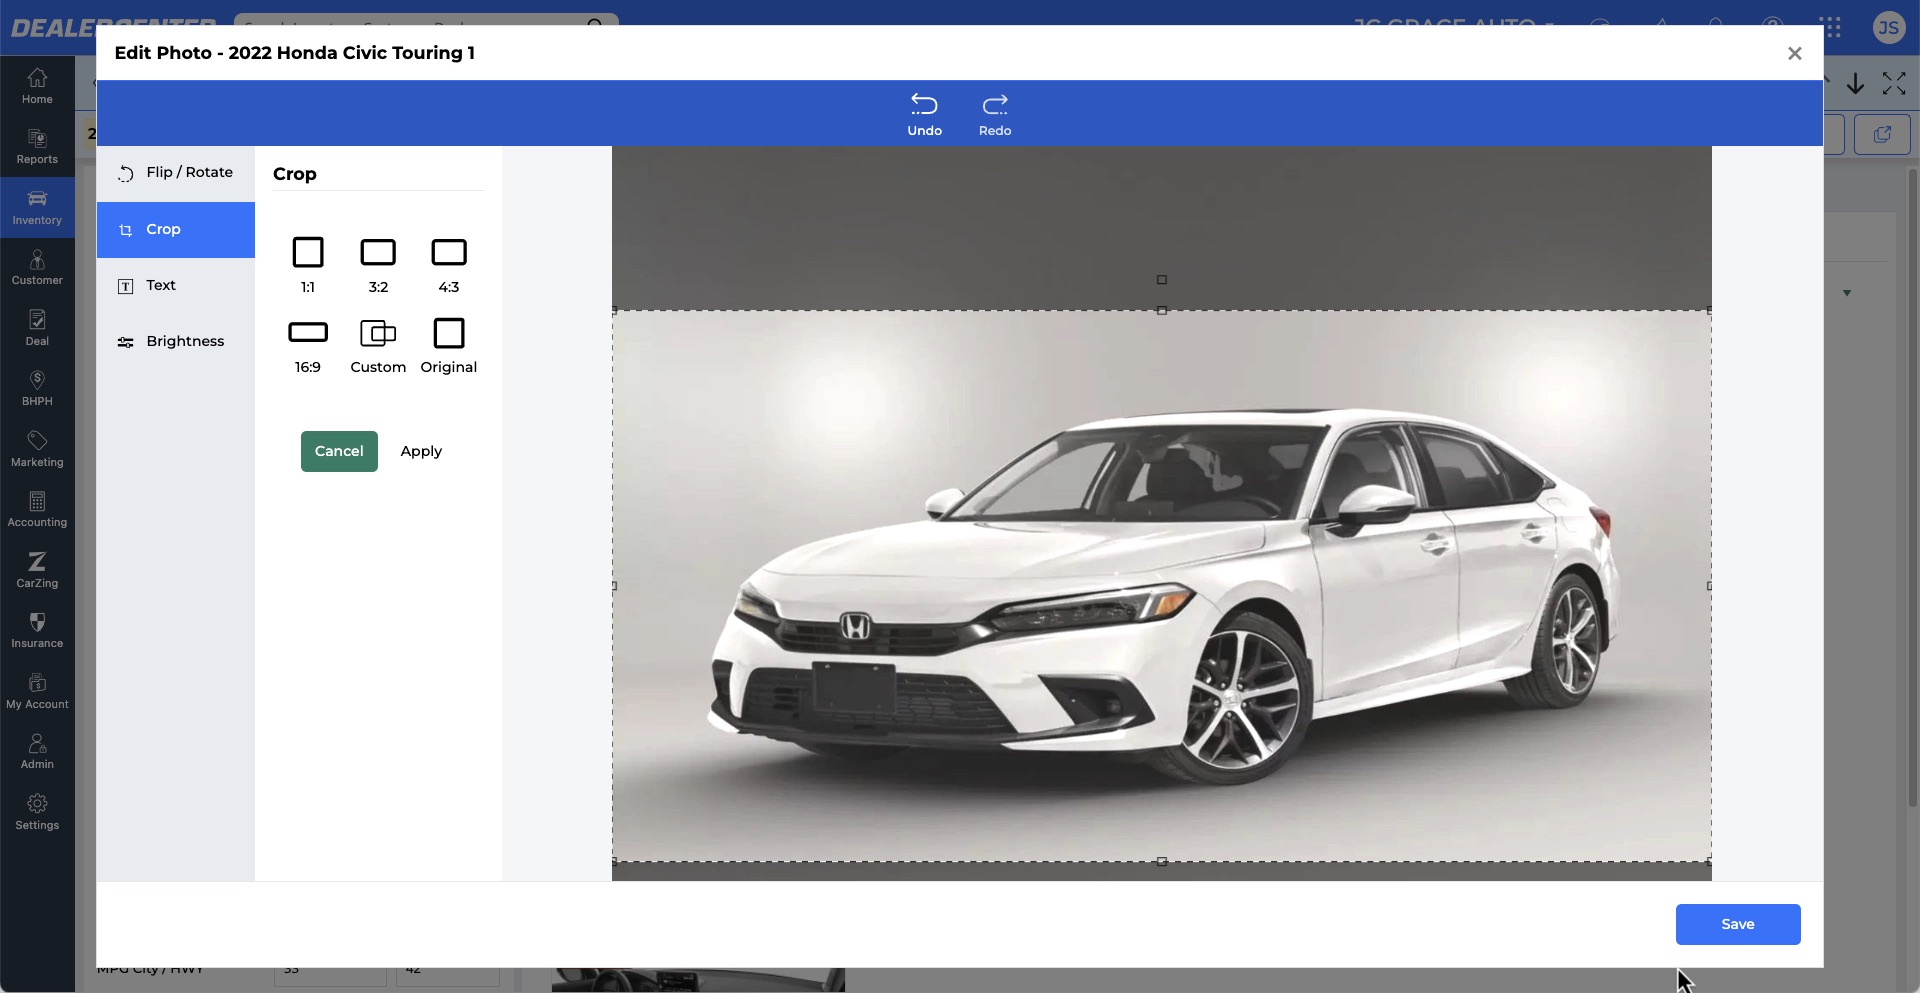
- Flip/Rotate
- Crop
- Add Text
-
Brightness adjustments
- Once finished, click Save.
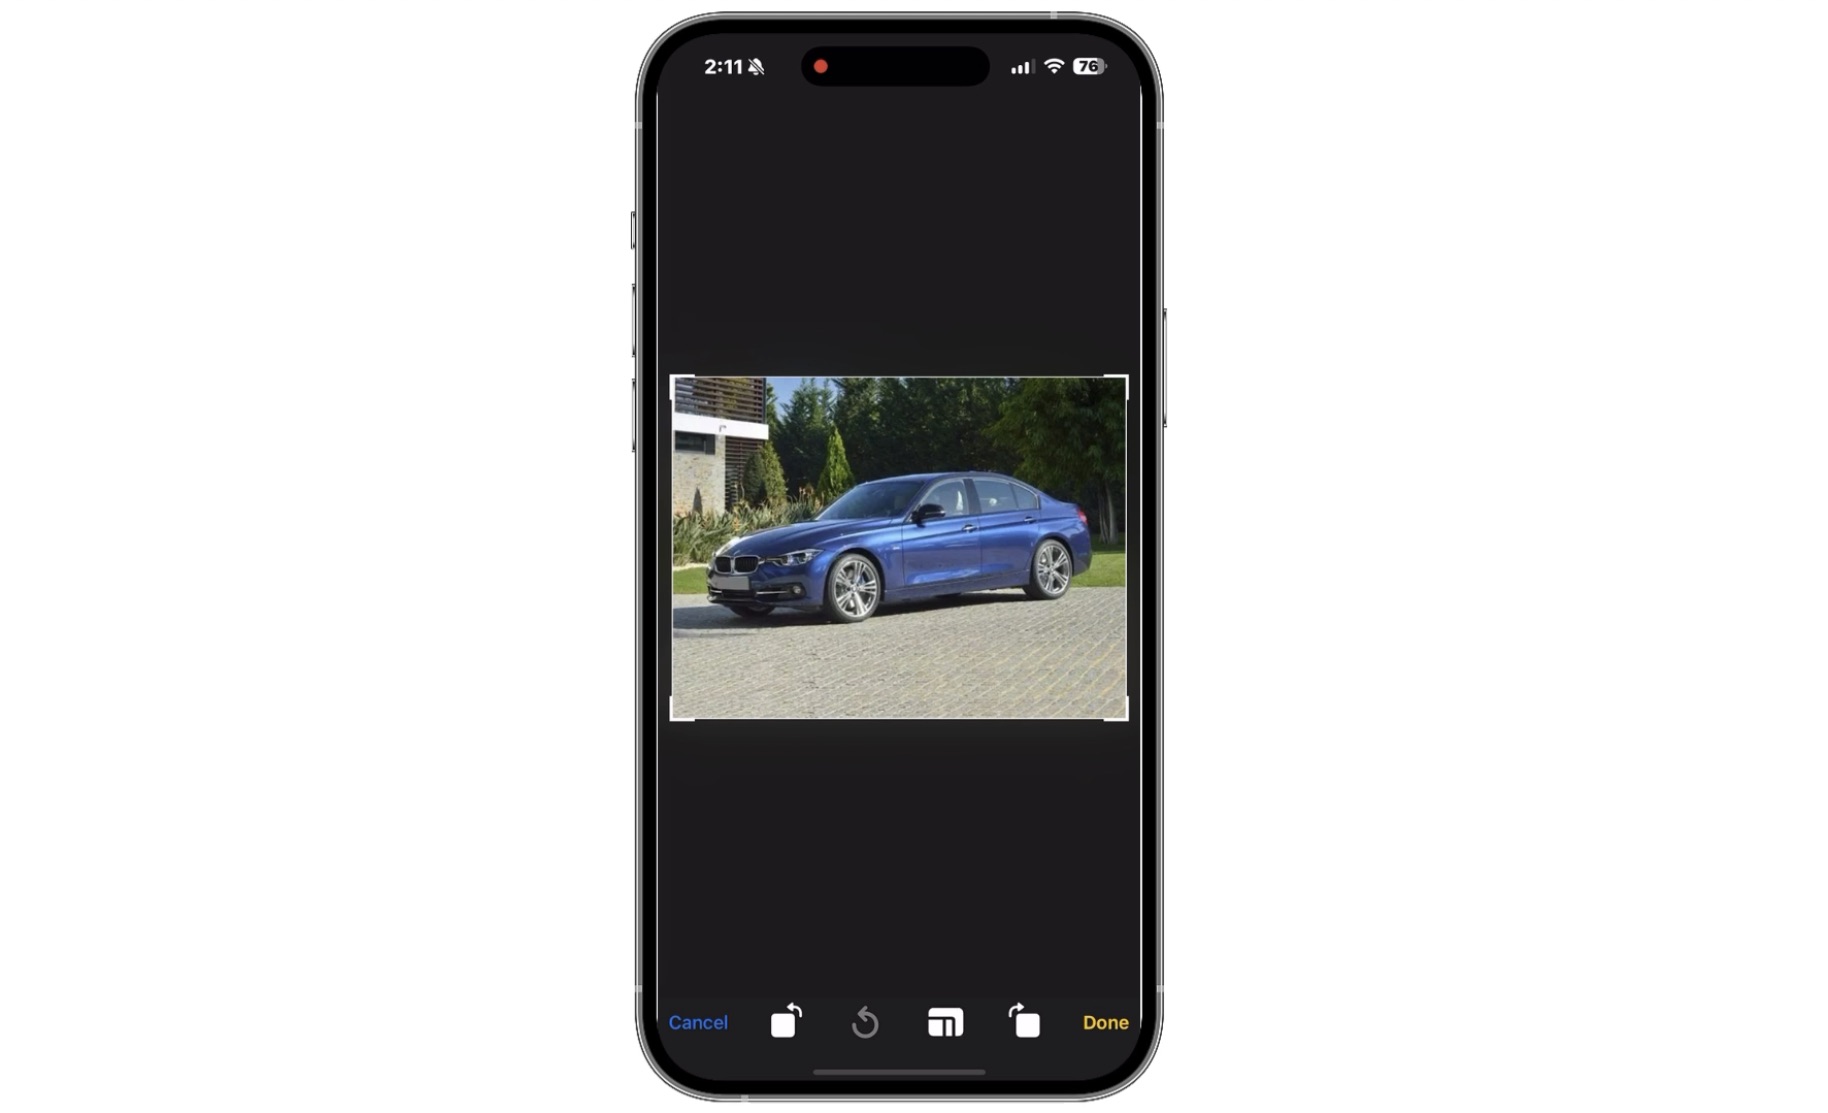
Uploading and Editing Photos on the Mobile App
To upload and edit vehicle photos directly using the DealerCenter mobile app:
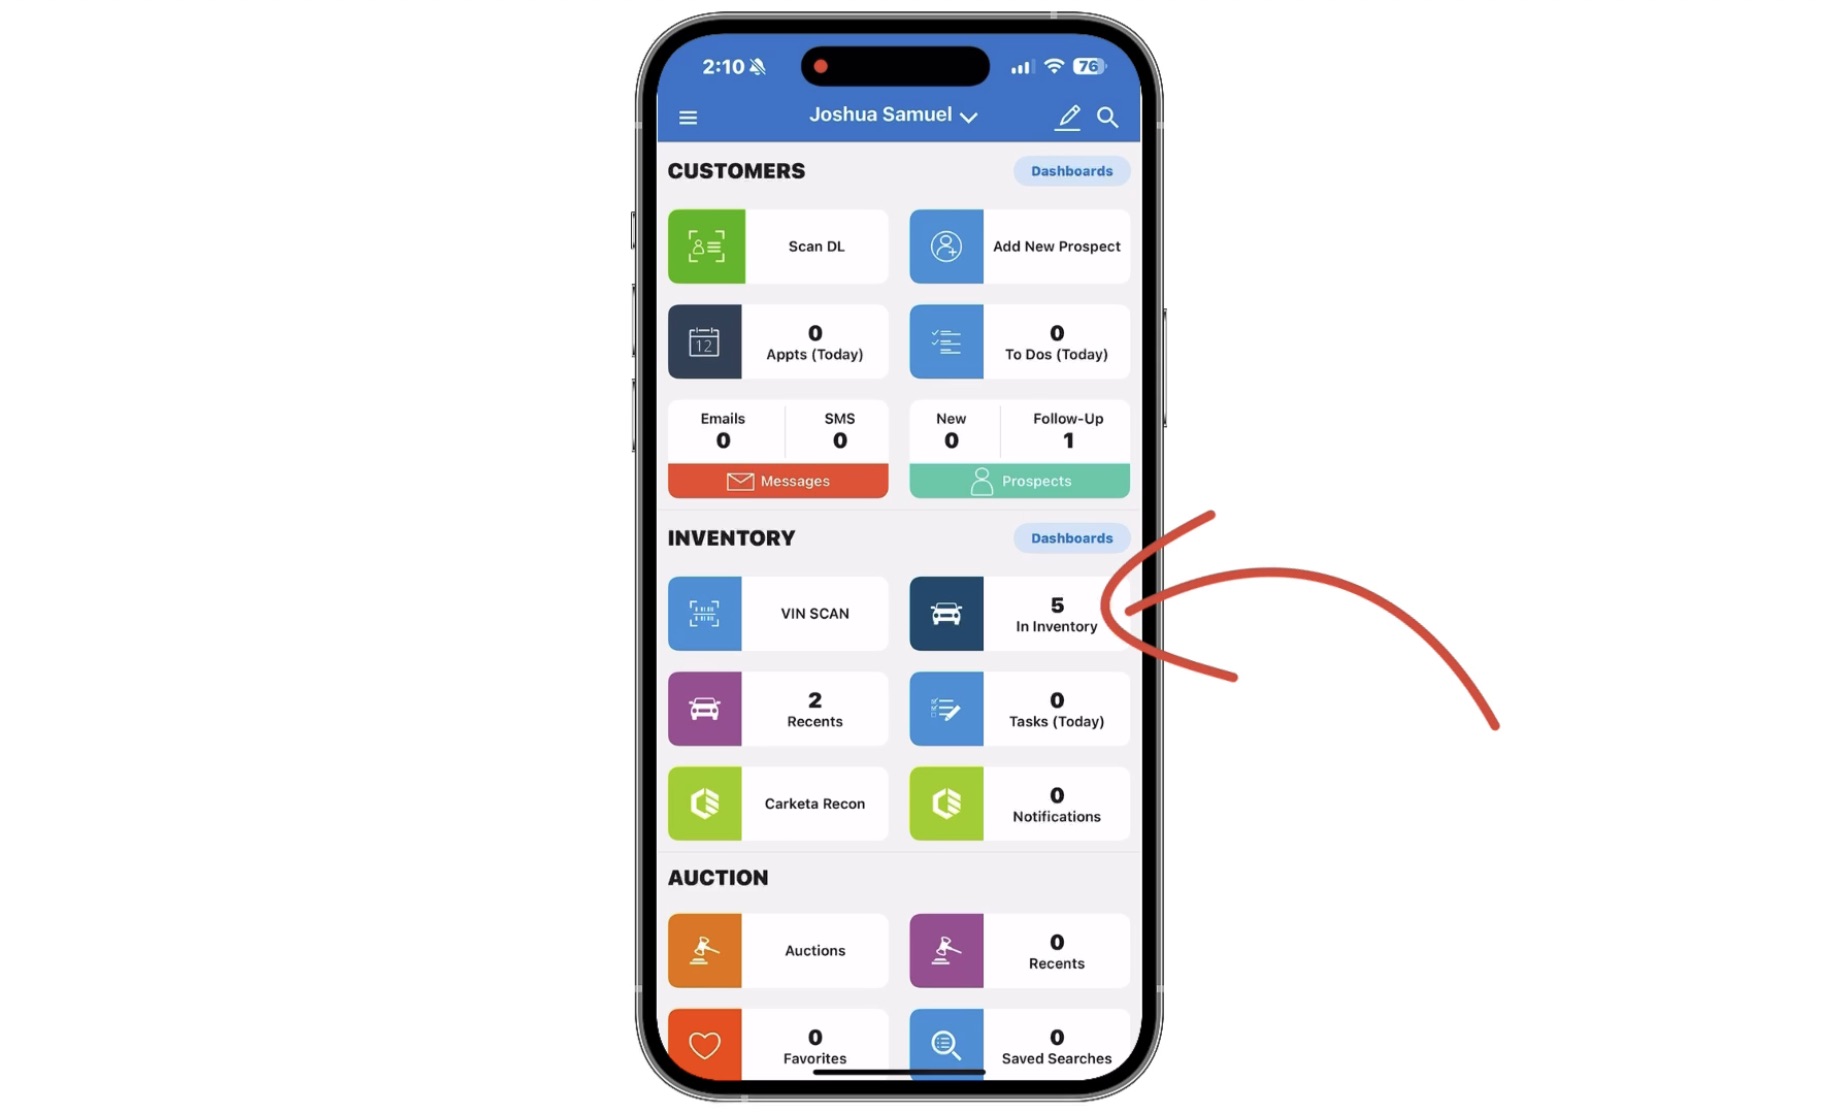
- Open a vehicle by selecting it from your inventory or using the search feature.
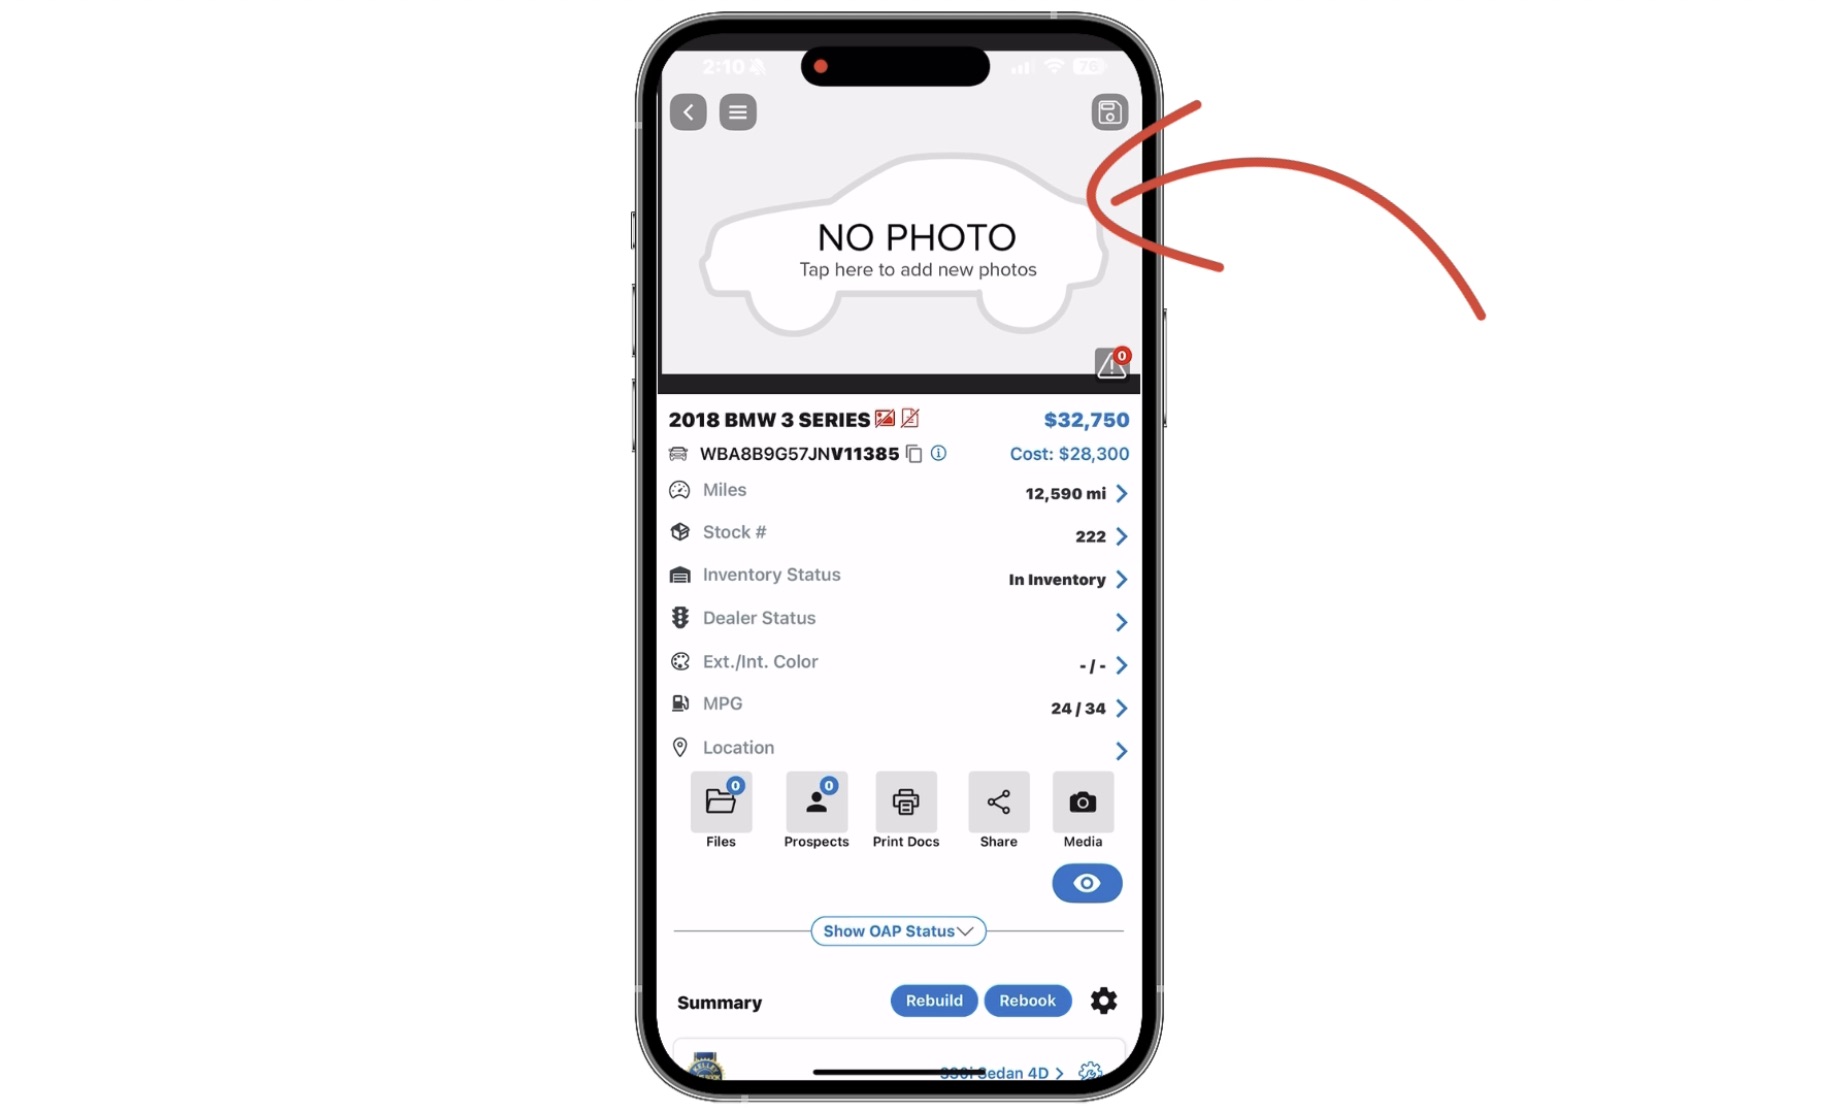
- Tap at the top of the screen where it shows the vehicle picture or the message "No Photo: Tap here to add new photos."
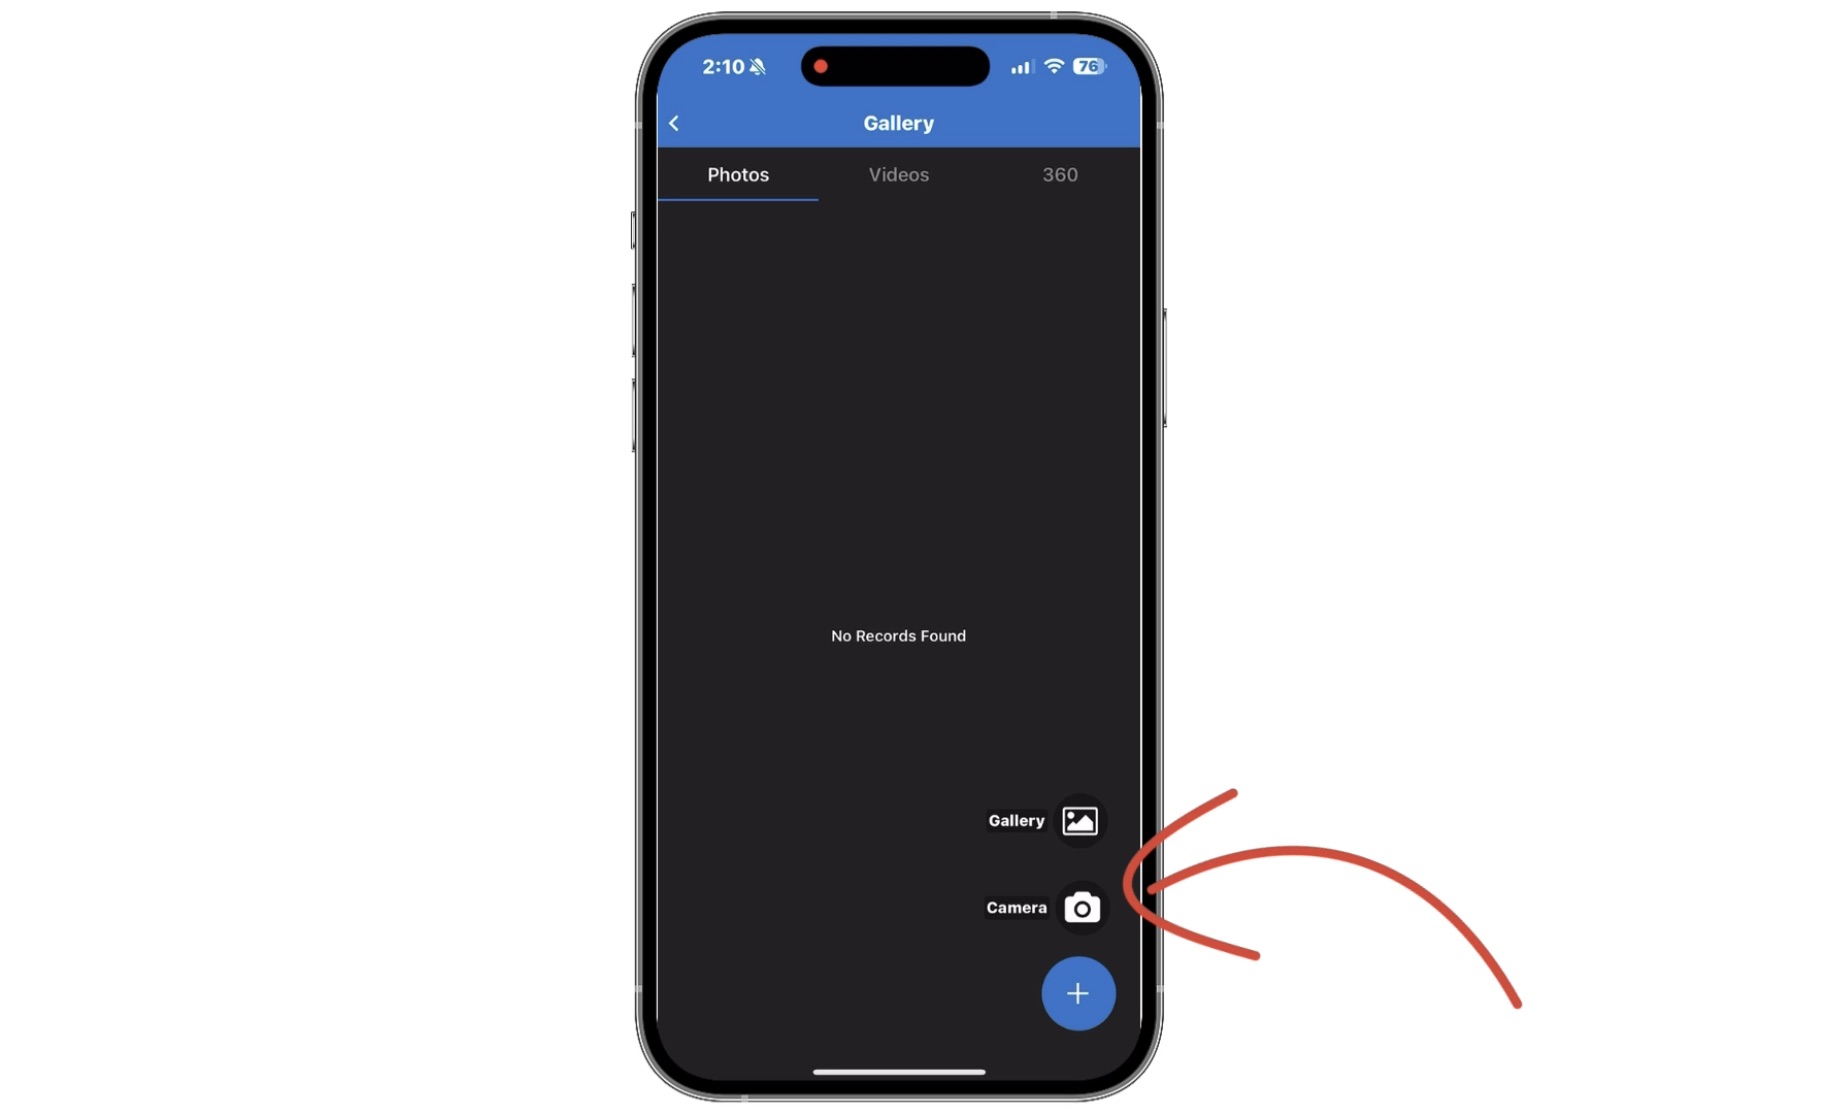
- Tap the plus button (+) at the bottom-right of the screen to take new photos with your camera or select existing photos from your photo library.
- Tap the re-order icon at the top-right of the screen to rearrange the order of your pictures.
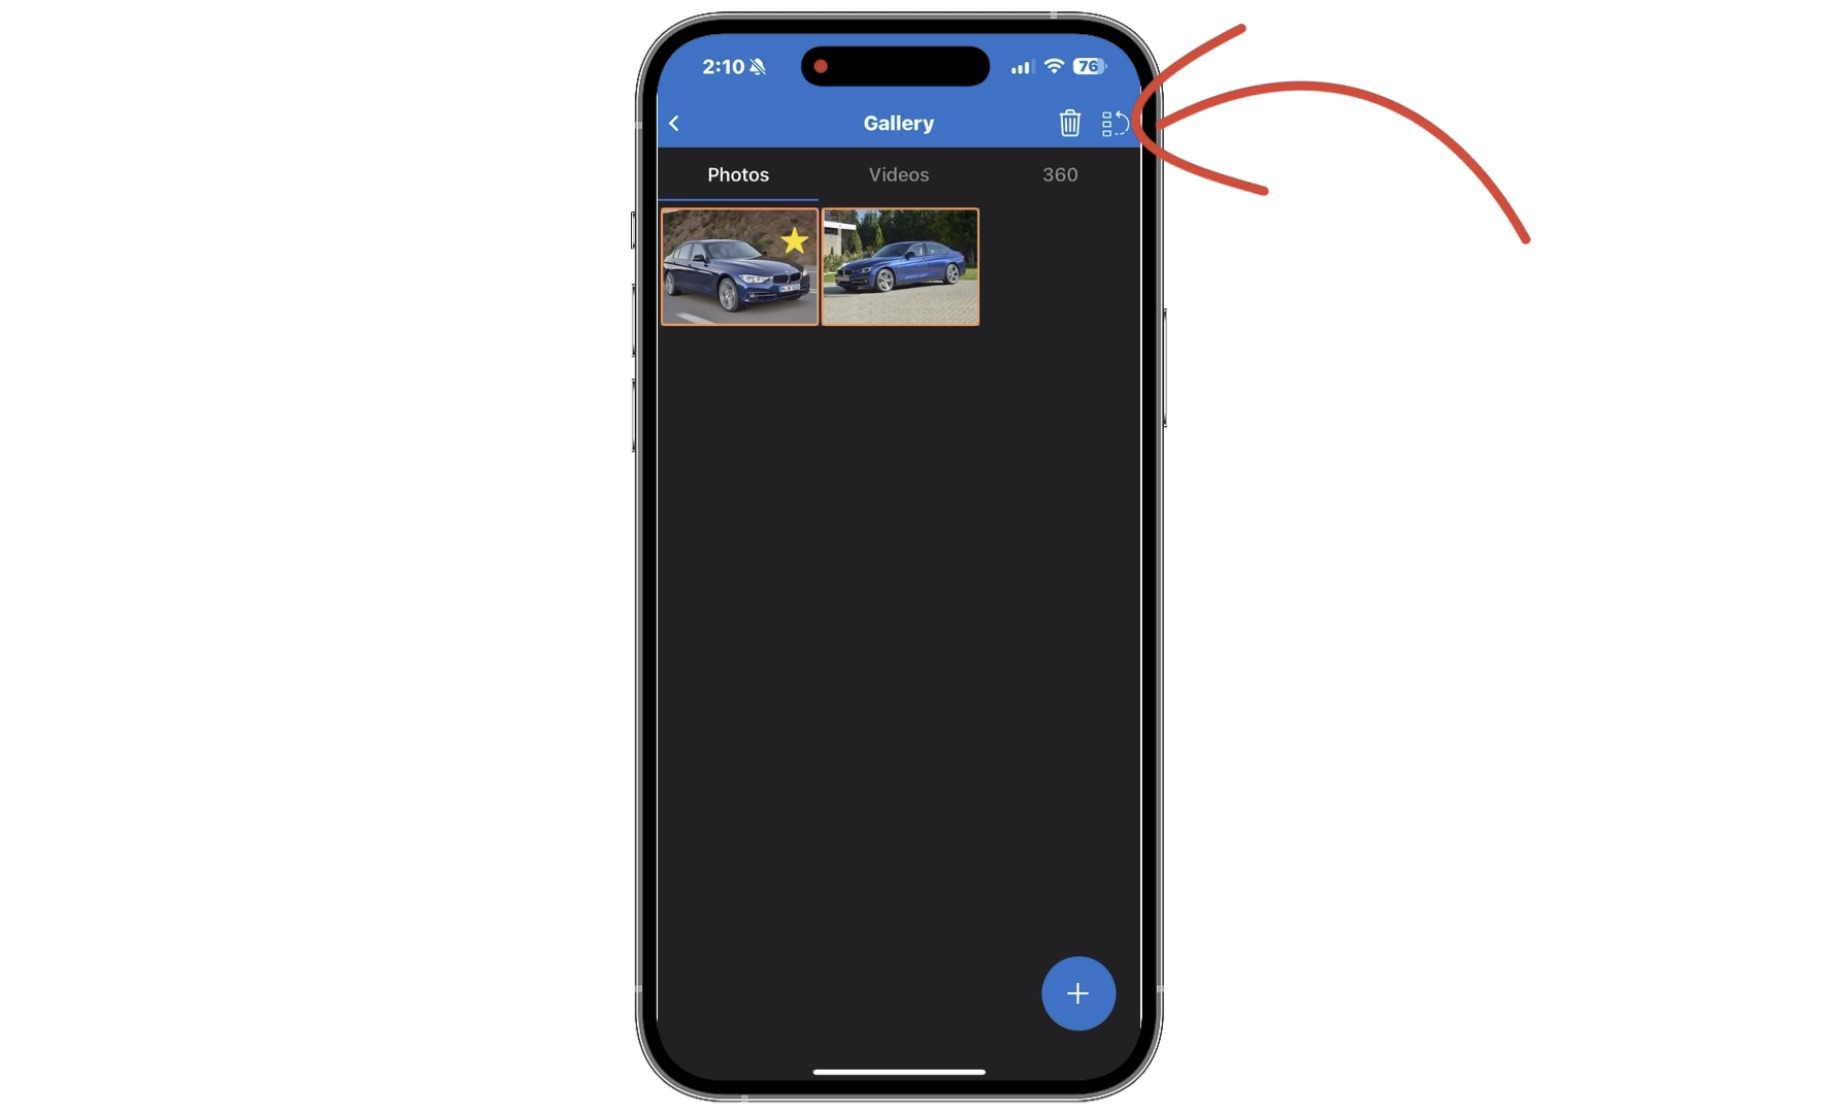
- Tap on a specific photo to edit it with tools like cropping or rotating.