IN THIS ARTICLE
Add a New User
Each person who uses DealerCenter should have their own username and password for account security and activity tracking.
- Go to the Admin page from the side menu, then click New User.
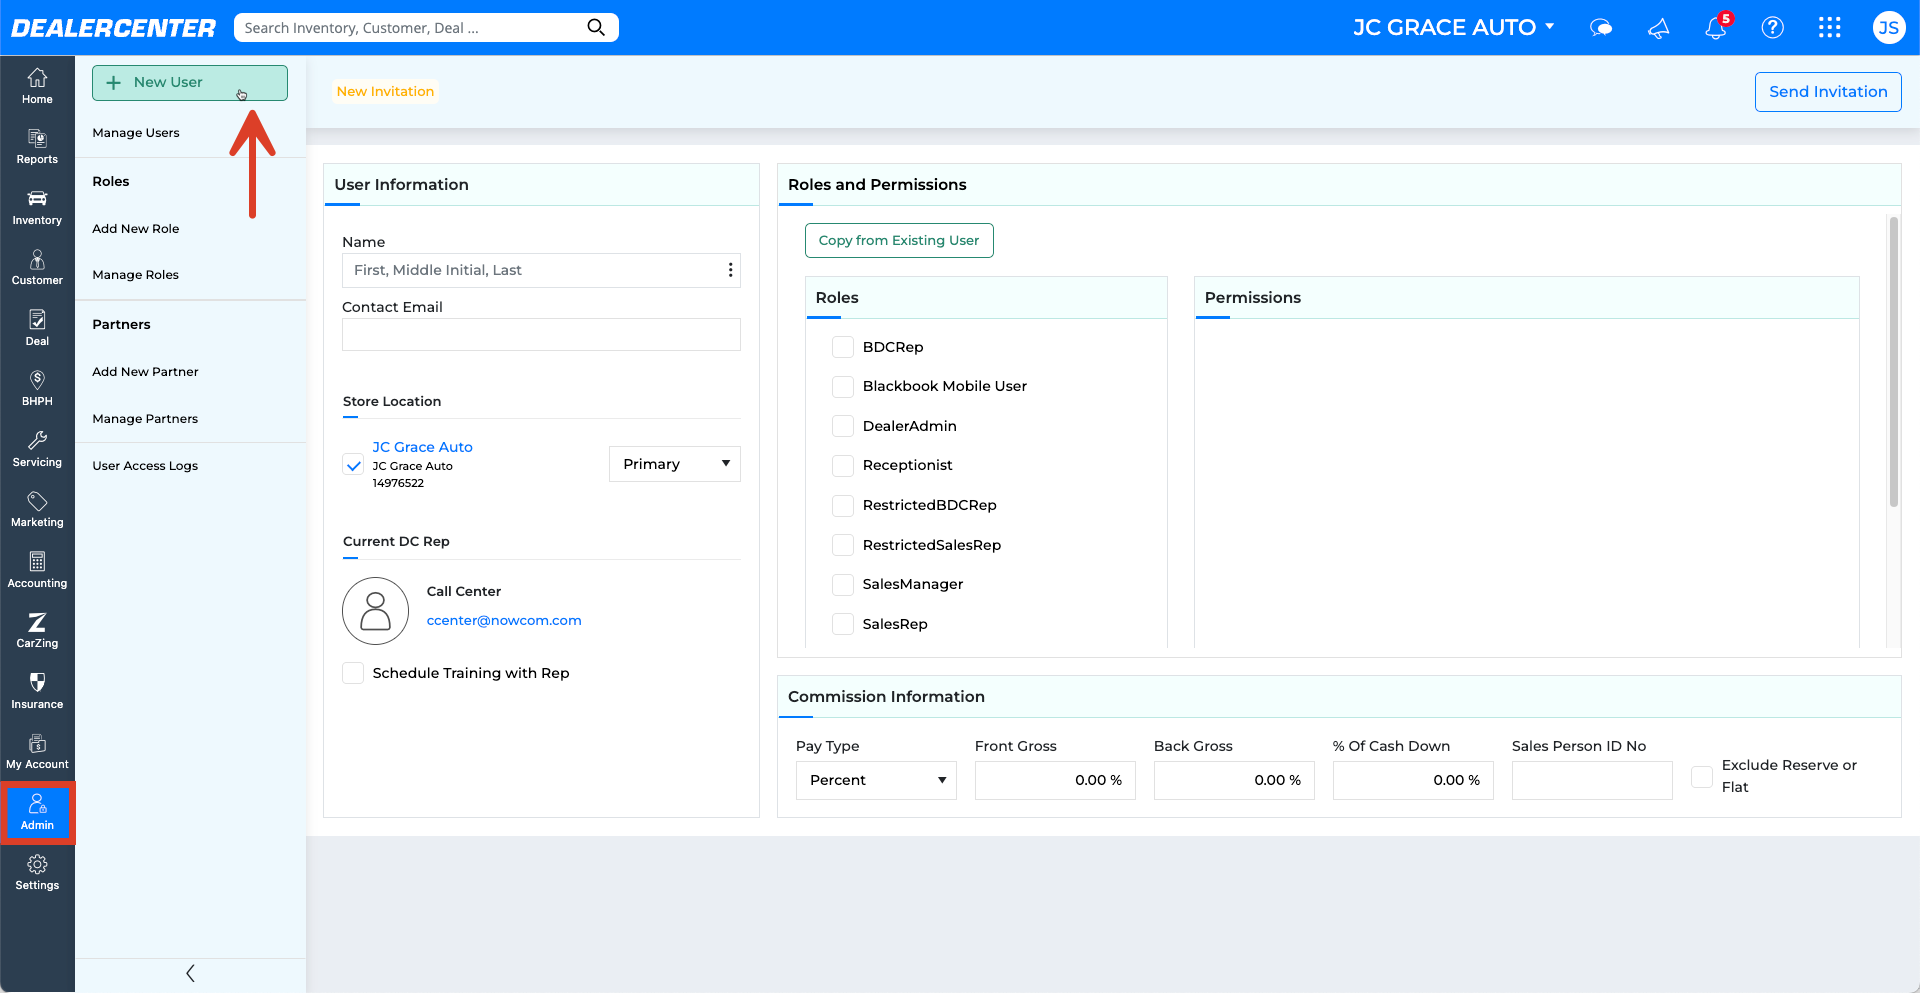
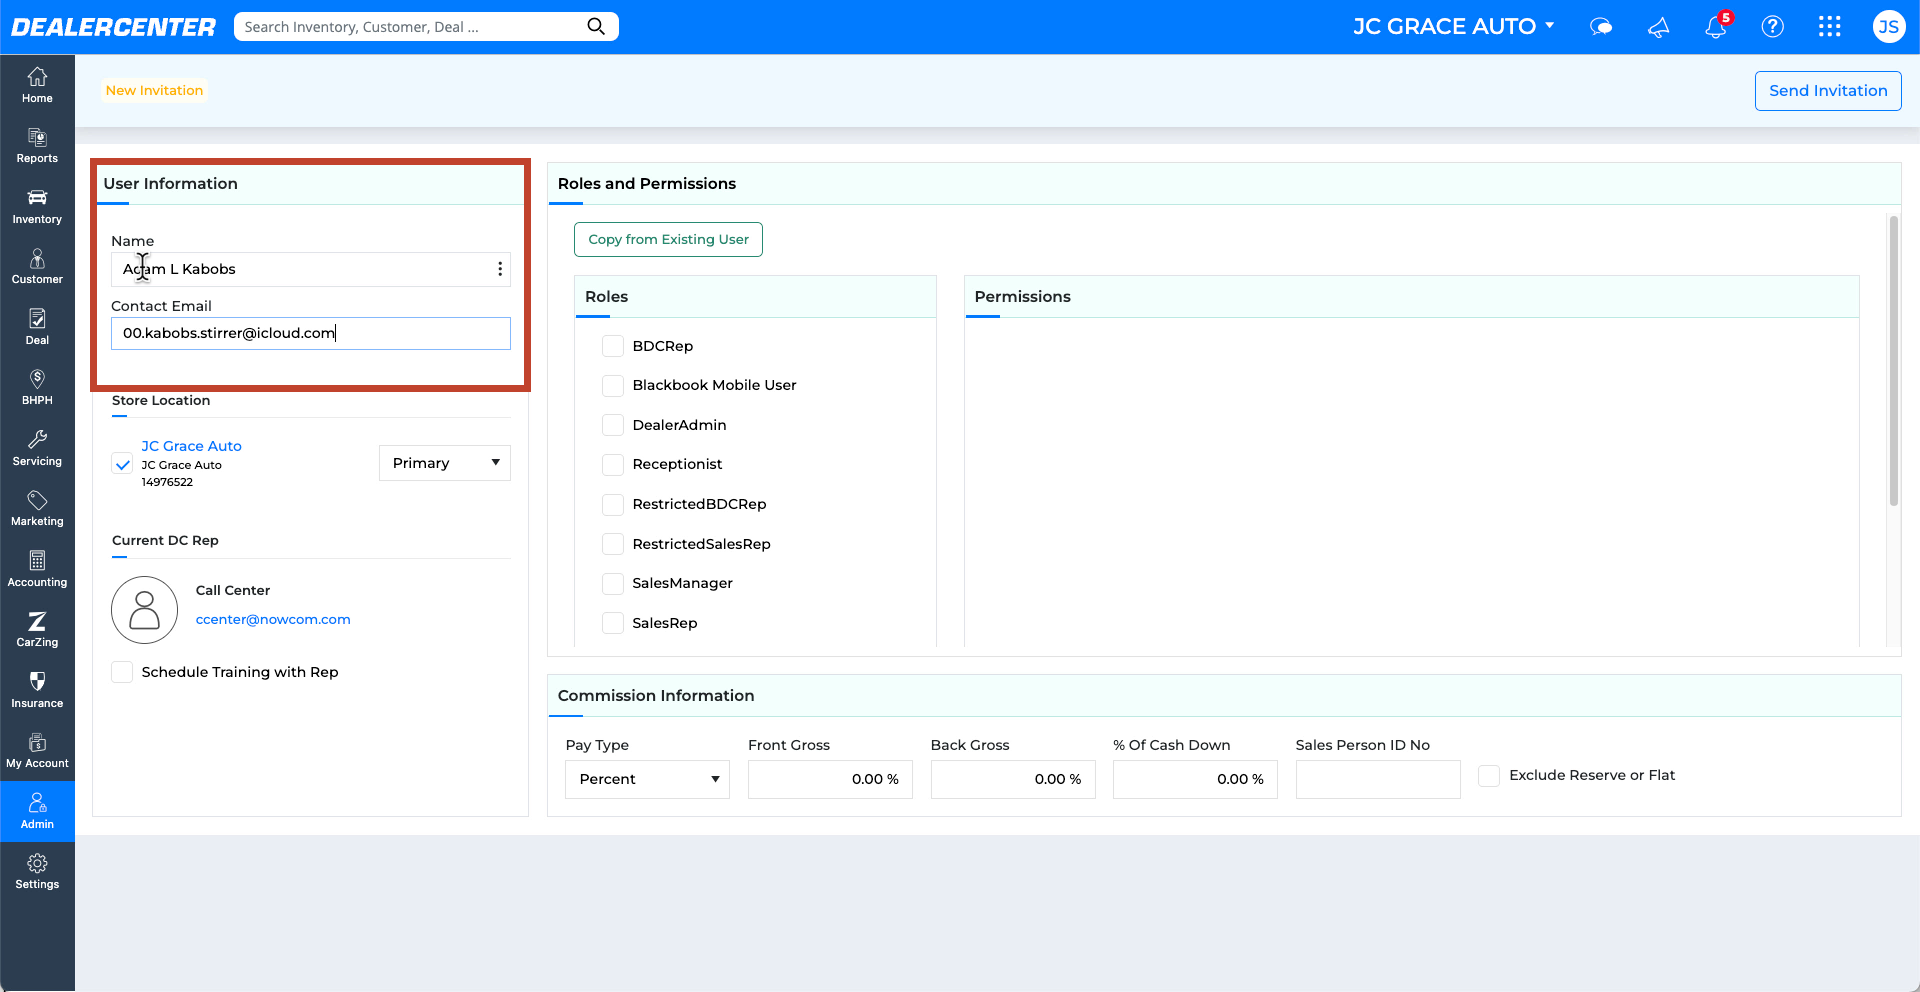
- Enter the new user’s Name and Email Address. This email will receive the account setup invitation.
- Verify the details under User Information, including store location and assigned DealerCenter rep.
User Account Setup Process
After you click Send Invitation, the invited user will receive an email with a link to create their DealerCenter account.
- The user opens the email and clicks the invitation link to begin the process.
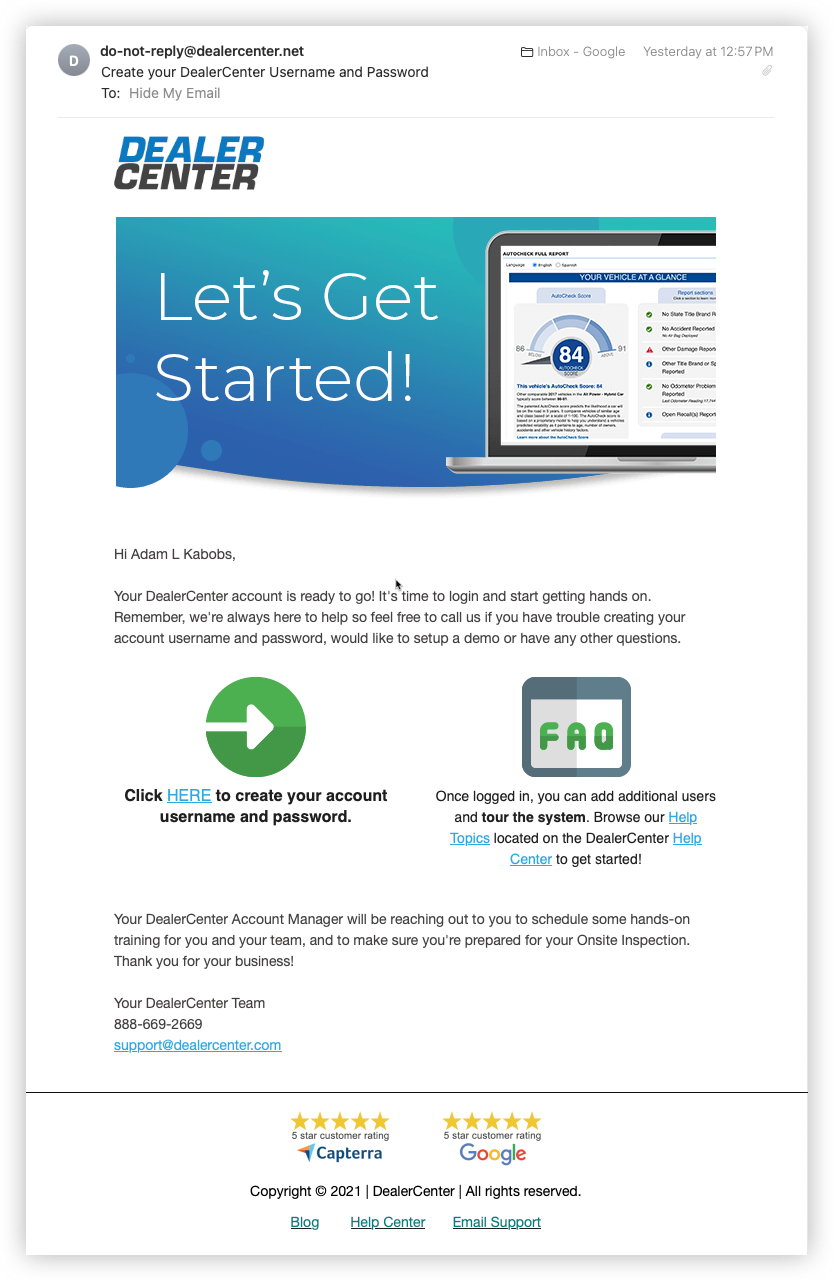
- They will be prompted to create a username and password.
- Next, the user completes their profile information, such as name, email, and phone number.
- Then they will secure their account by setting up multi-factor authentication. A passcode will be sent to their phone for verification.
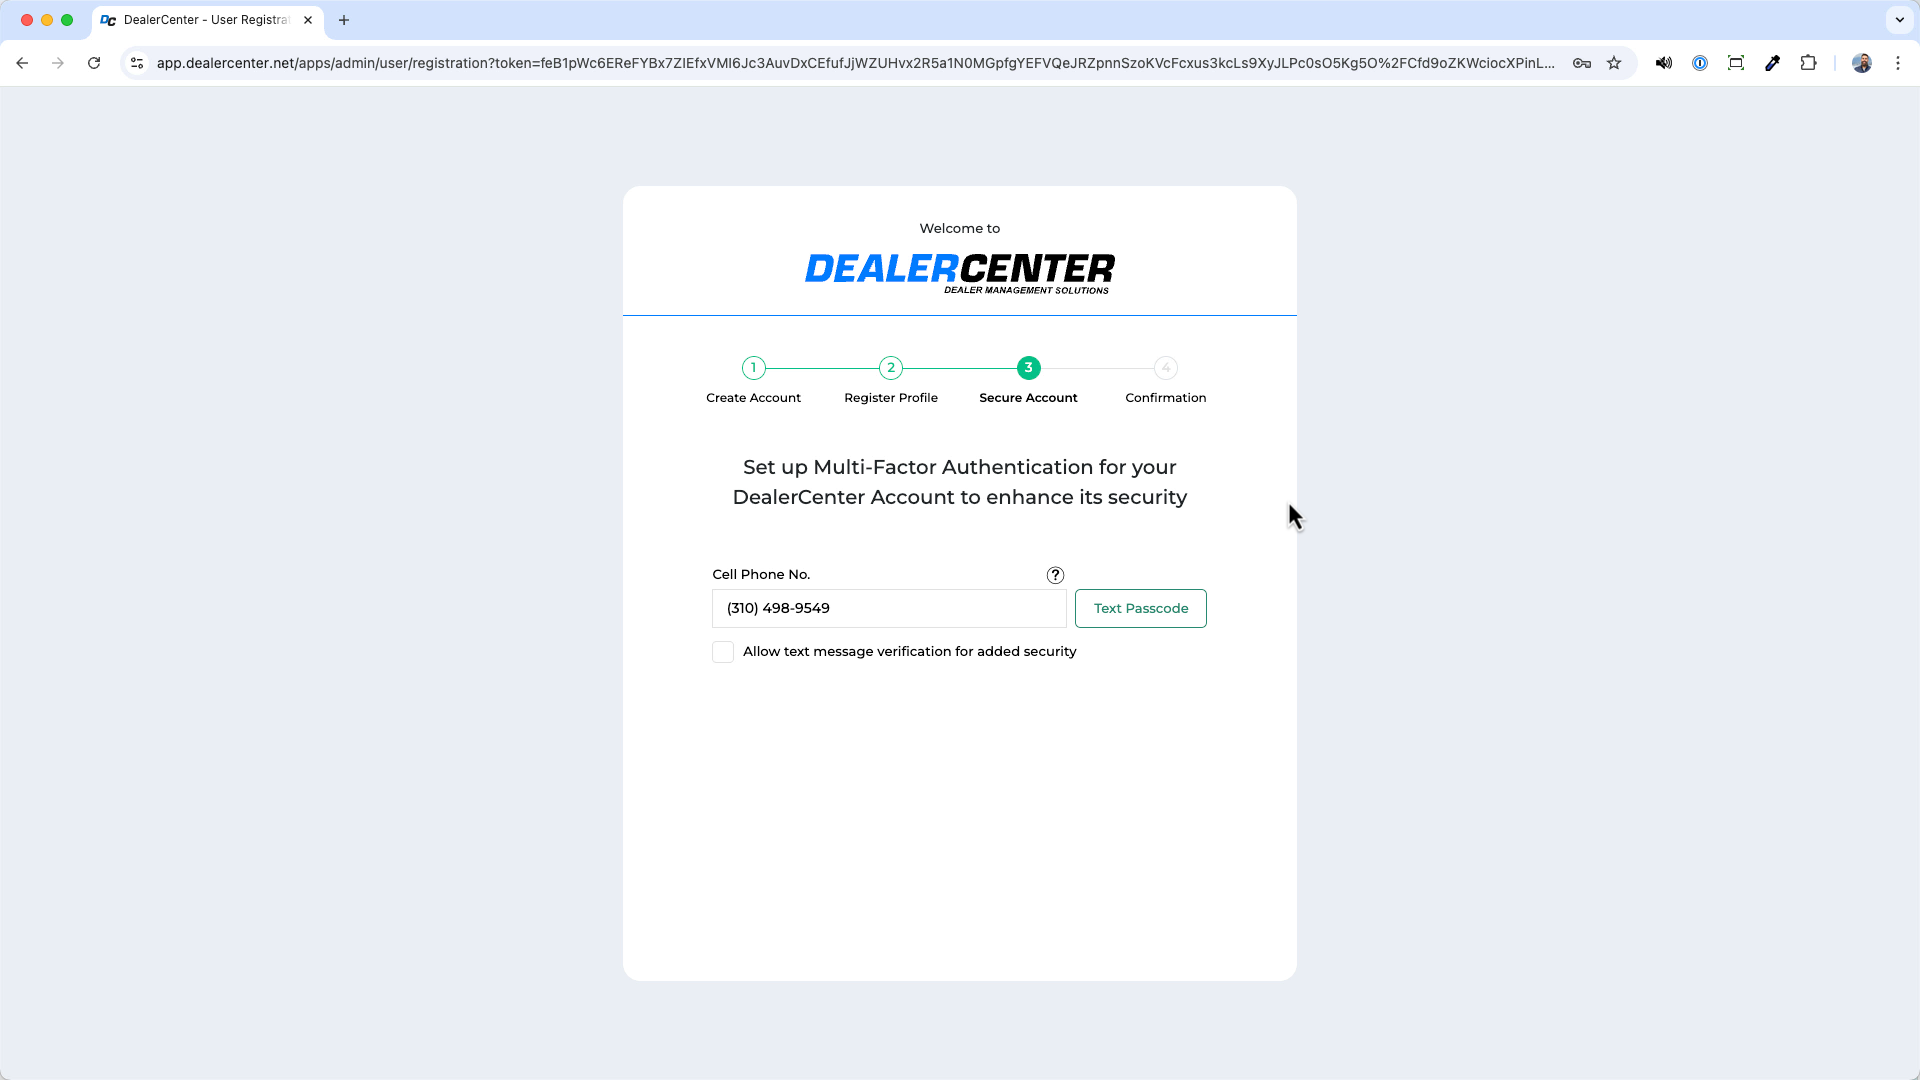
- Once verified, they will reach the confirmation screen and can log in to start using DealerCenter.
Assign Roles and Permissions
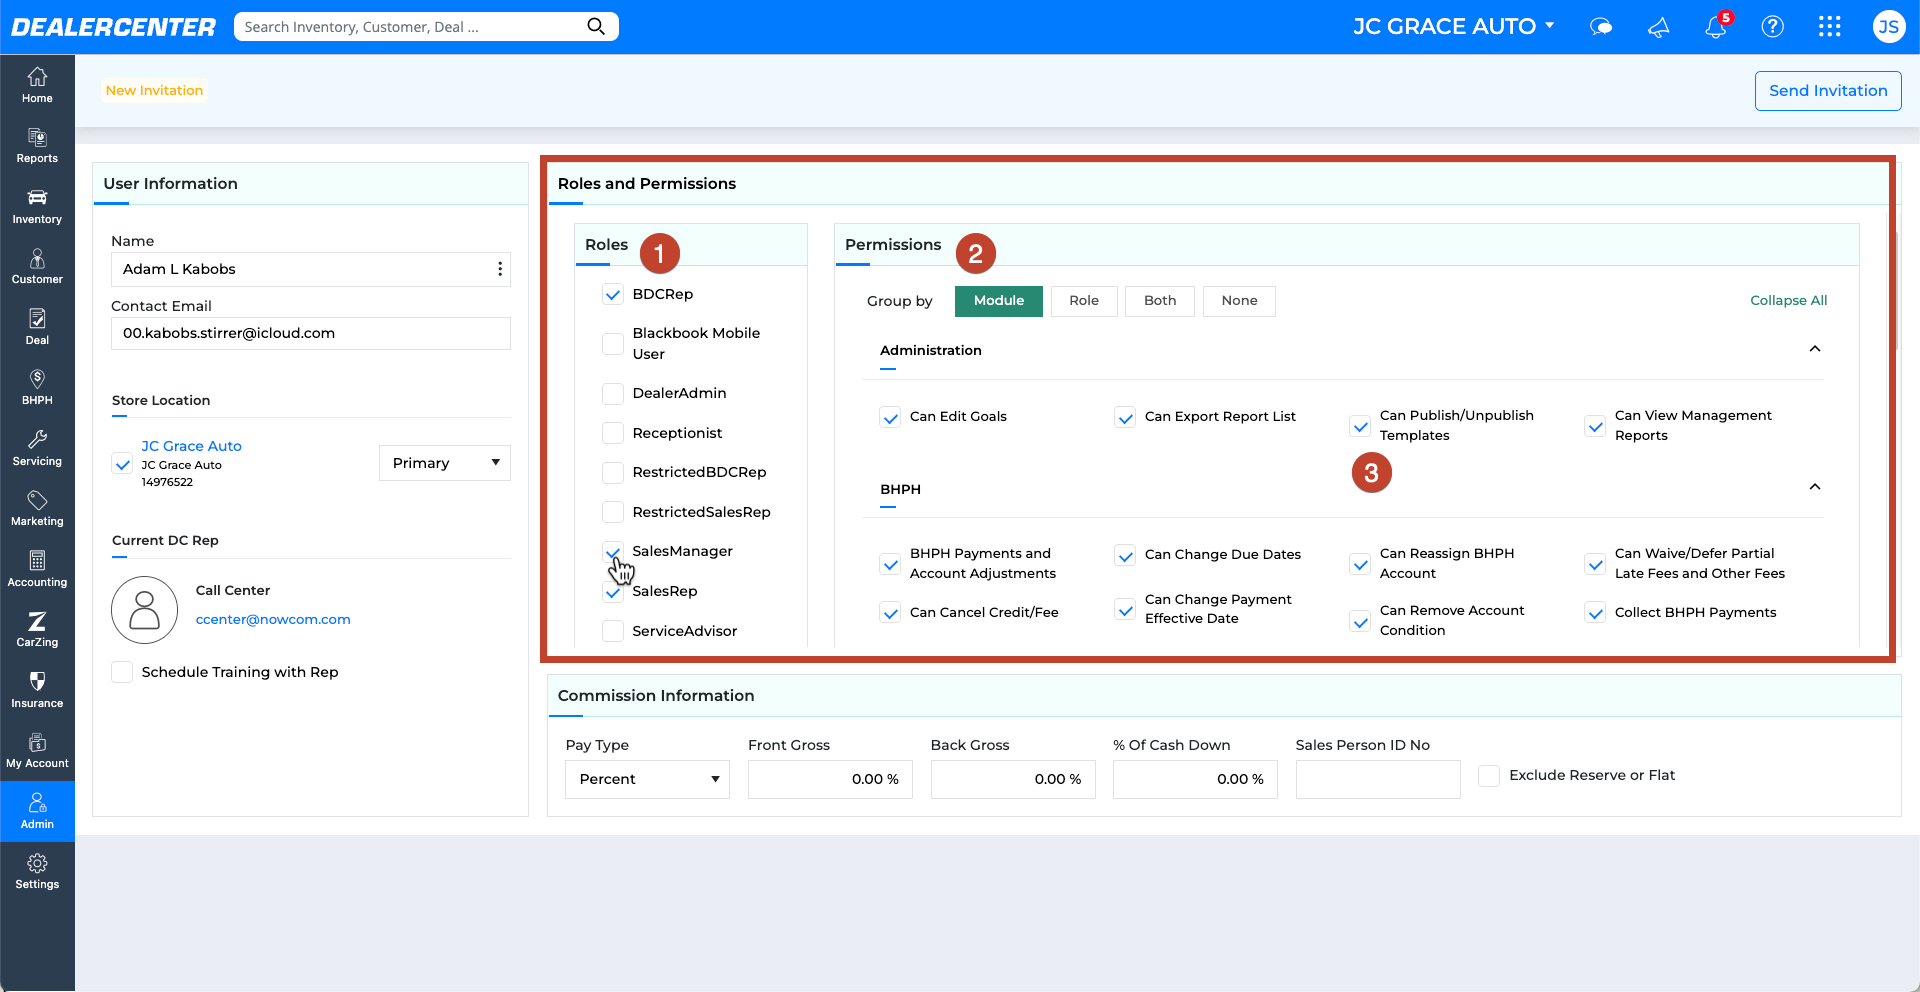
Assign roles to determine what the user can access and control. You can choose multiple roles or copy permissions from an existing user.
- In the Roles and Permissions section, select one or more predefined roles such as Sales Rep or BDC Rep.
- DealerCenter will combine permissions from all selected roles.
- Optionally, turn specific permissions on or off to further customize access.
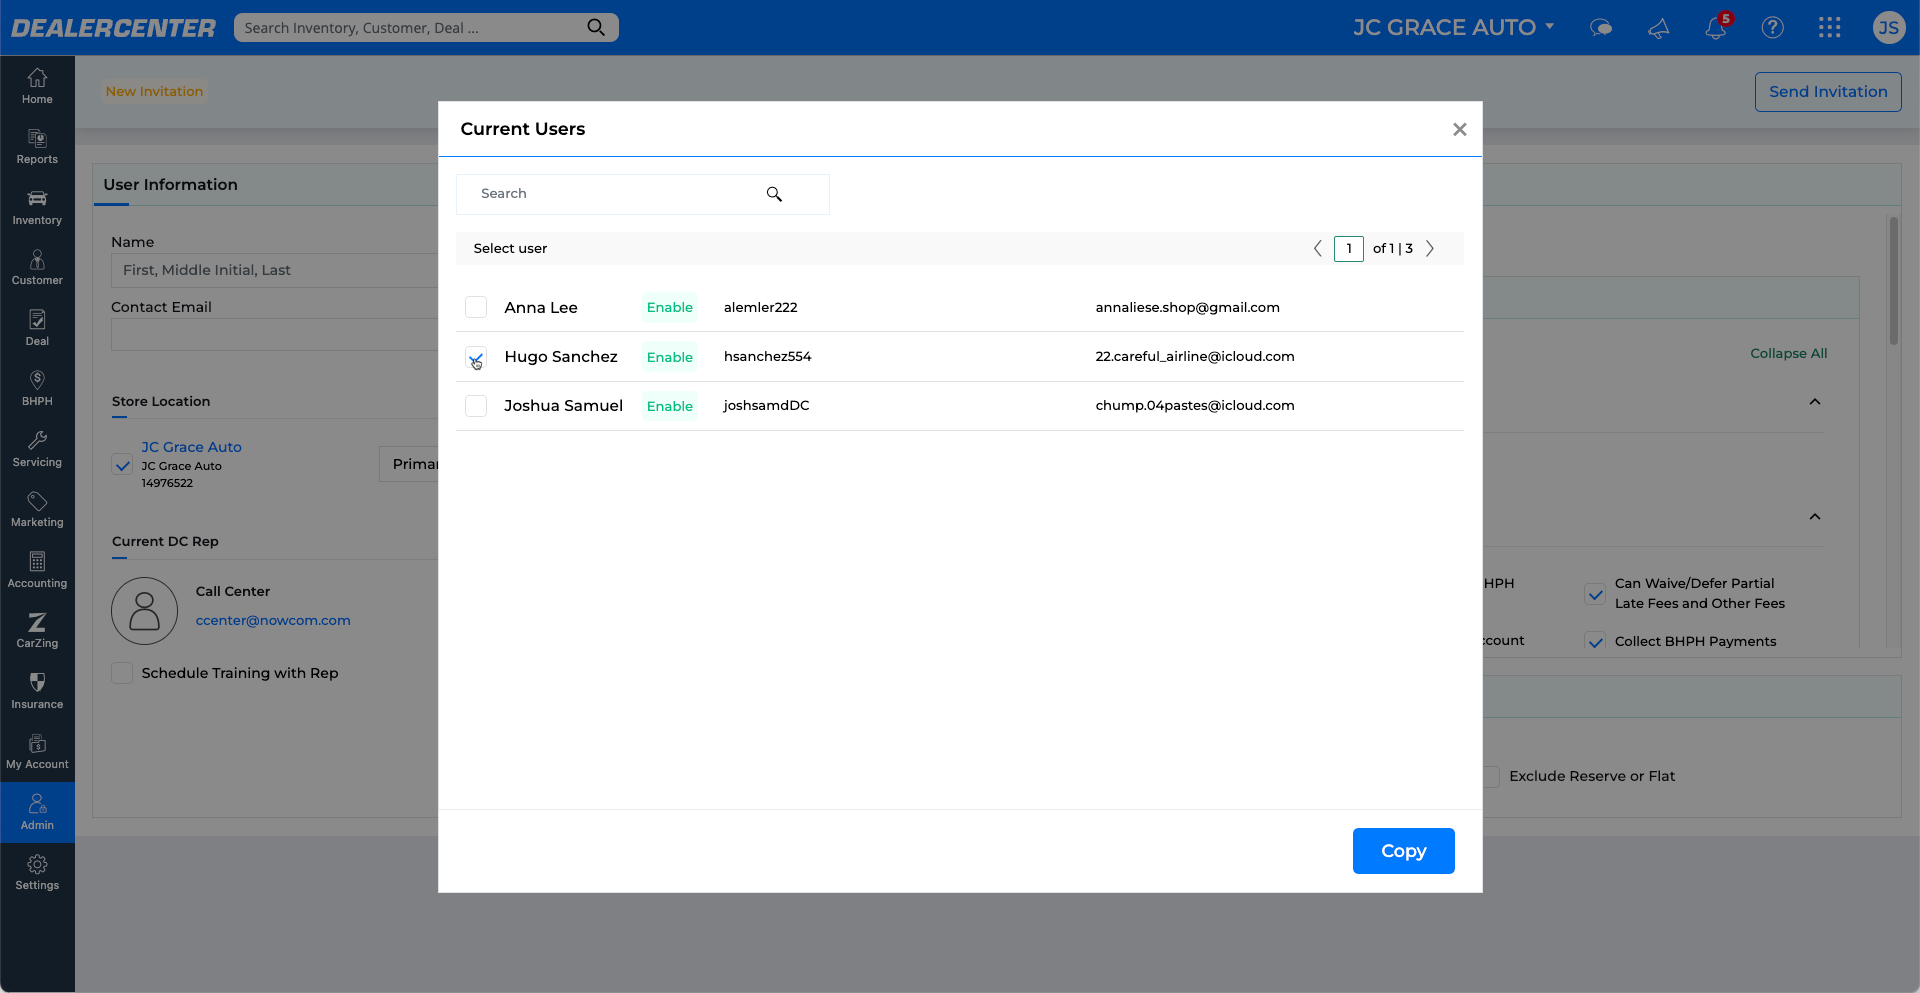
- To save time and ensure consistency, click Copy From Existing User to duplicate the roles and permissions of another user.

Create a Custom Role
Create a new role if you need more precise control over user permissions.
- Go to Admin, then click Add New Role.
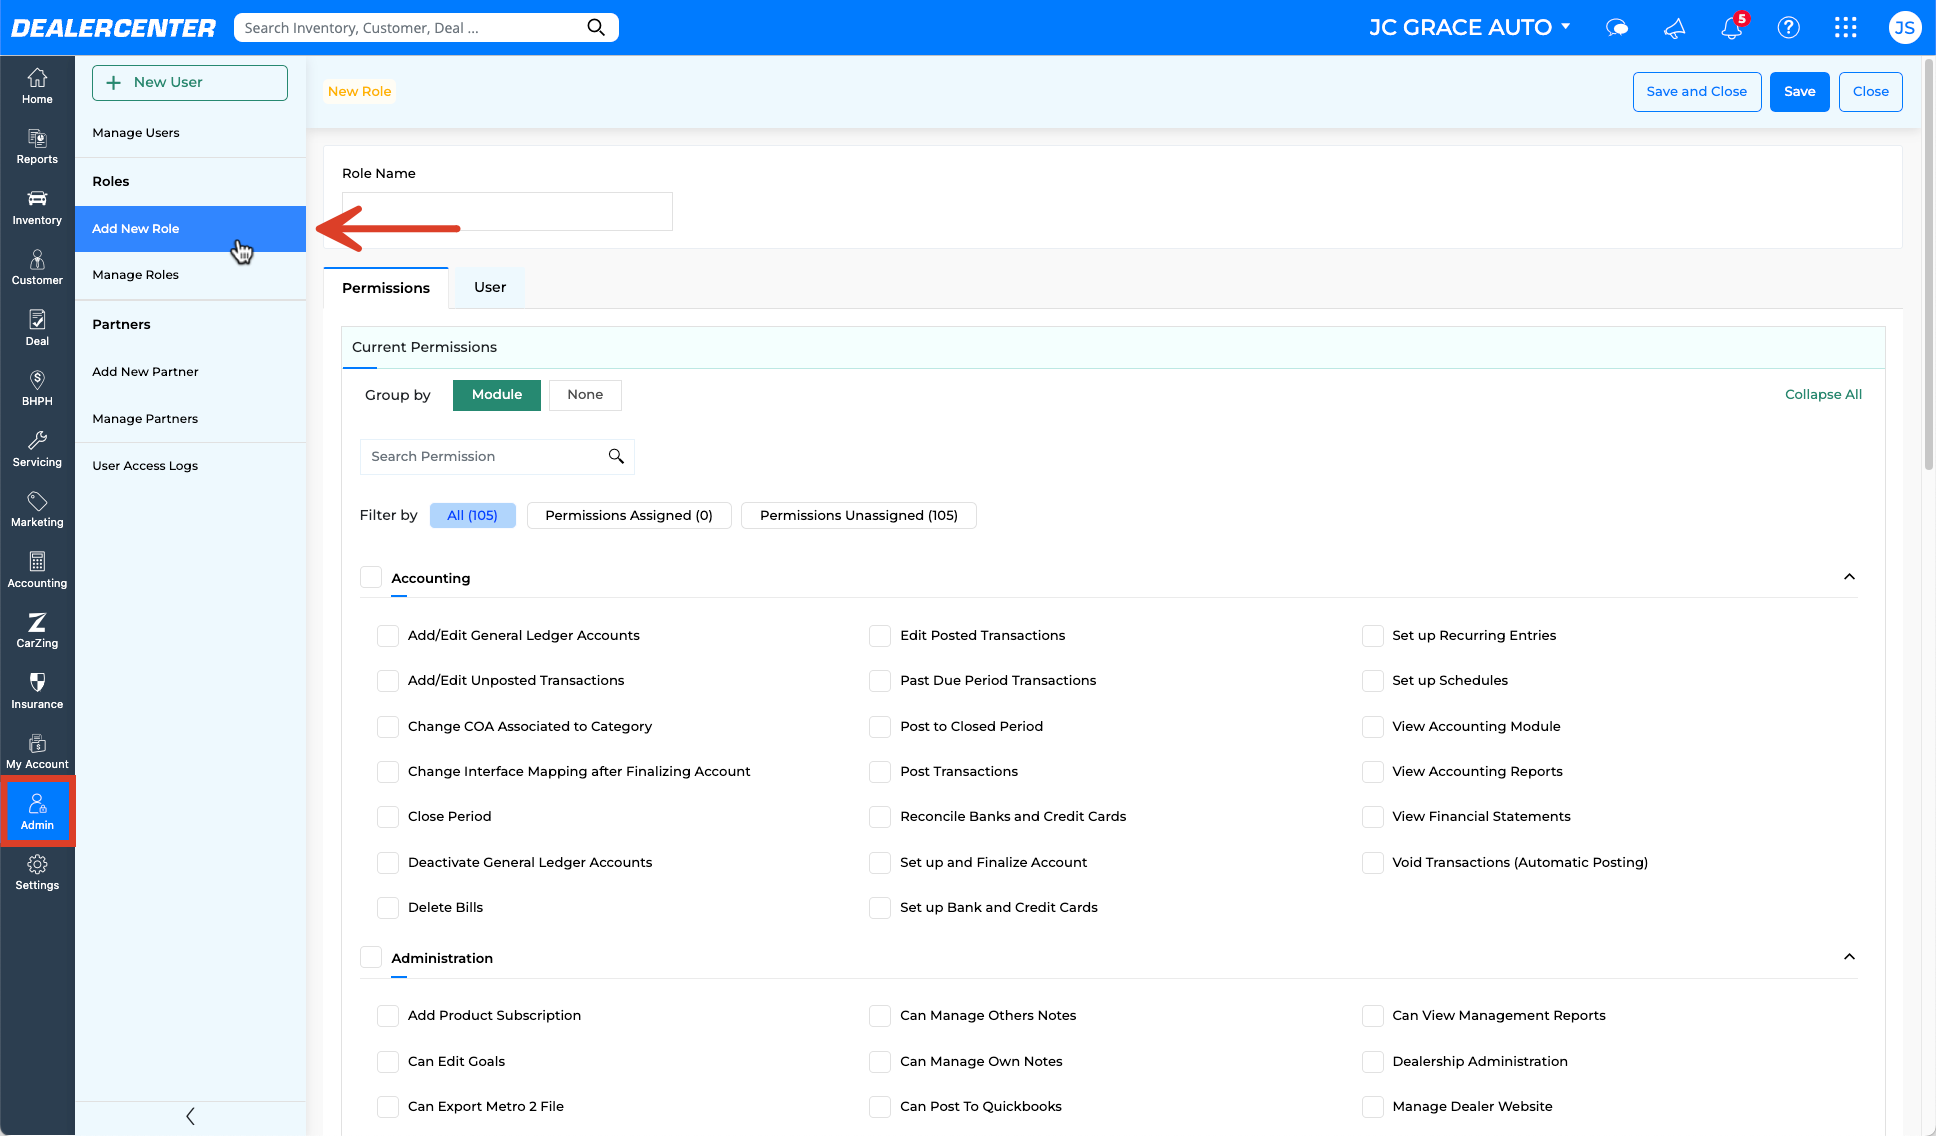
- Enter a name for the role and select the specific permissions to include.
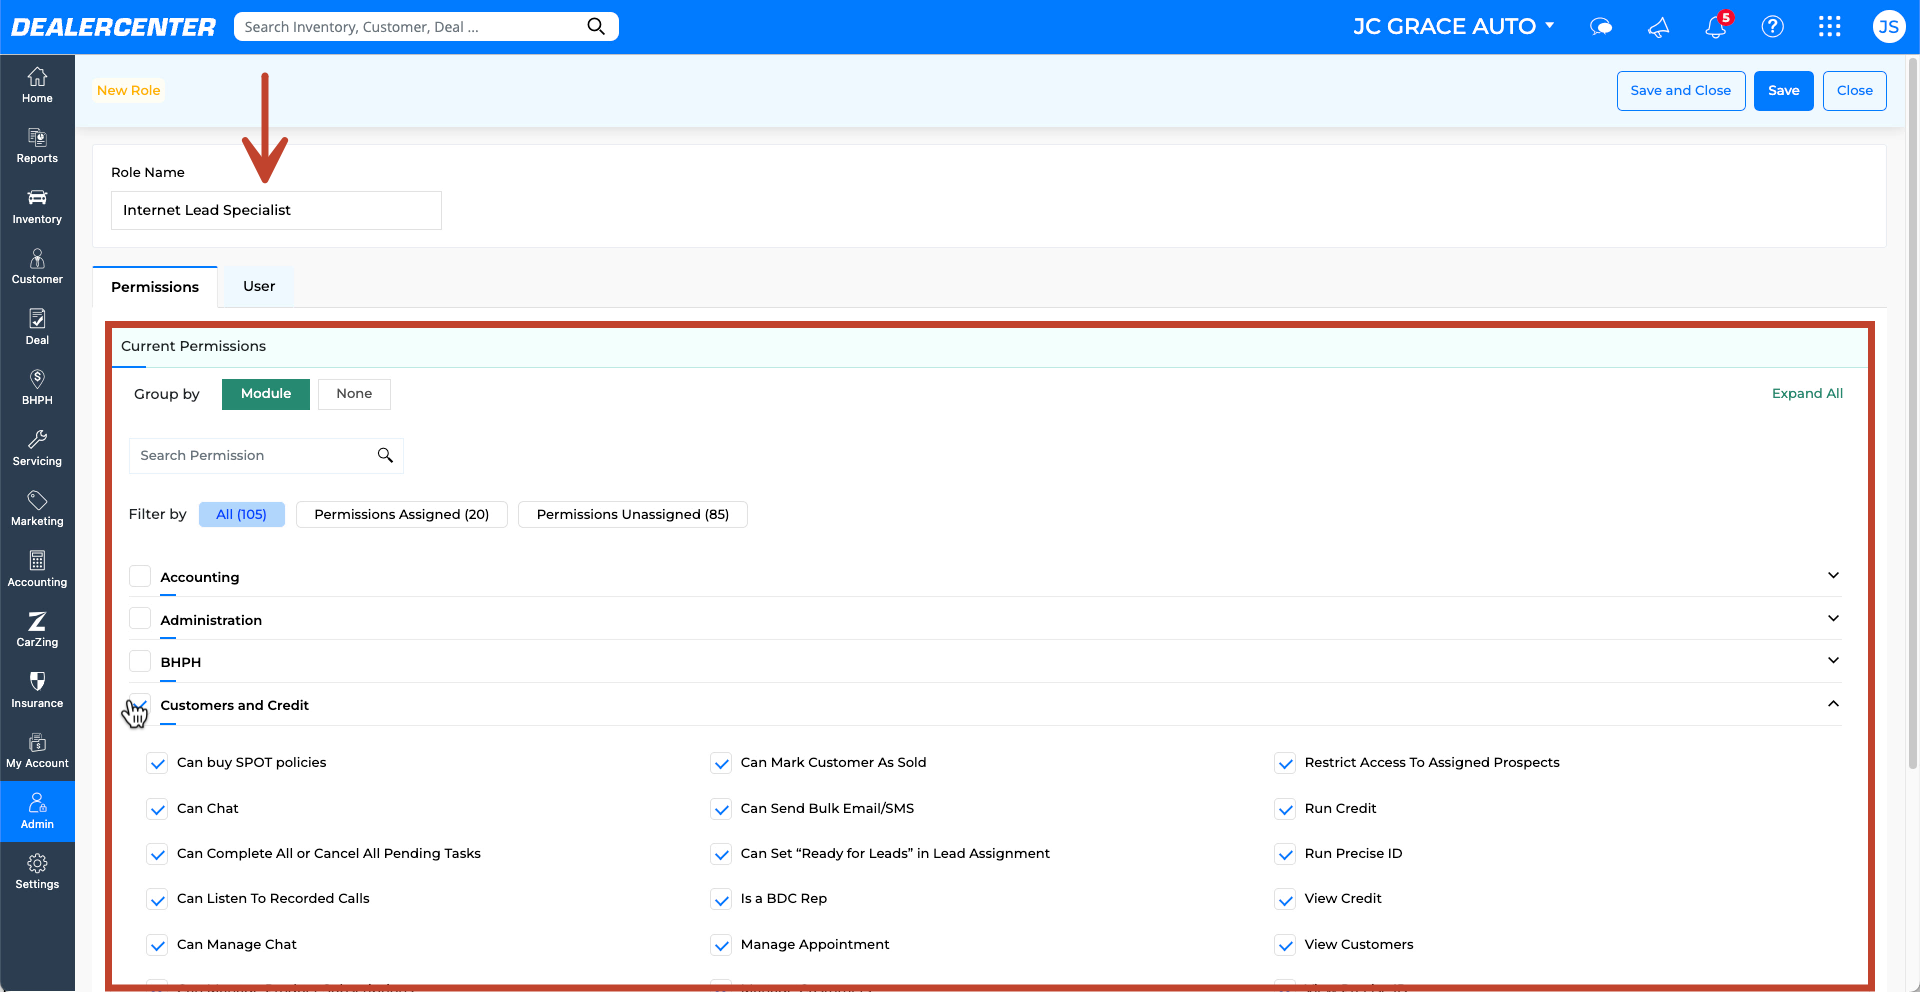
- Click Save to create the role.
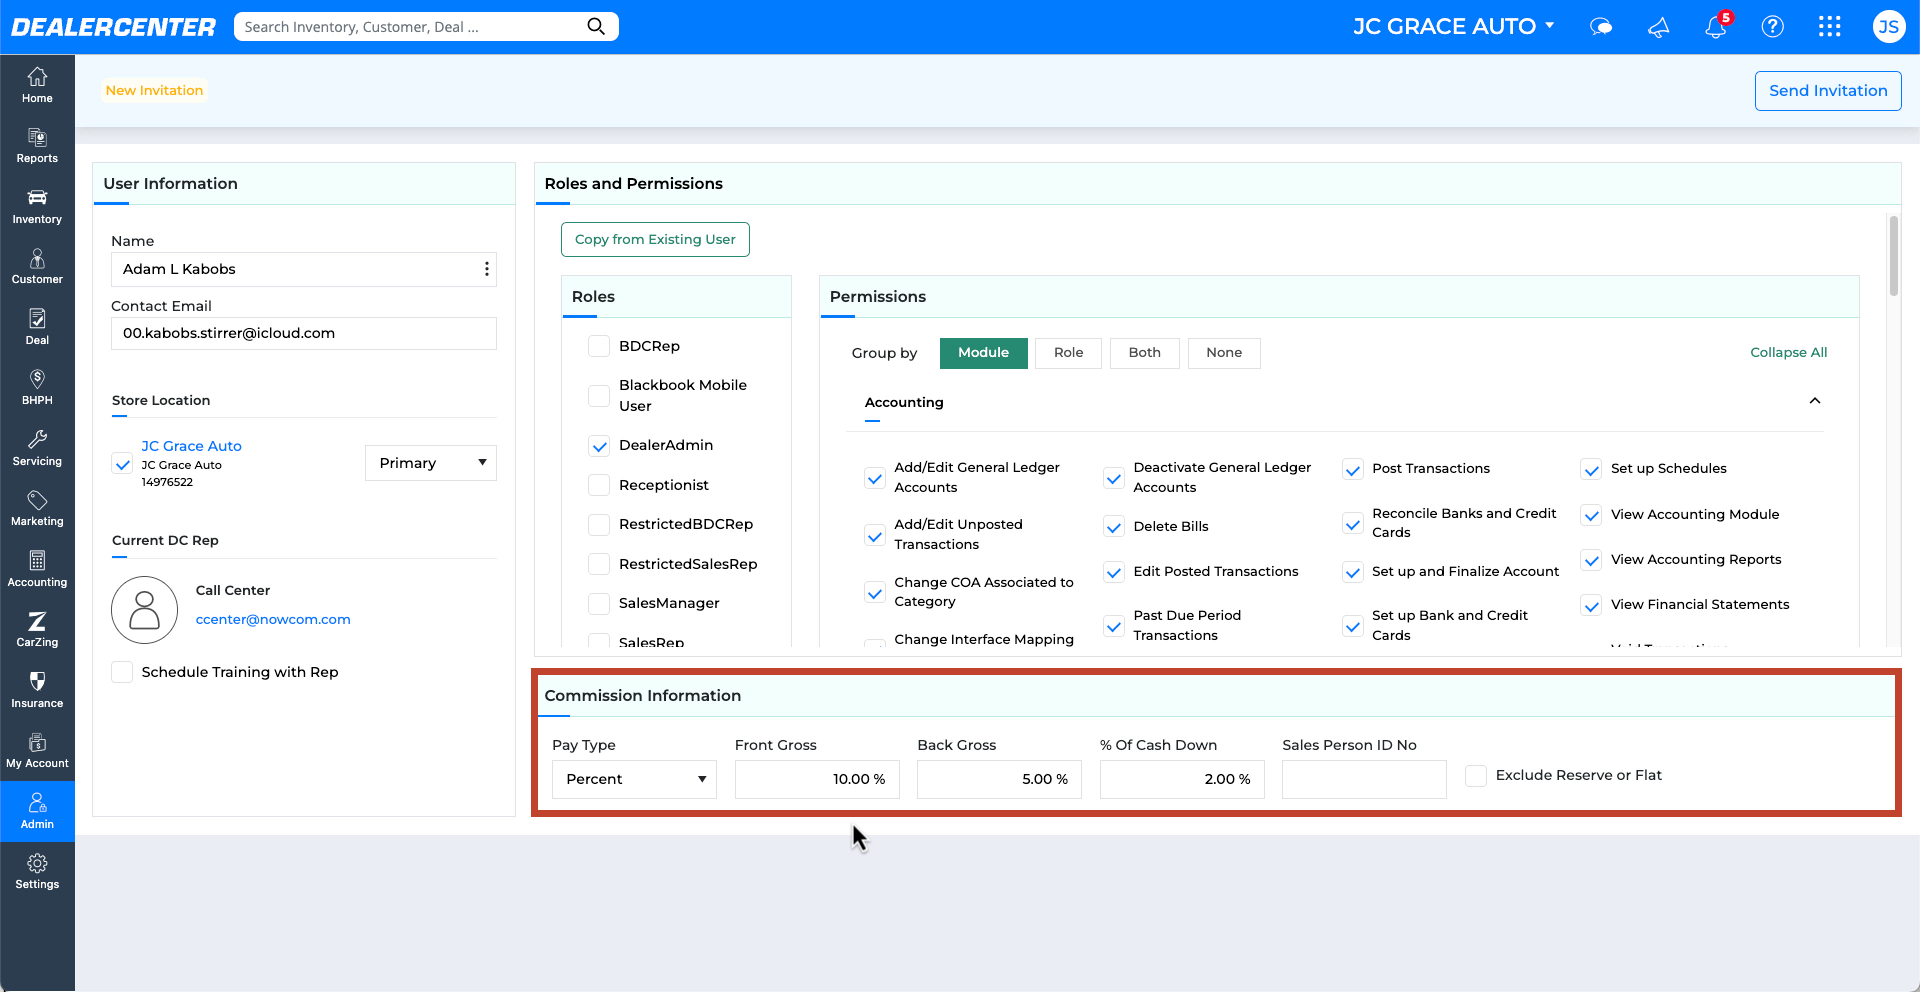
Commission Information
You can optionally enter commission details for the new user.
- In the Commission Information section, enter details for how commissions are calculated — such as based on Front Gross, Back Gross, or Cash Down.
- These values flow into deals and reports like Deal Commissions by Rep.
Manage Users
View, edit, or manage all users from the Manage Users section.
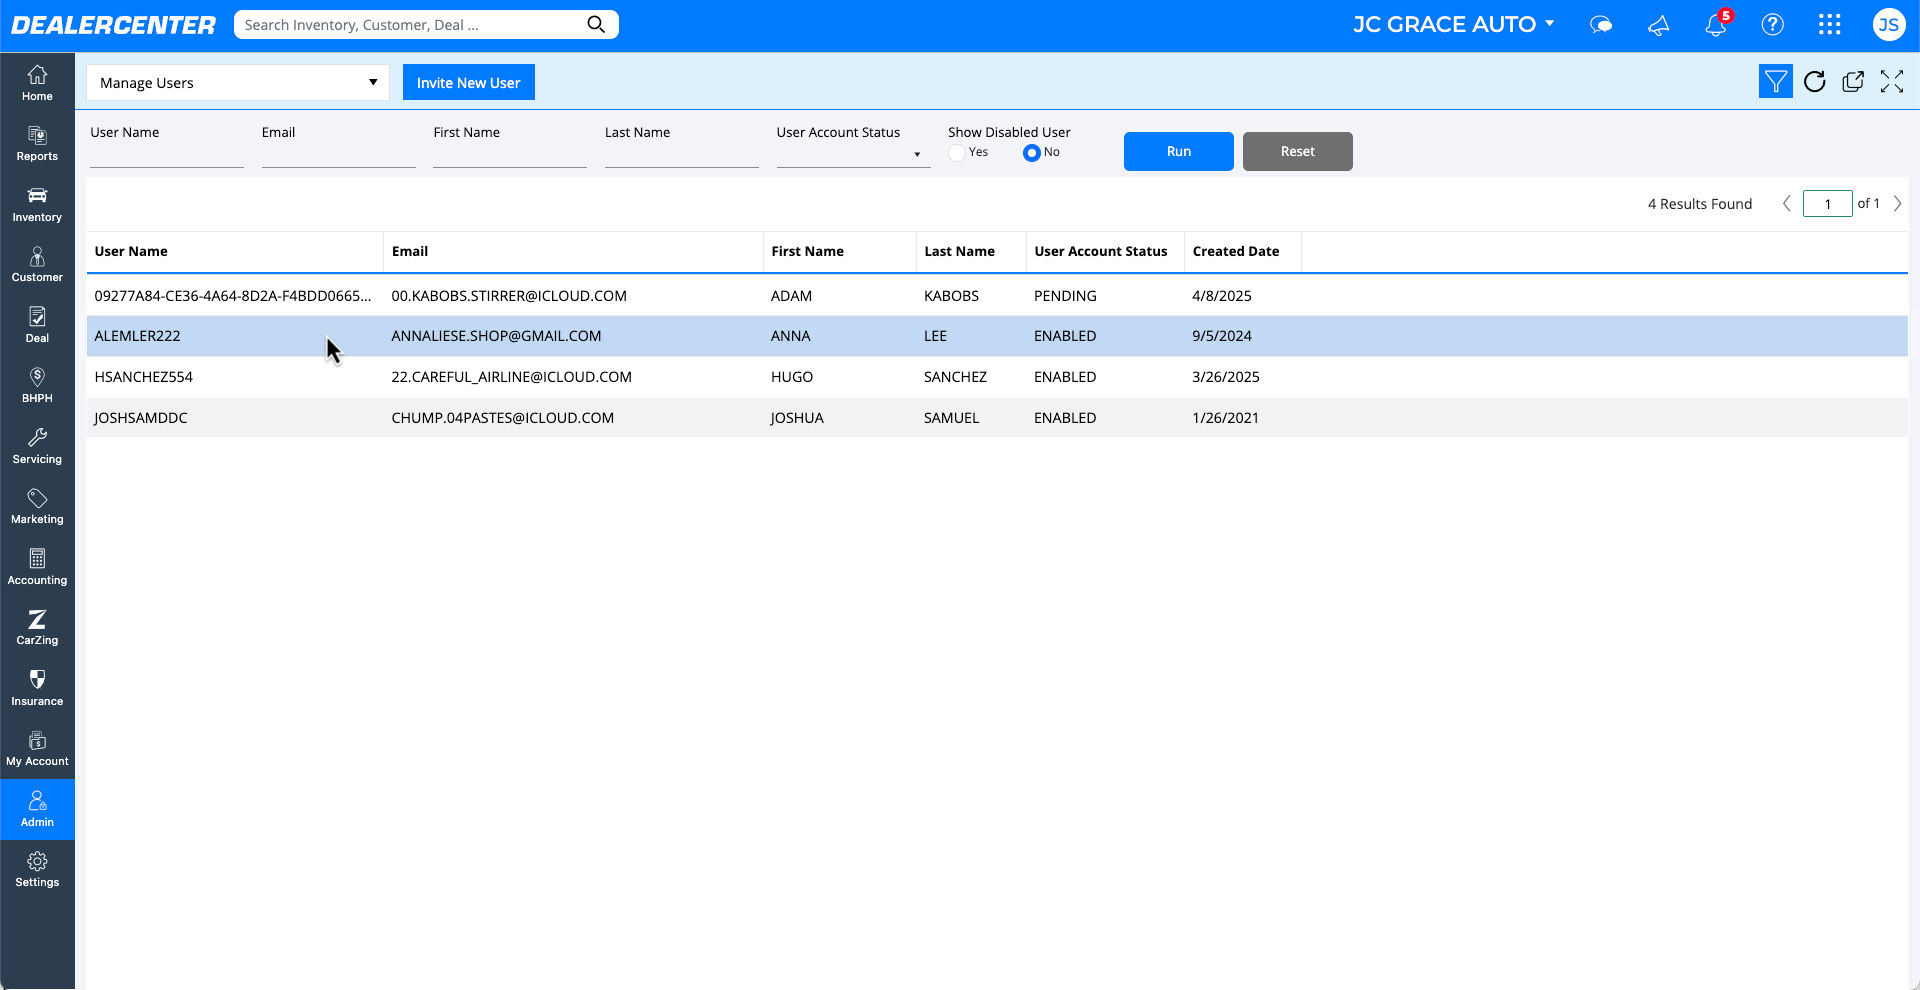
- Go to Admin, then click Manage Users.
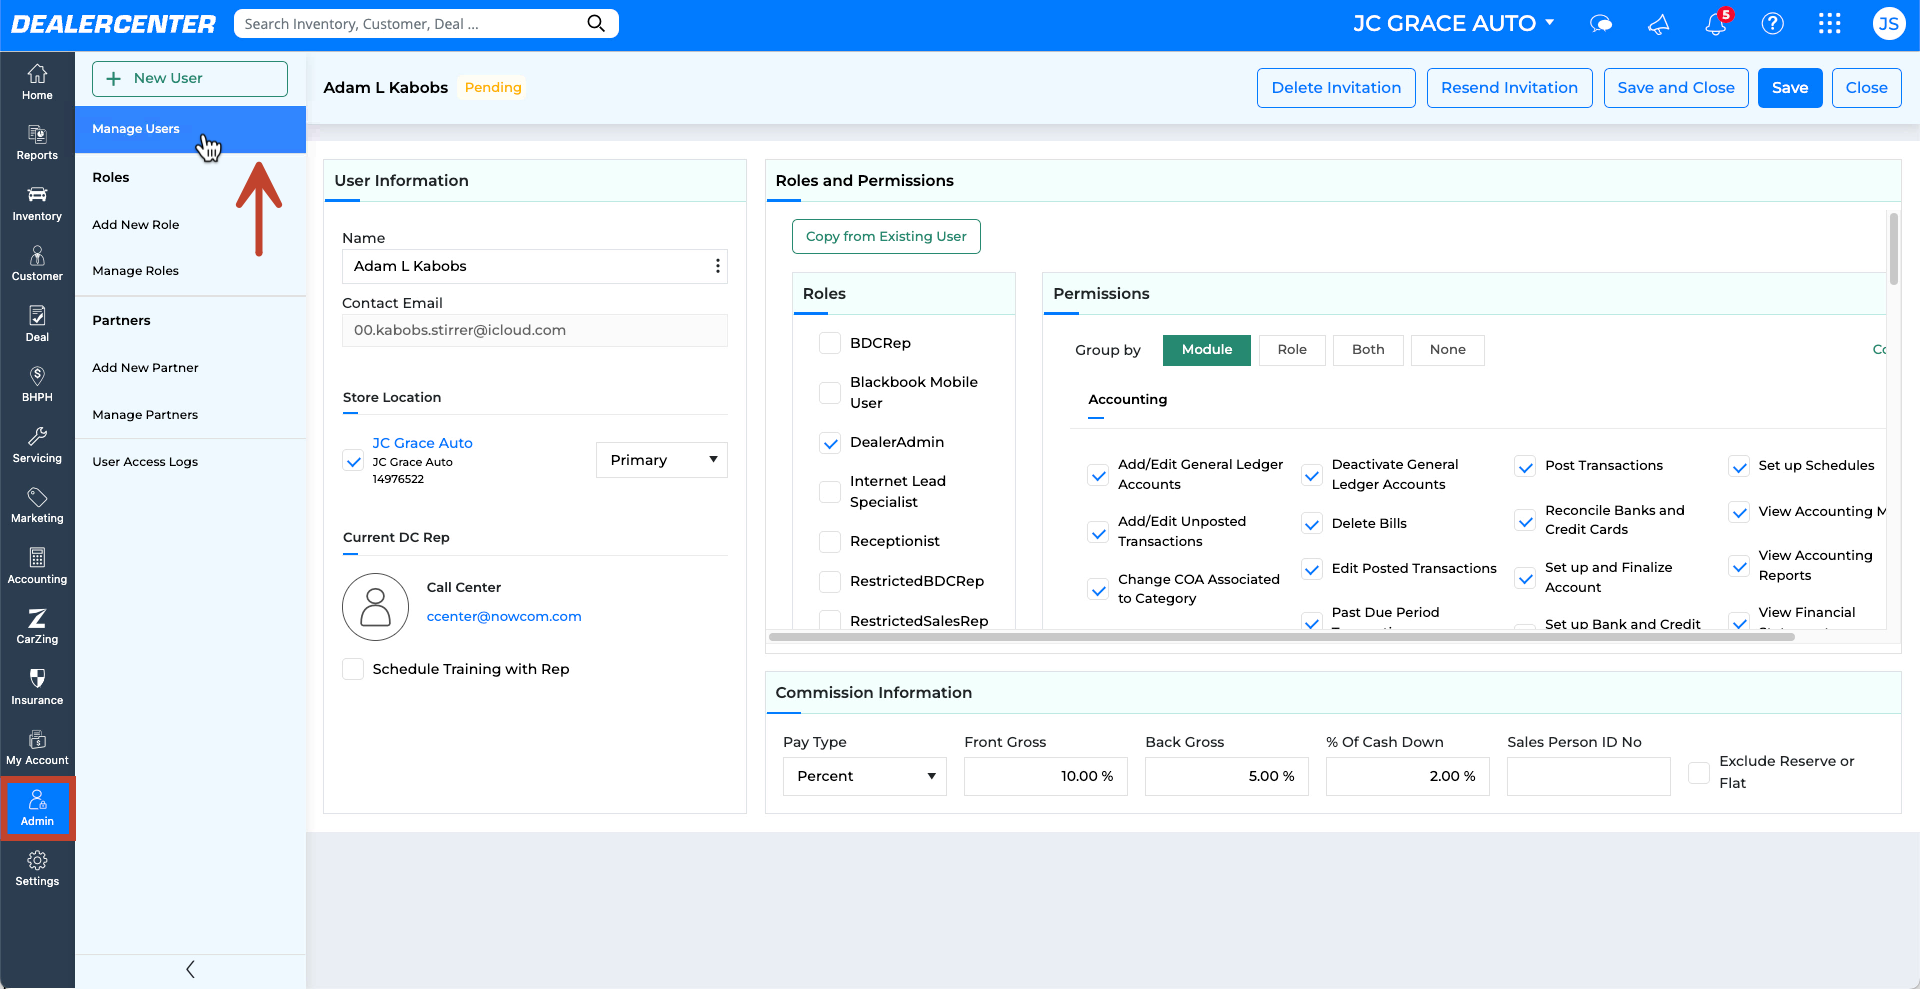
- Use the list view to locate any user. Double-click a user’s row to open their details.
- From here, you can update user info, adjust roles and permissions, reset their password, or resend/delete an invitation.

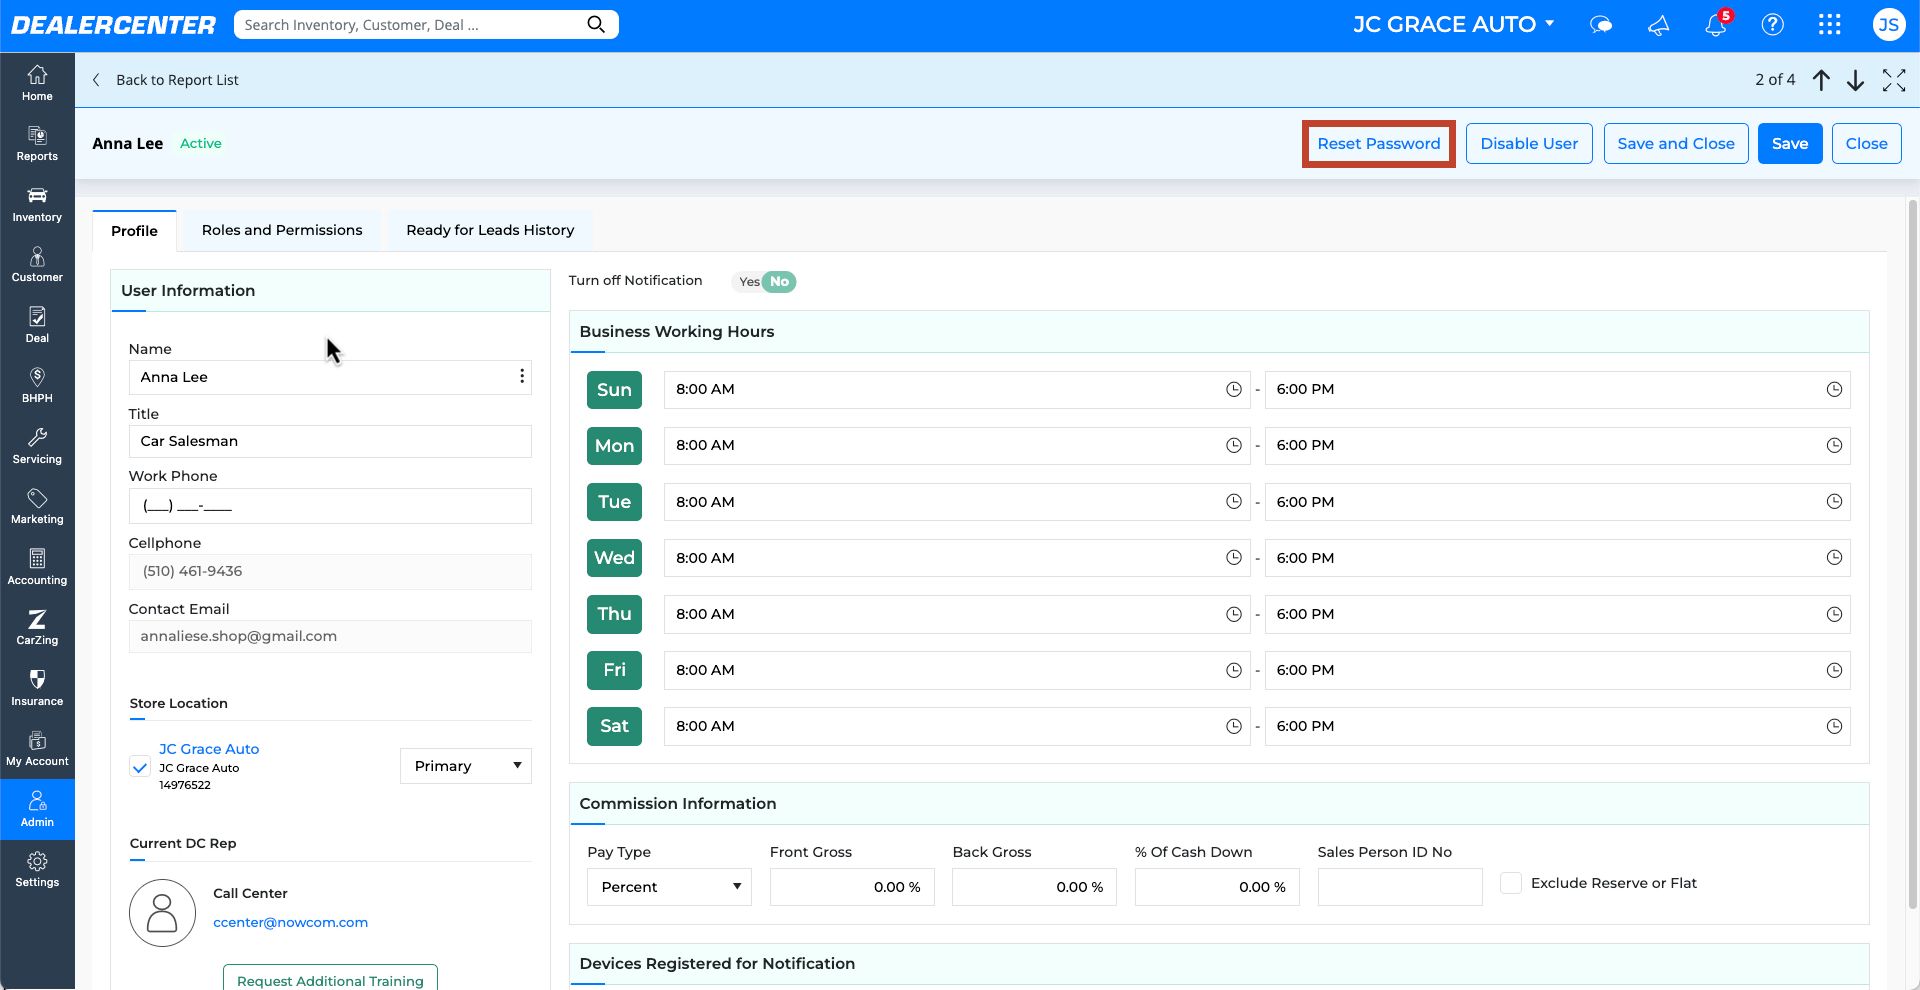
Resetting Password / Resending Invitation
If a user has not activated their account or has trouble logging in, you can resend their invitation or reset their password.
- Go to Admin, then click Manage Users.
- Locate the user in the list and double-click to open their user details.
- If the account is not yet activated, click Resend Invitation.
- To reset a user’s password, click the Reset Password button.