IN THIS ARTICLE
- Creating Appointments
- Creating Work Orders
- Work Order Page Overview
- Vehicle Check-In
- Inspections
- Inspections on Mobile App
- Adding Jobs and Job Packages
- Jobs on Mobile
- Estimates and Invoices
- Customer Communication
- Post-Inspection and Ready for Pickup
- Taking Payments
- Additional Tabs
- Reports and Boards
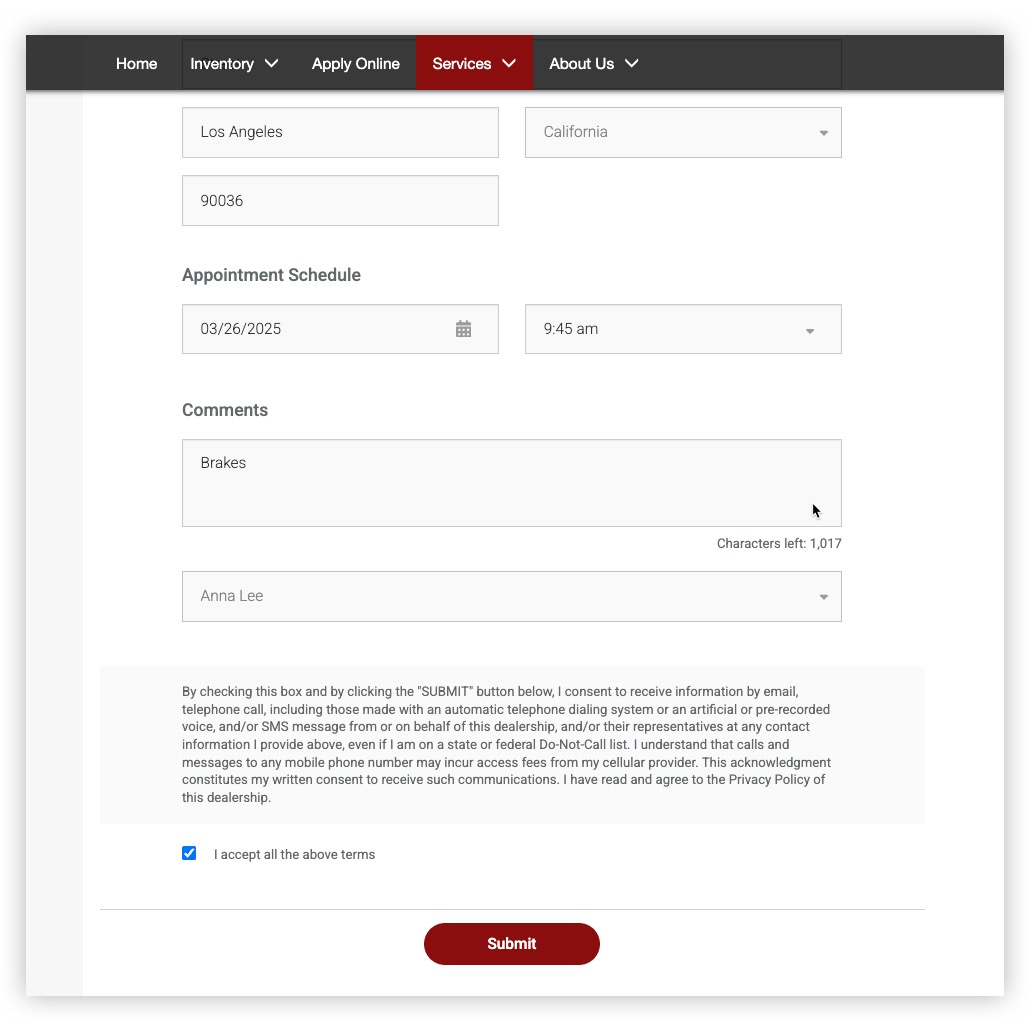
Creating Appointments
To schedule a servicing appointment:
- Go to Servicing in the left menu and select Schedule Appointment.
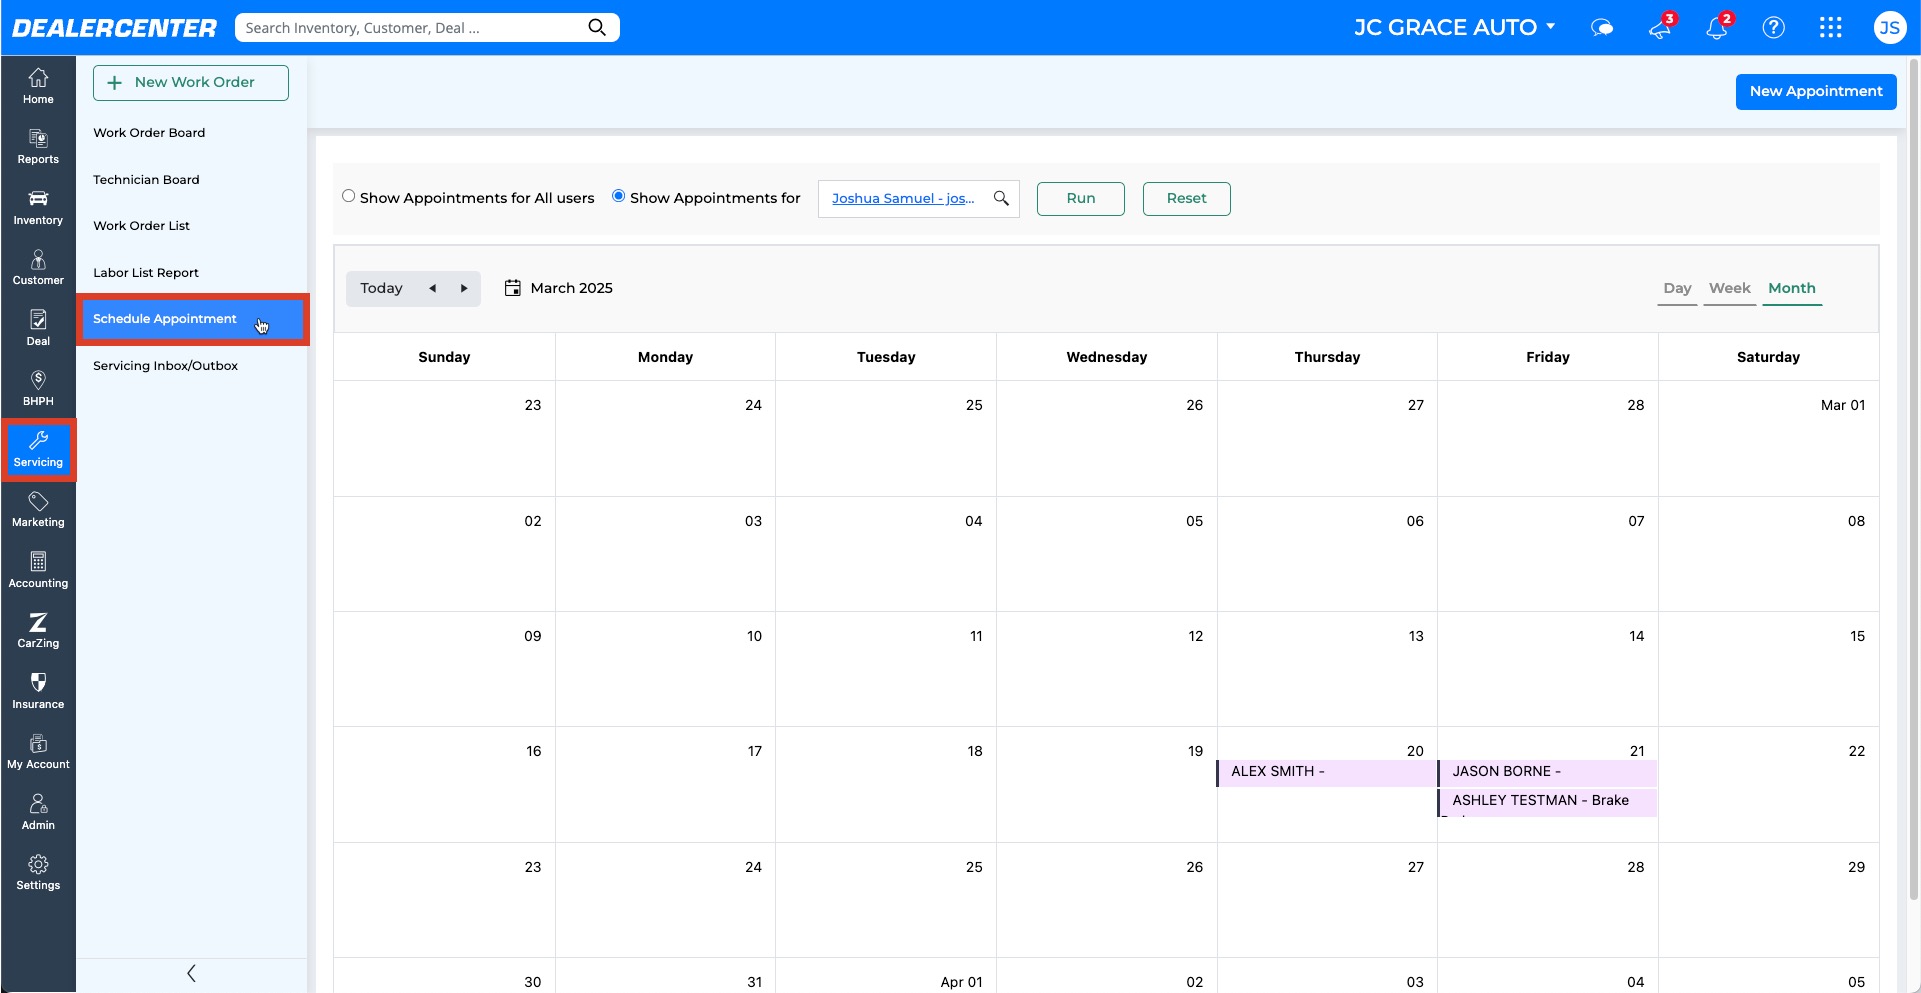
- Click New Appointment.
- Search for an existing customer or click the + to add a new one.
- Enter the appointment details, including date, time, and notes.
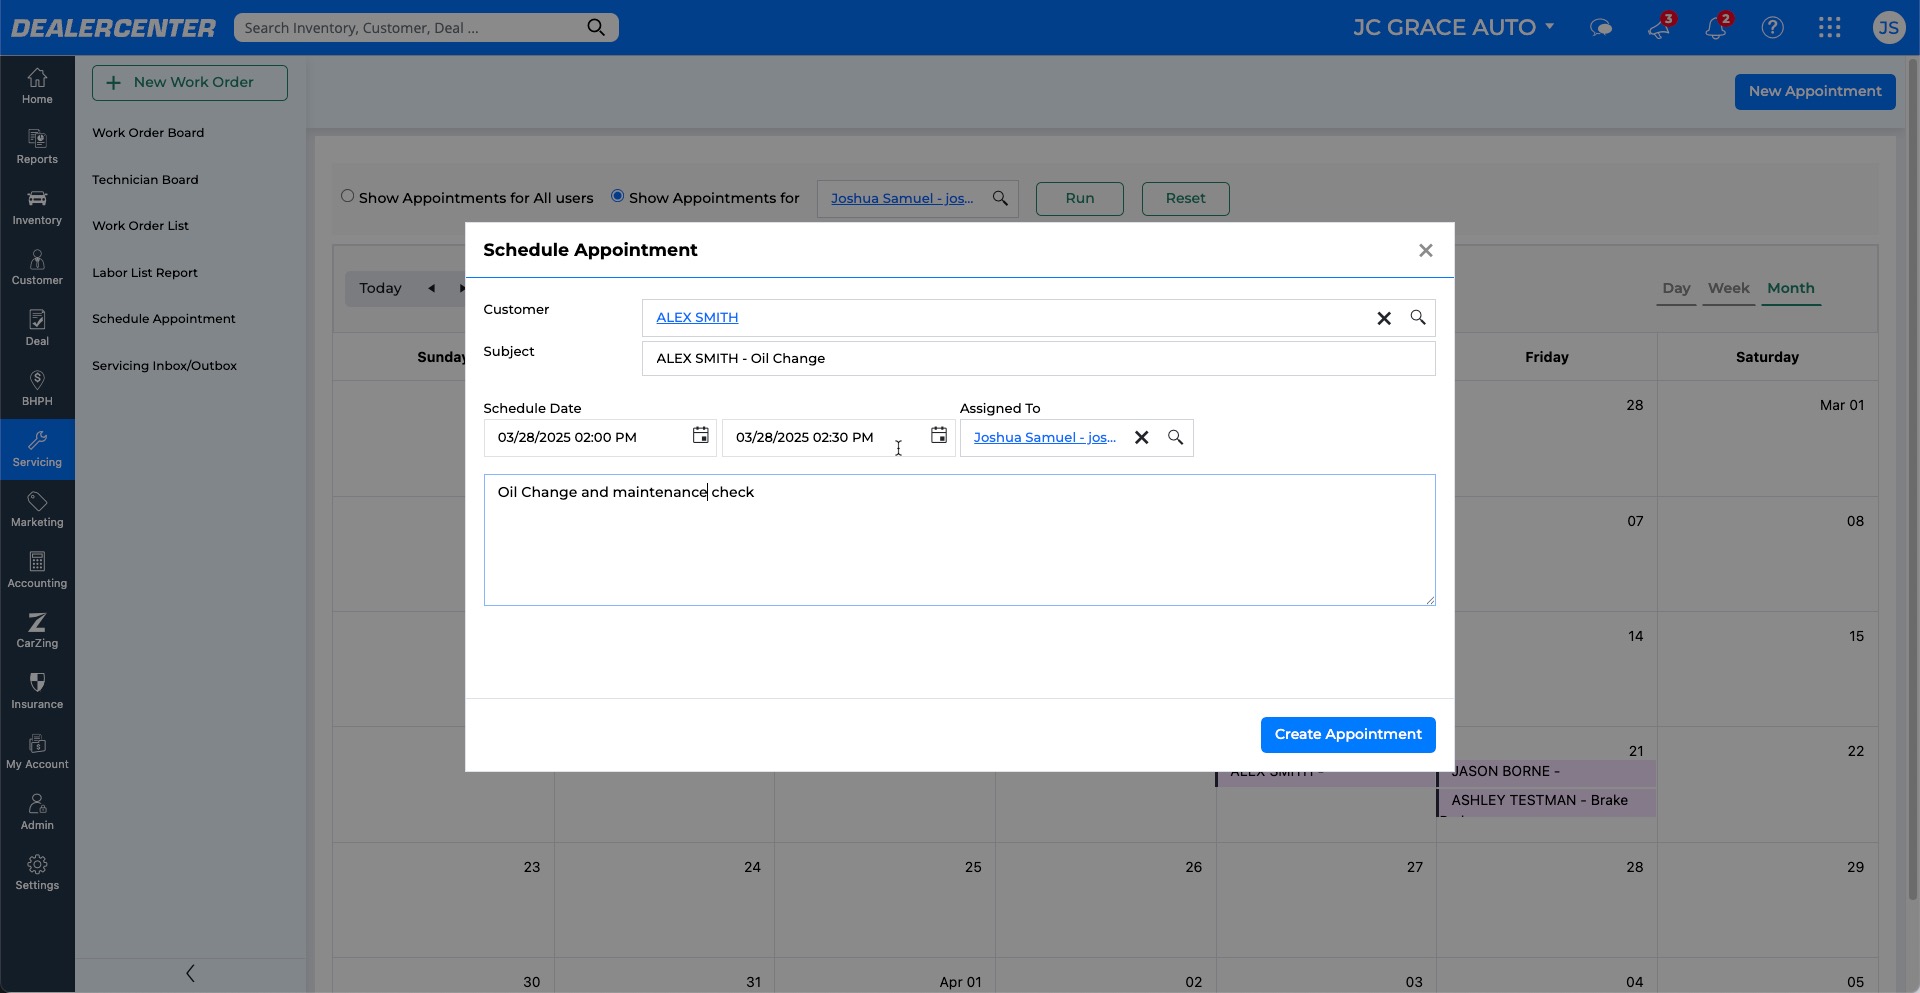
- Click Create Appointment.
Appointments scheduled via the optional servicing page on your DealerCenter website will appear automatically in the calendar.
Creating Work Orders
Once an appointment is scheduled or a customer arrives, you can create a new work order.
- Select Servicing from the left menu and click New Work Order.
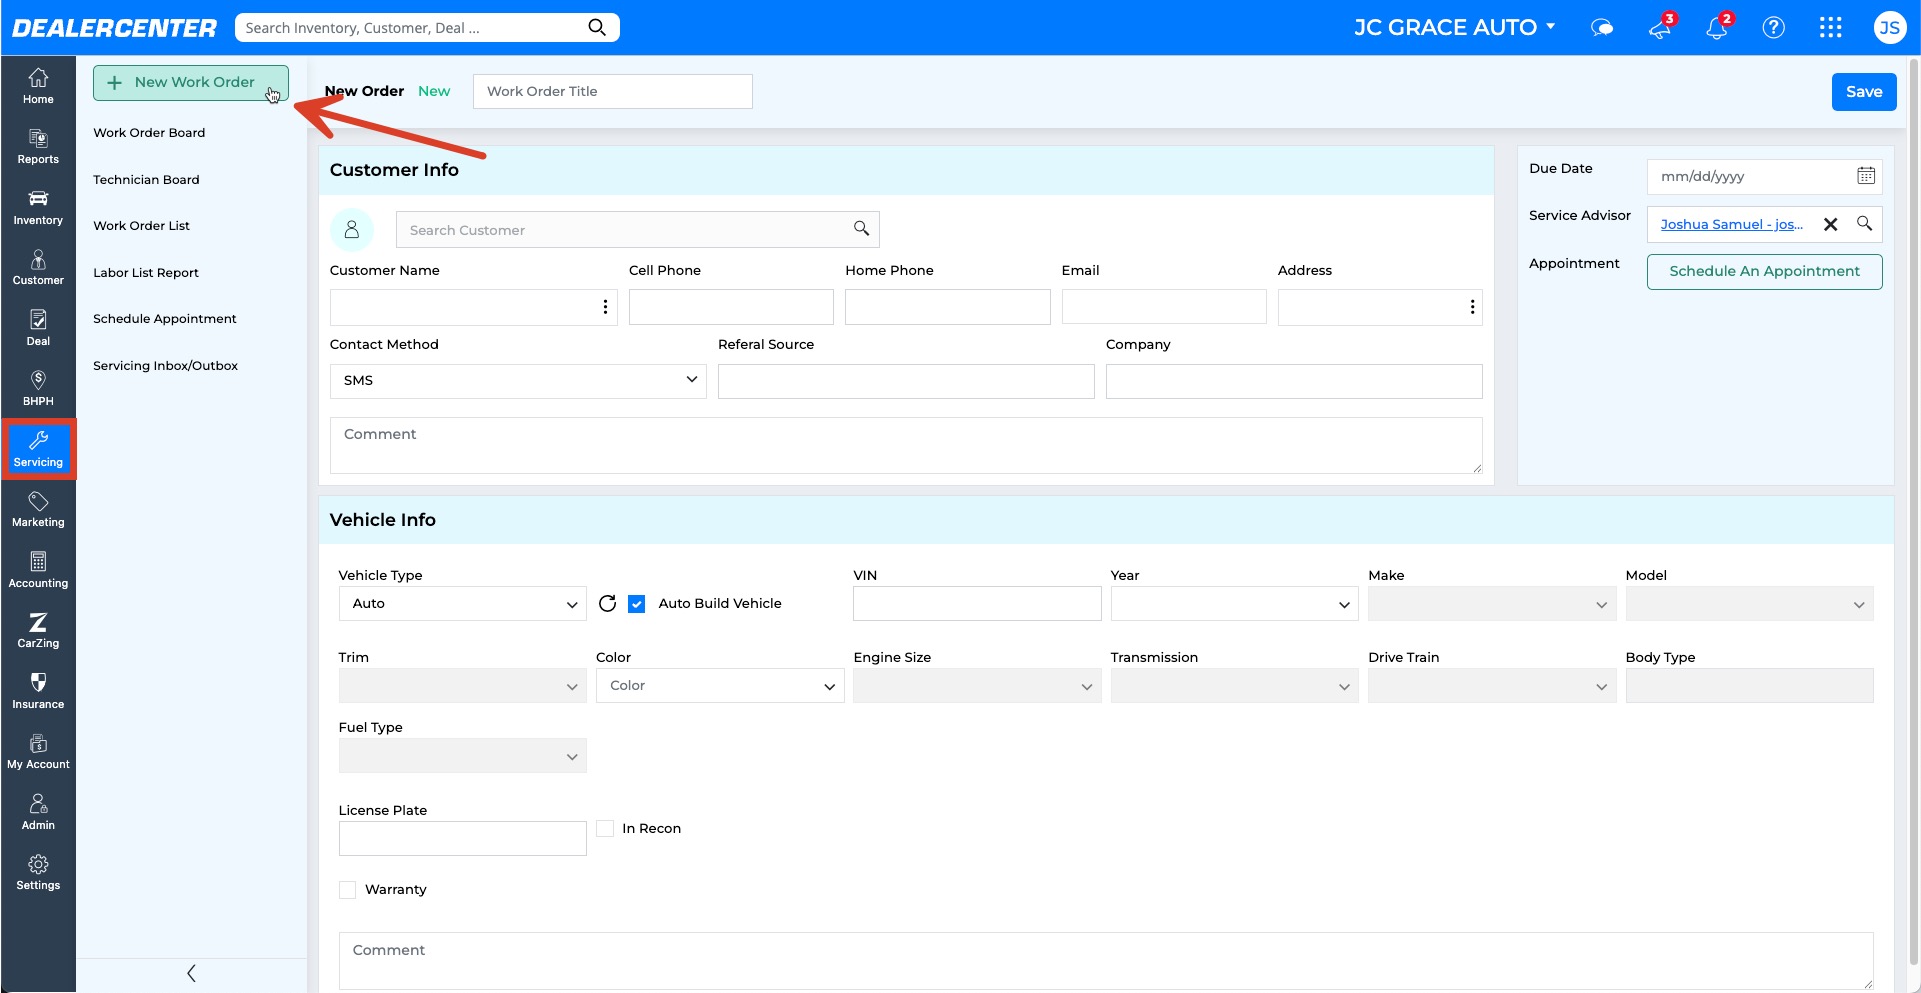
- Enter a title for the work order (optional).
- Search for or add a customer manually.
- Add a vehicle by selecting from customer records or entering the VIN (auto-build available).
- Set the due date (optional)
- Click Save to create the work order.

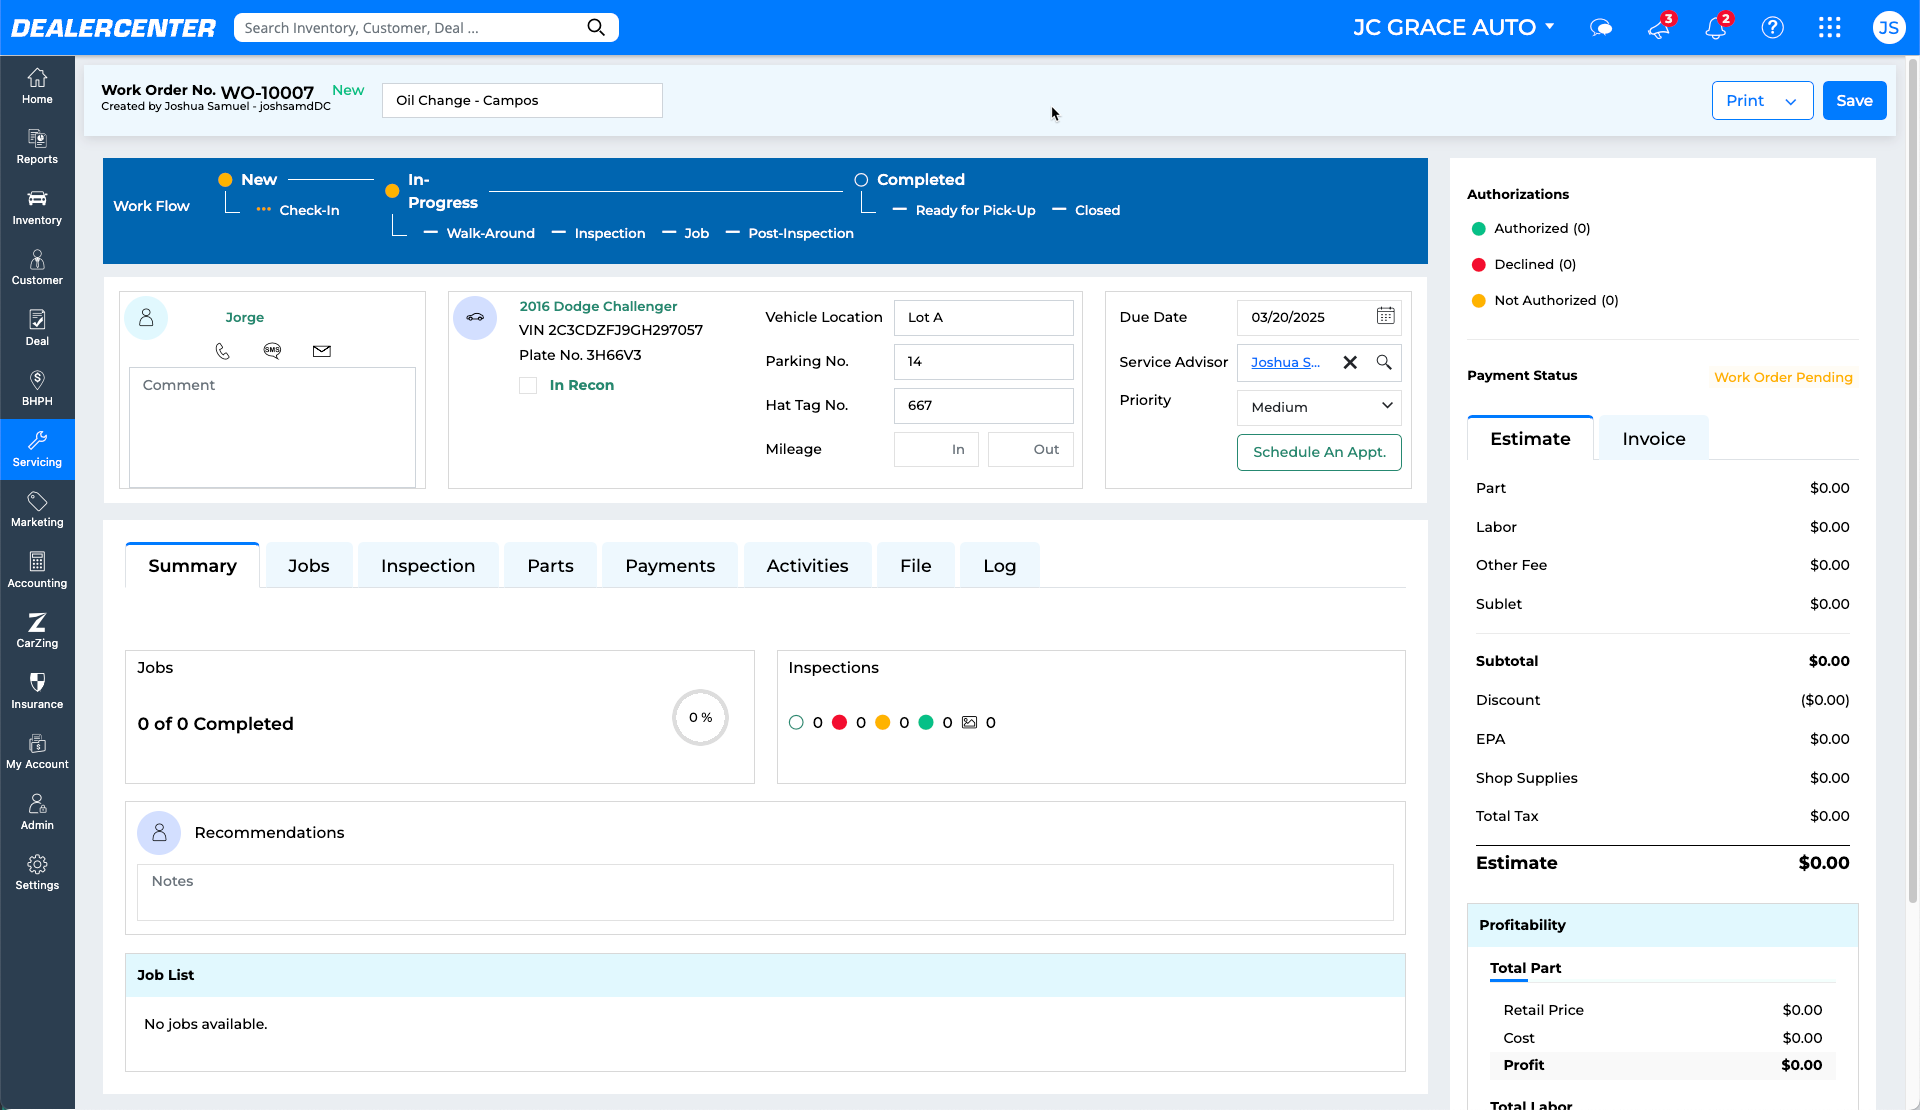
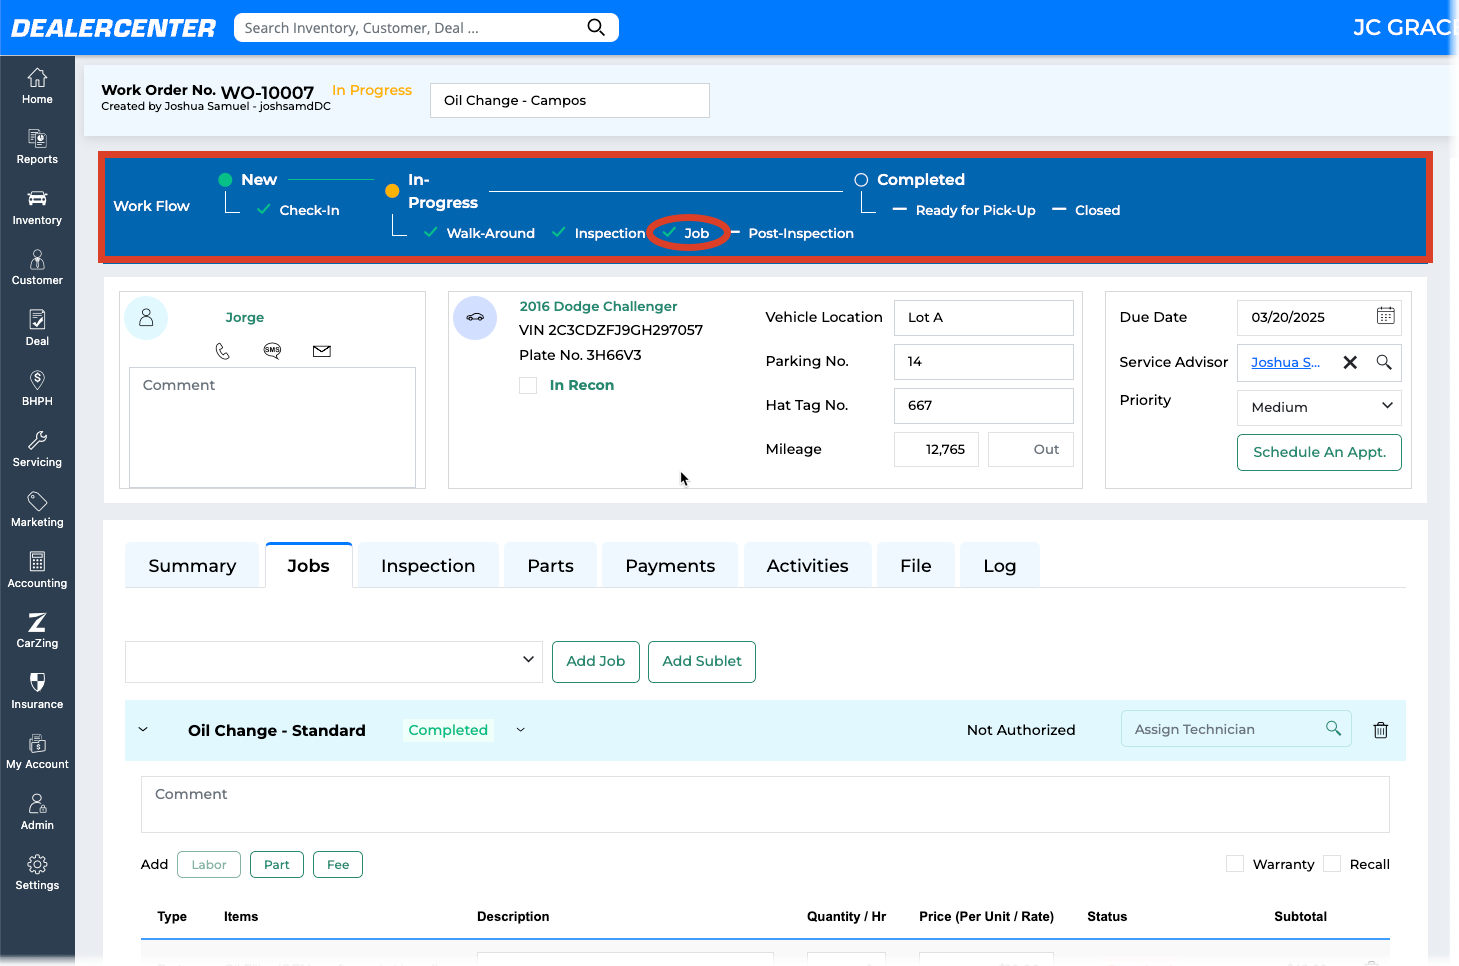
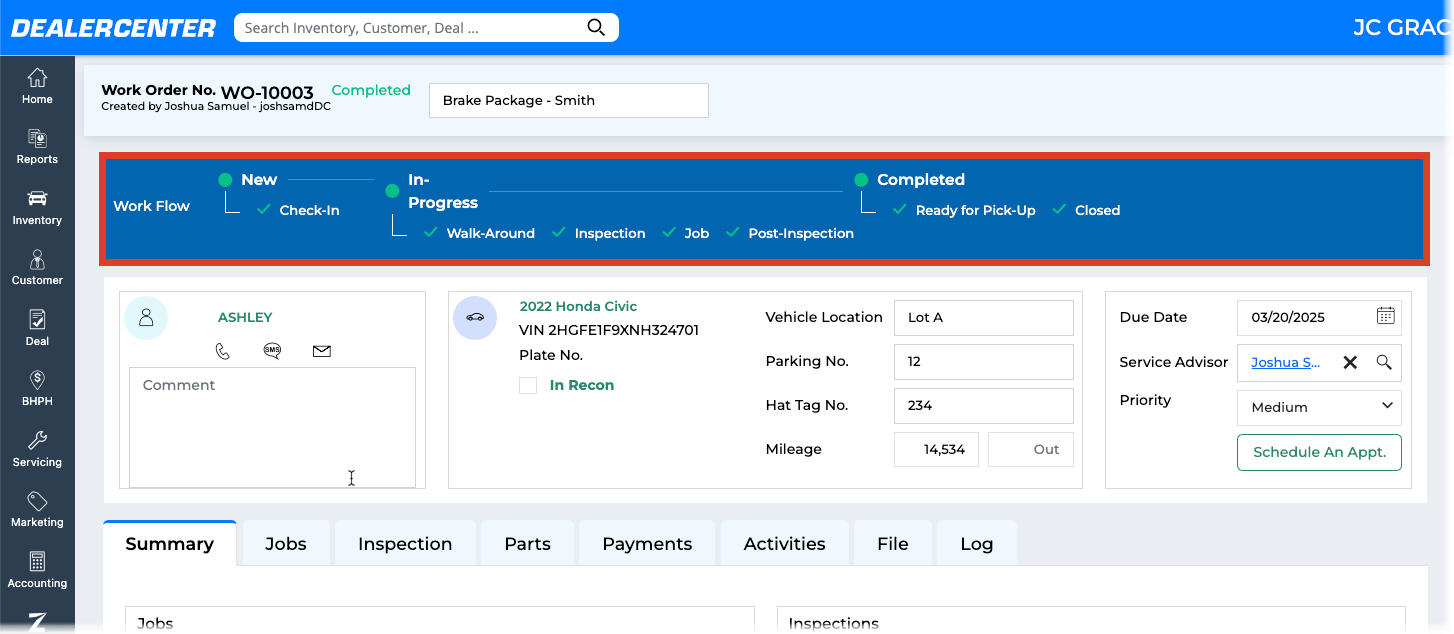
Work Order Page Overview
The work order page provides a full view of the repair process:
-
Workflow Tracker: Displays stages of the service process and updates automatically.

-
Customer Info: Includes quick-action buttons for calling, texting, and emailing.
-
Vehicle Info: Shows VIN, location fields (parking, hat tag)
-
Due Date, Service Advisor and Priority (optional)

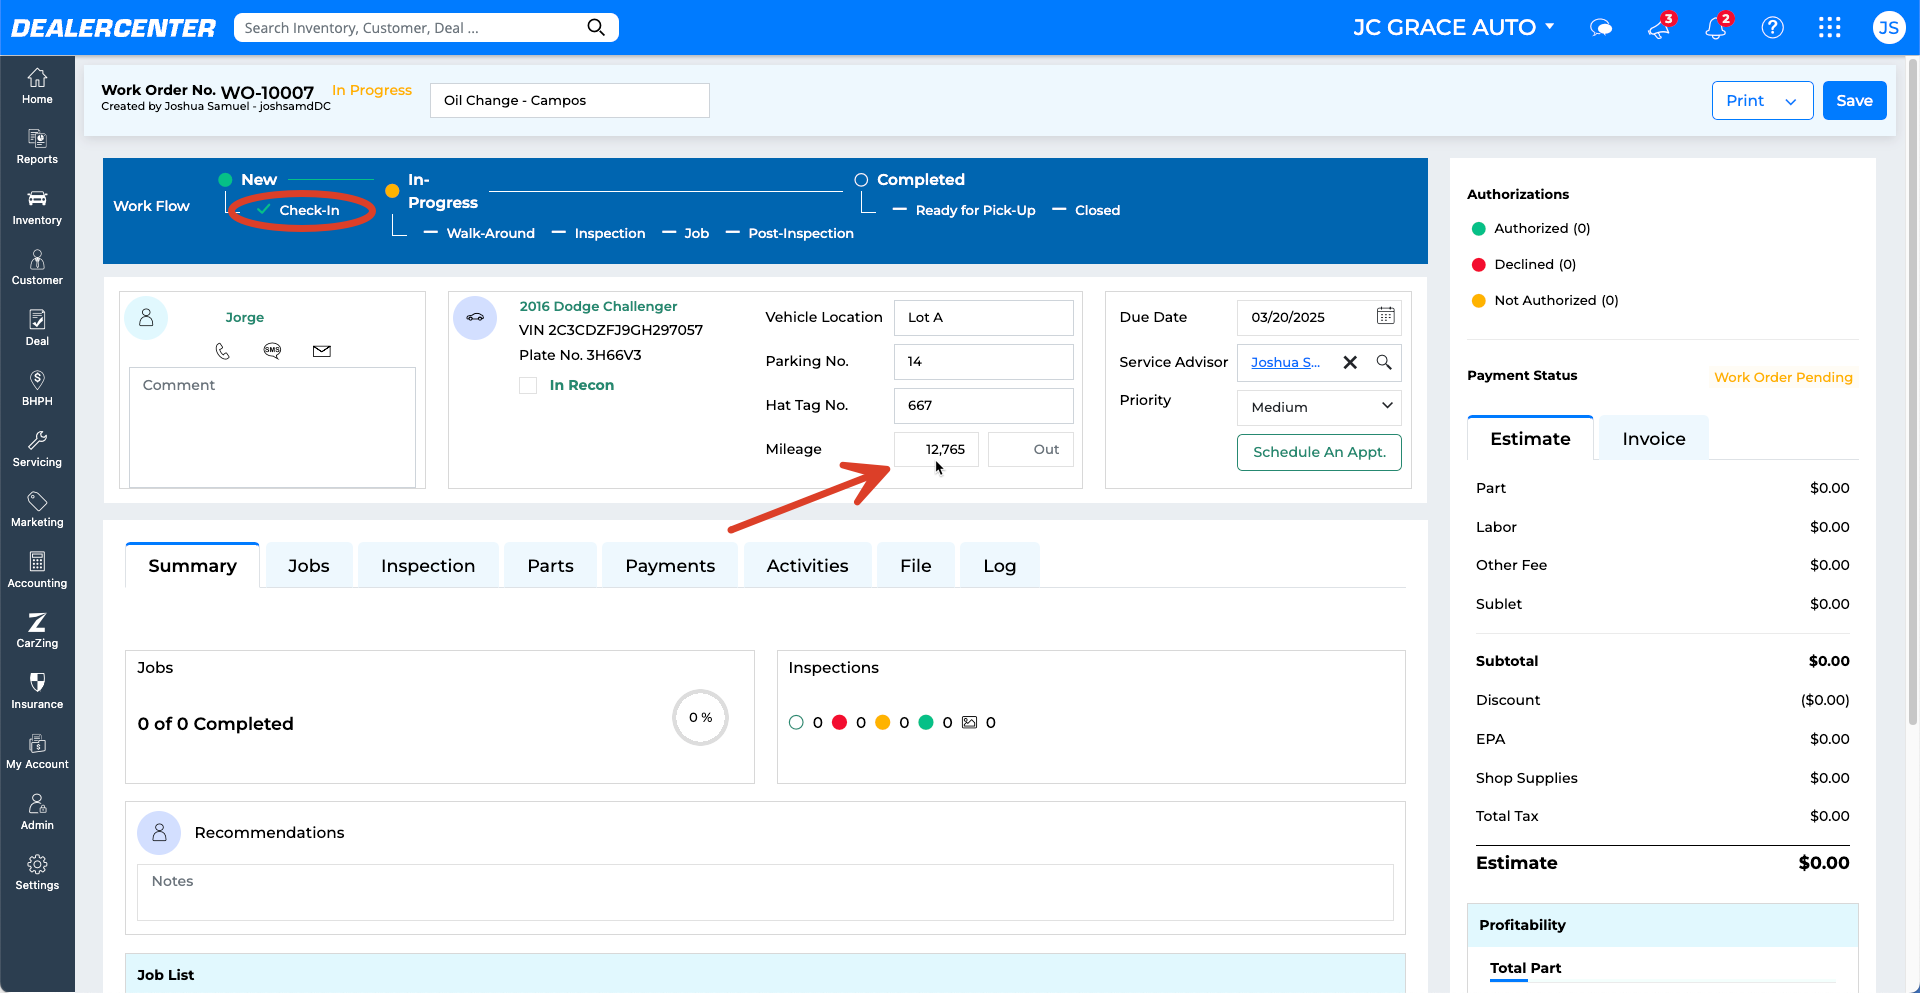
Vehicle Check-In
To check in a vehicle after creating a work order:
- Go to the Vehicle Info section of the work order.
- Optionally fill in Vehicle Location, Parking No., and Hat Tag No
- Enter the Mileage In (required).
The Work Flow tracker automatically updates to show the vehicle in the "Check-in" Status
Inspections
Inspections are managed from the Inspection tab and include:
-
Walk-Around: Initial inspection during intake.
-
Technician Inspection: Performed by the technician/mechanic to identify issues and add repair recommendations.
-
Post-Inspection: Final quality check.
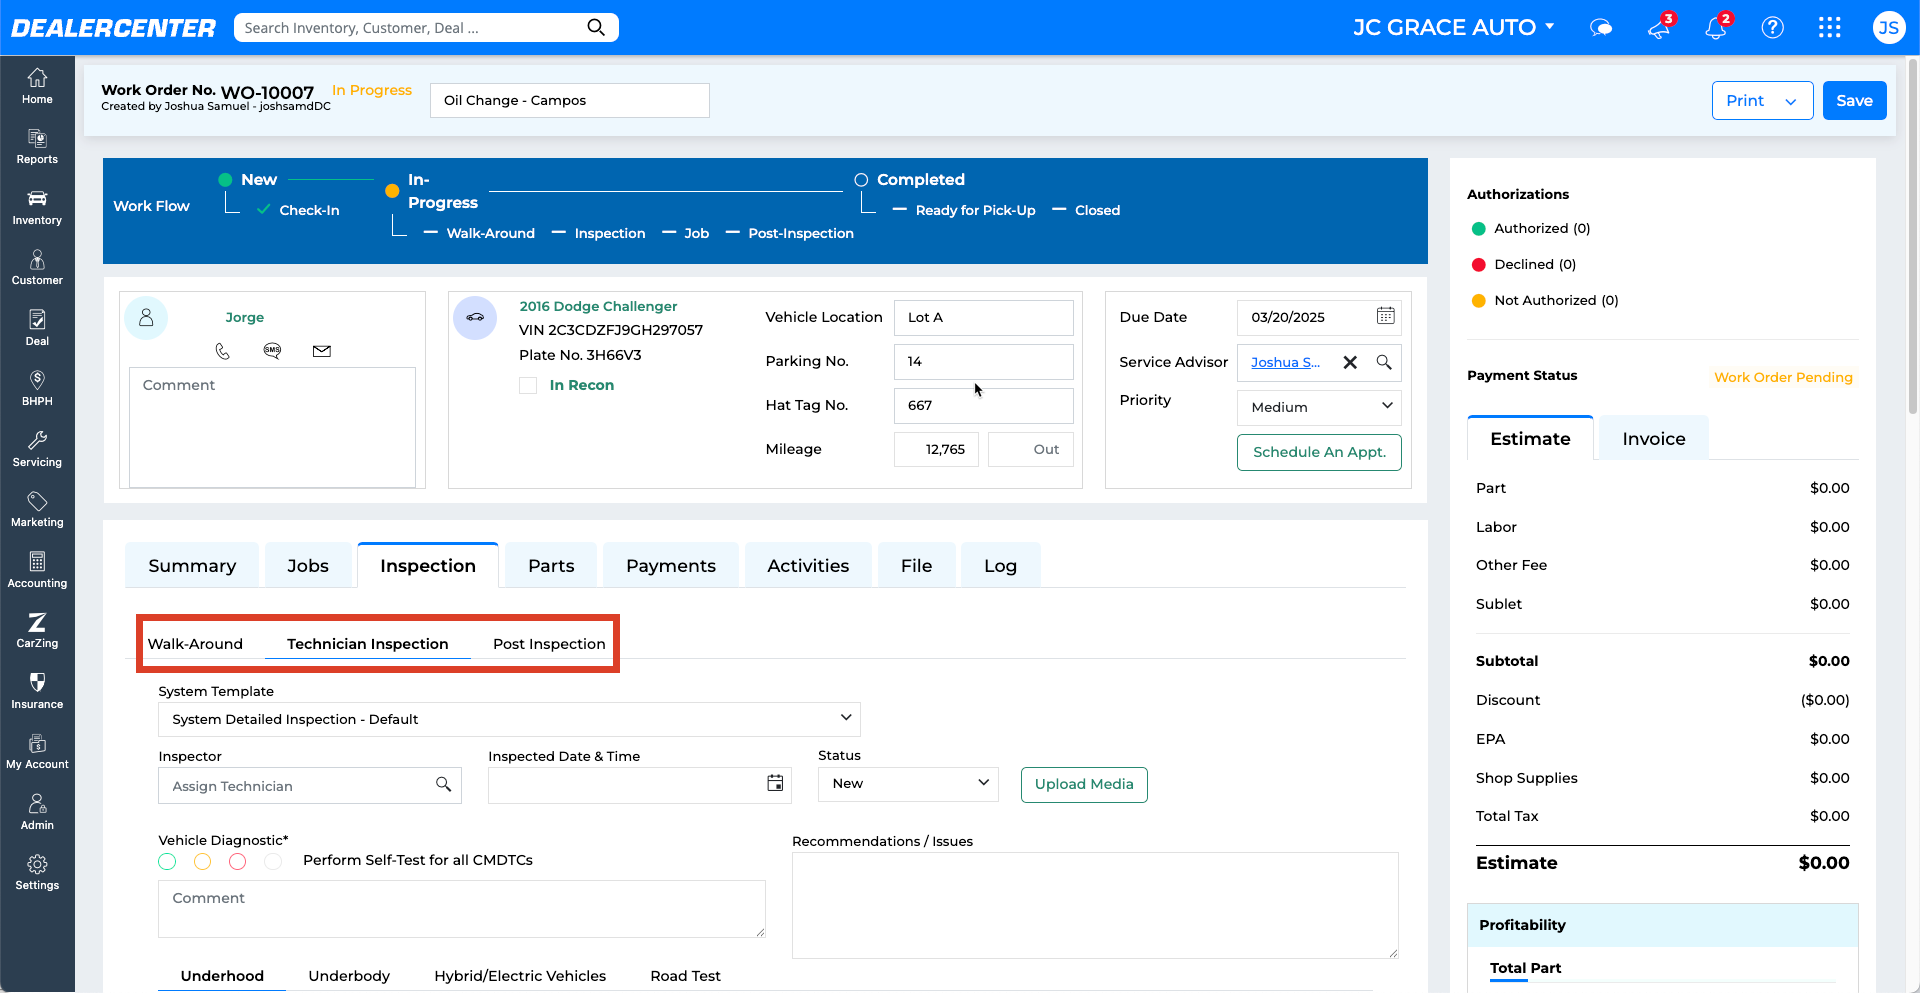
- Select the inspection type
- Assign Inspector
- Choose Inspection template or use default

- Complete checklist items and add notes/comments if needed.
- Use the Repair Recommendations feature in the Technician Inspection to suggest any additional work. Service Advisors will be notified.
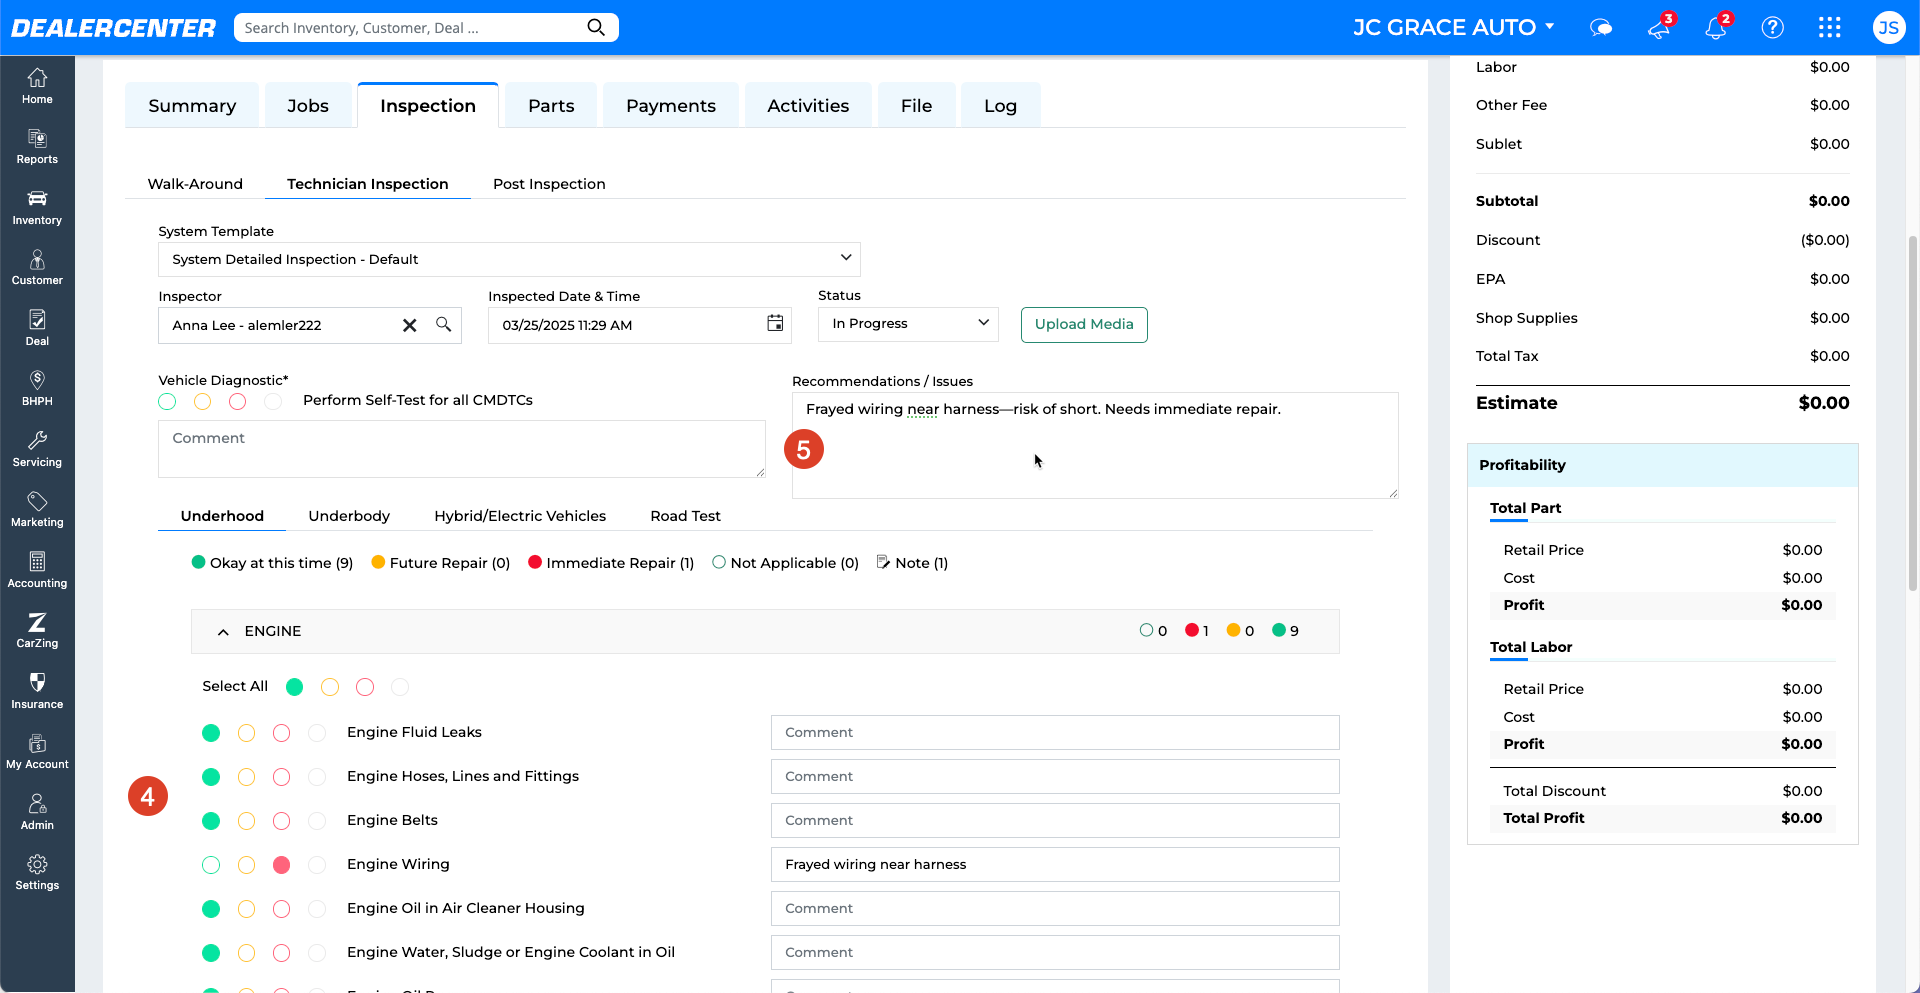
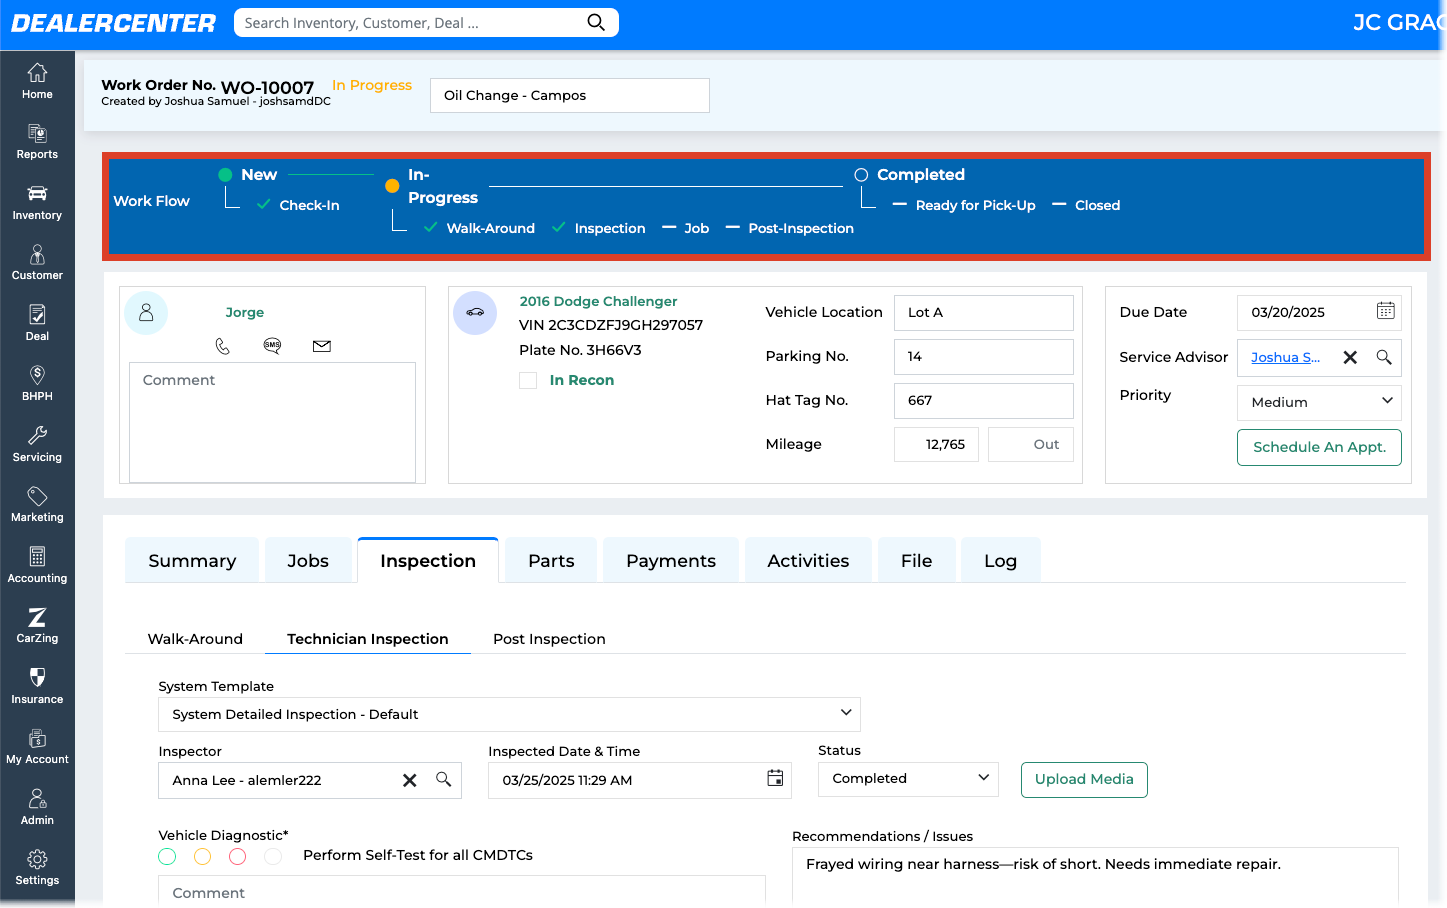
- Update inspection status as Completed.

The Work Flow tracker automatically updates to show the vehicle in the completed Inspections.
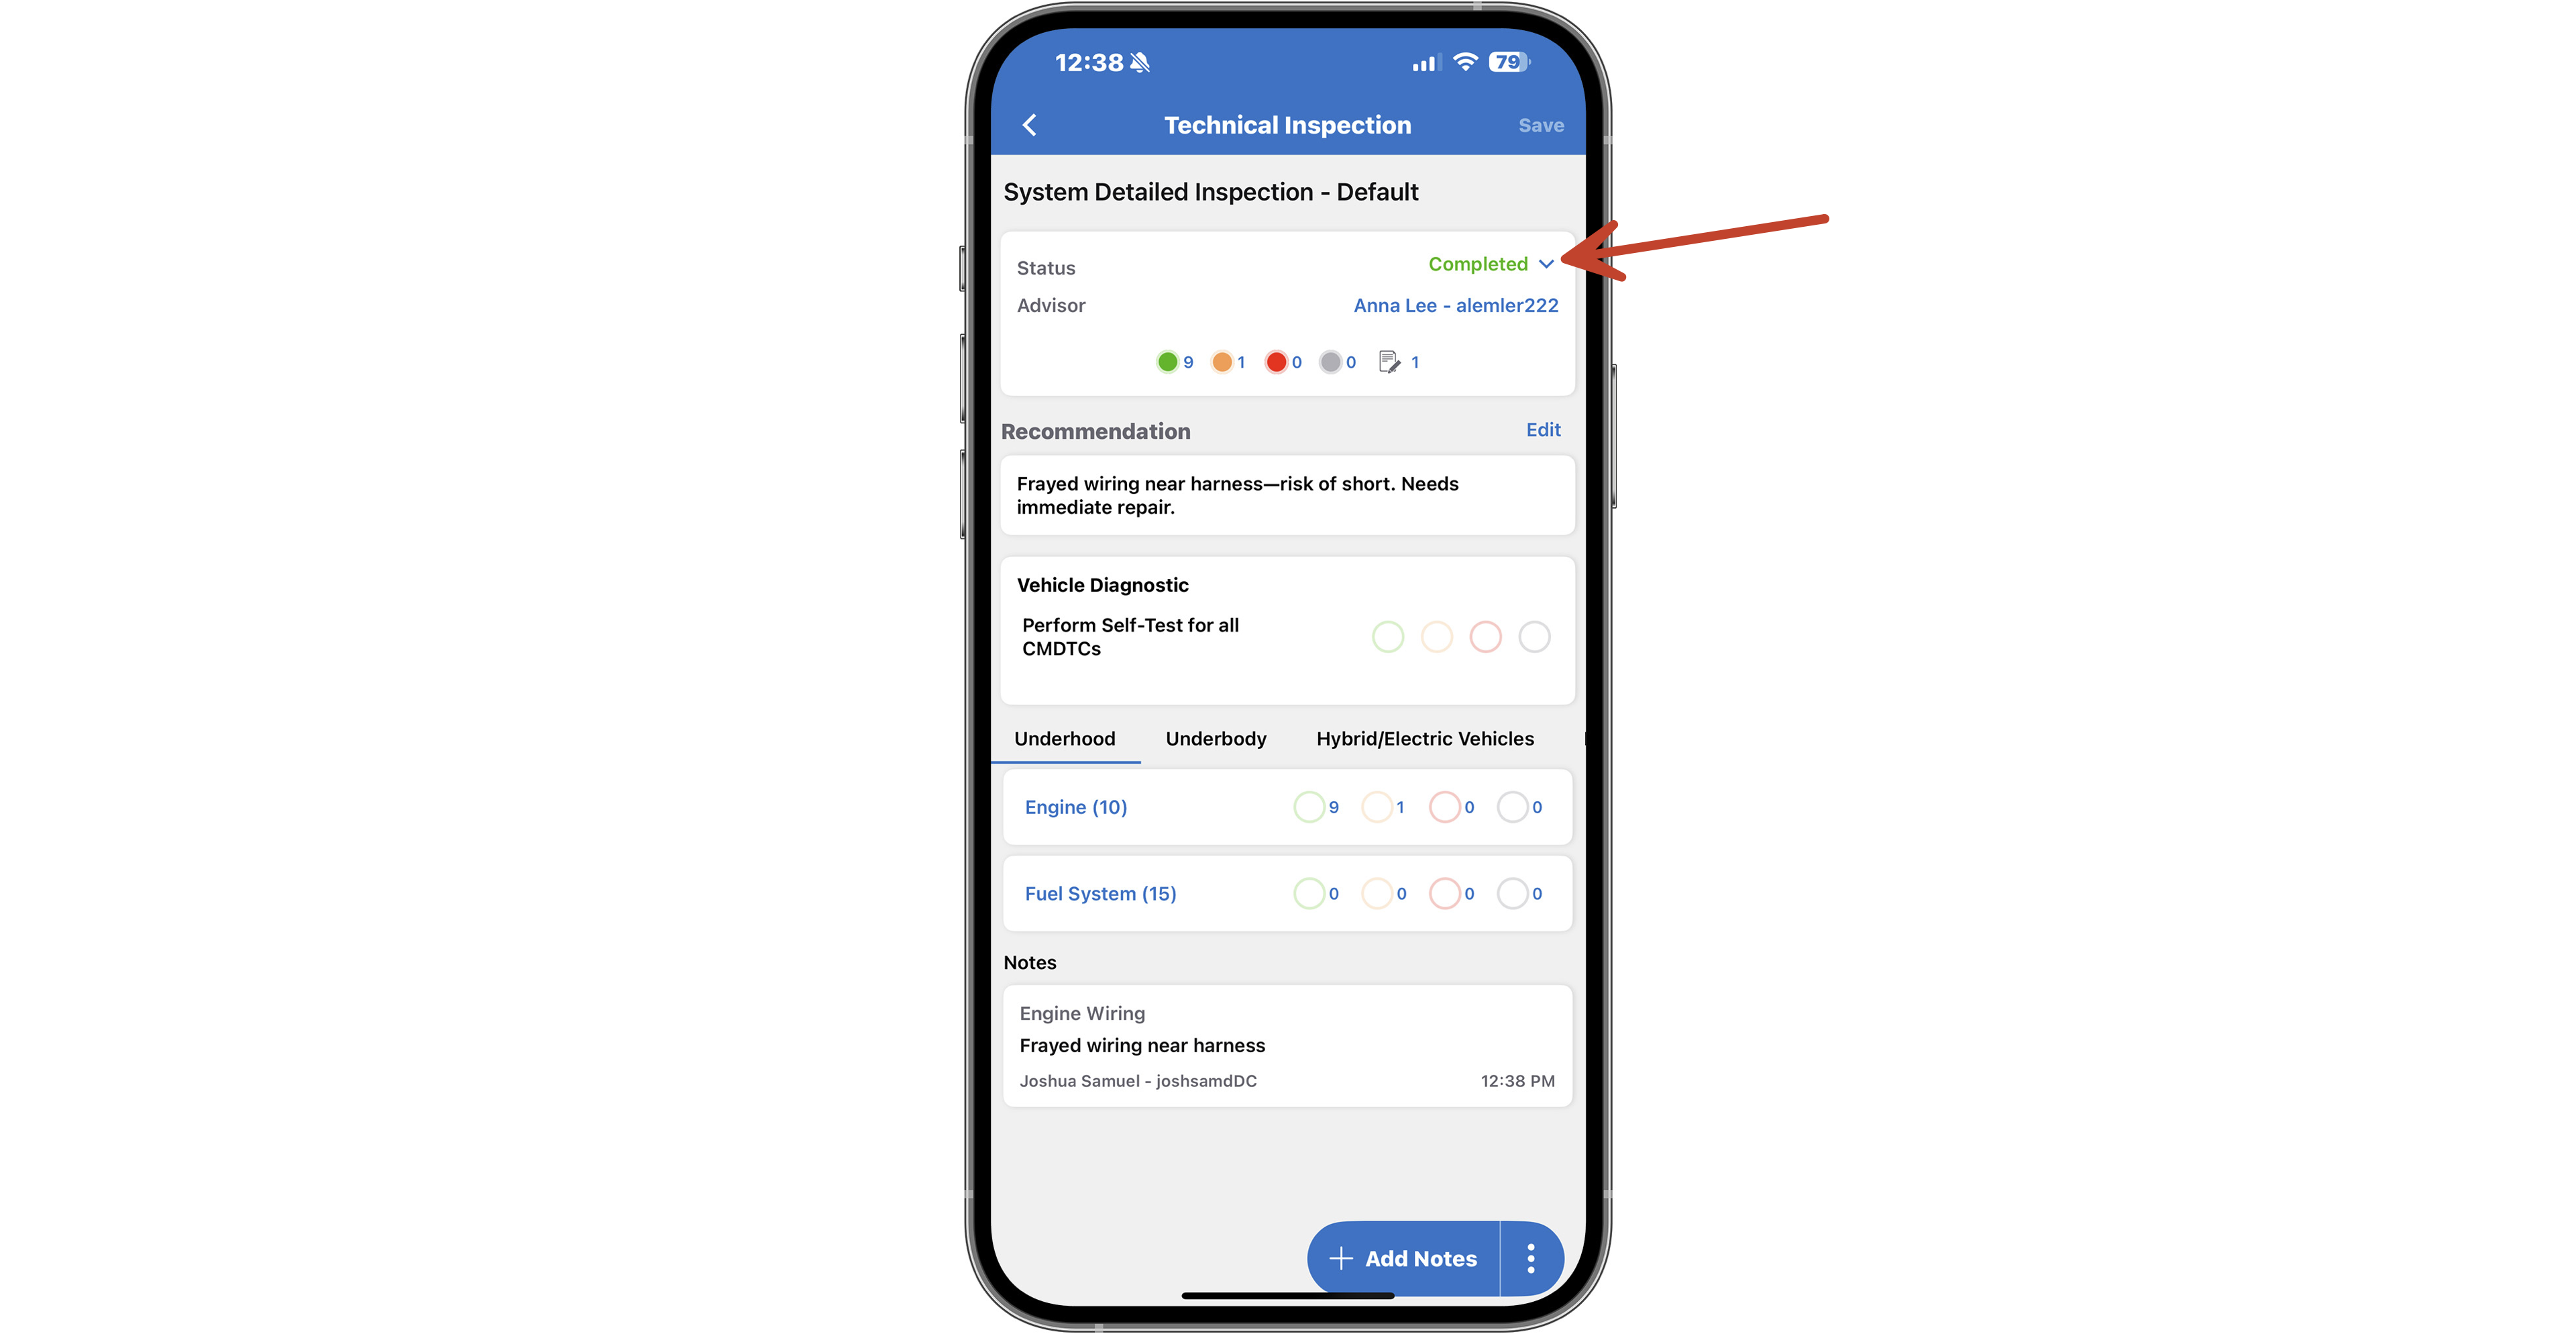
Inspections on Mobile App
- From the mobile app menu access Work Orders from the Homescreen or the Work Order List from the Menu.
- From Work Order List tap to open a Work Order.

- Scroll to see Inspection section of Work Order, then tap an inspection to start or open it.
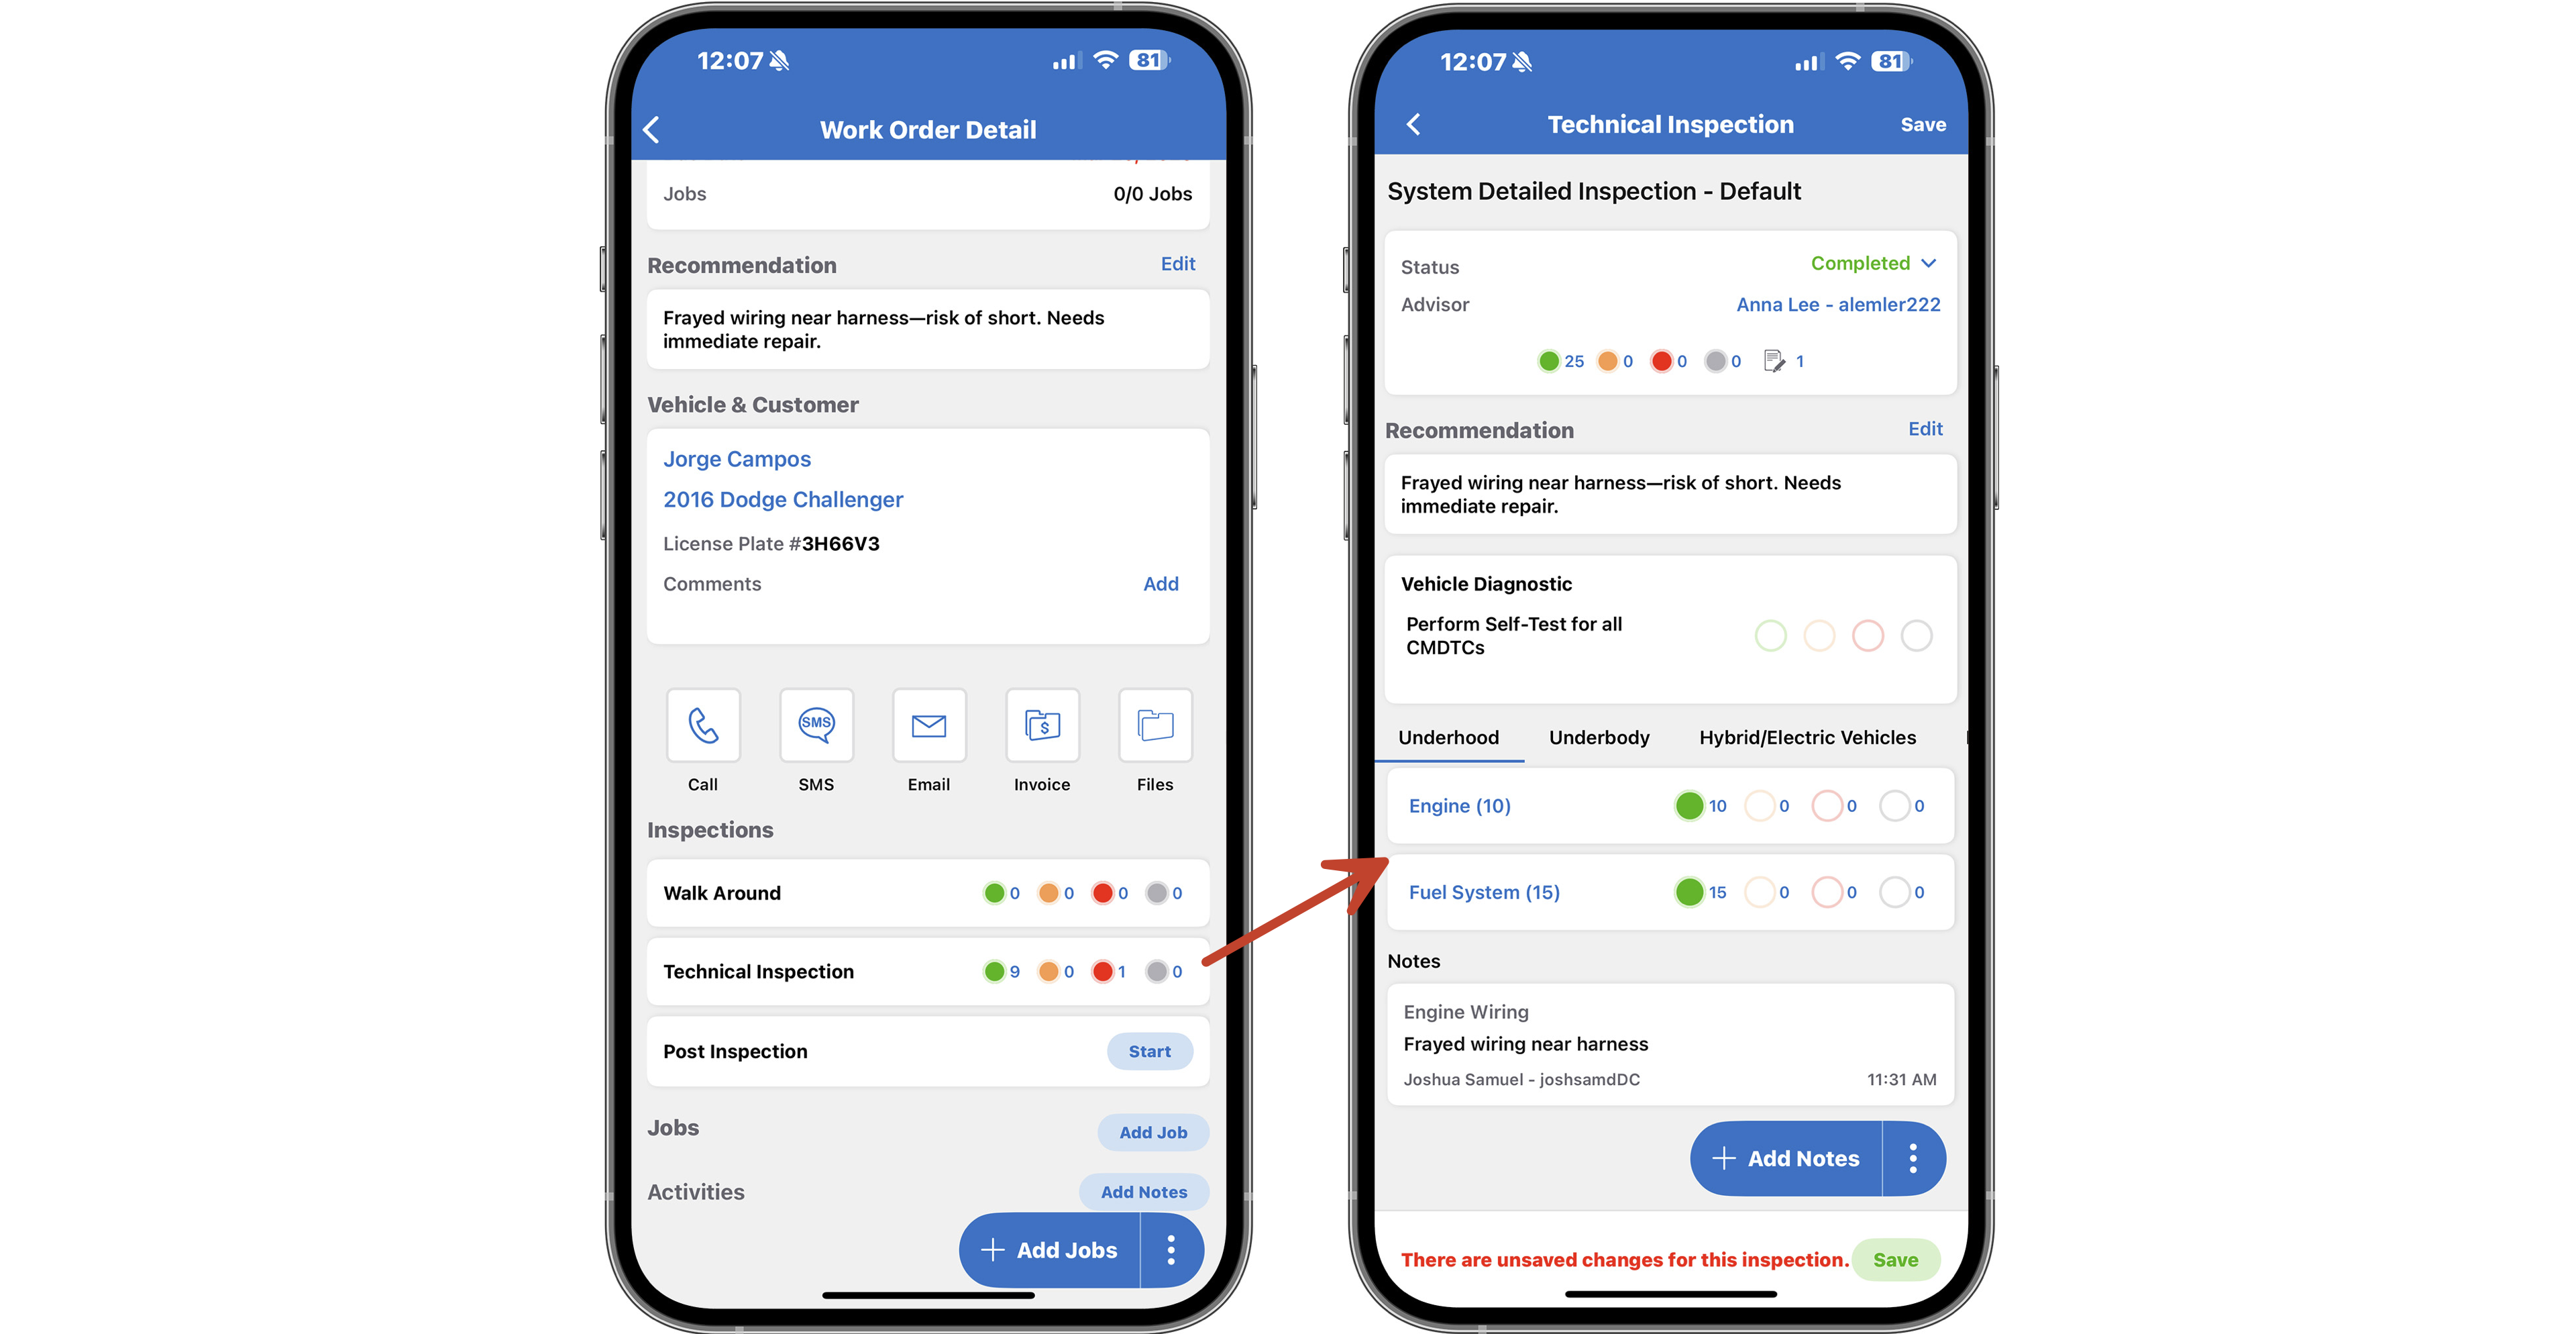
- Check off an entire category of inspection items, or tap a category (e.g. "Engine") to check individual items.
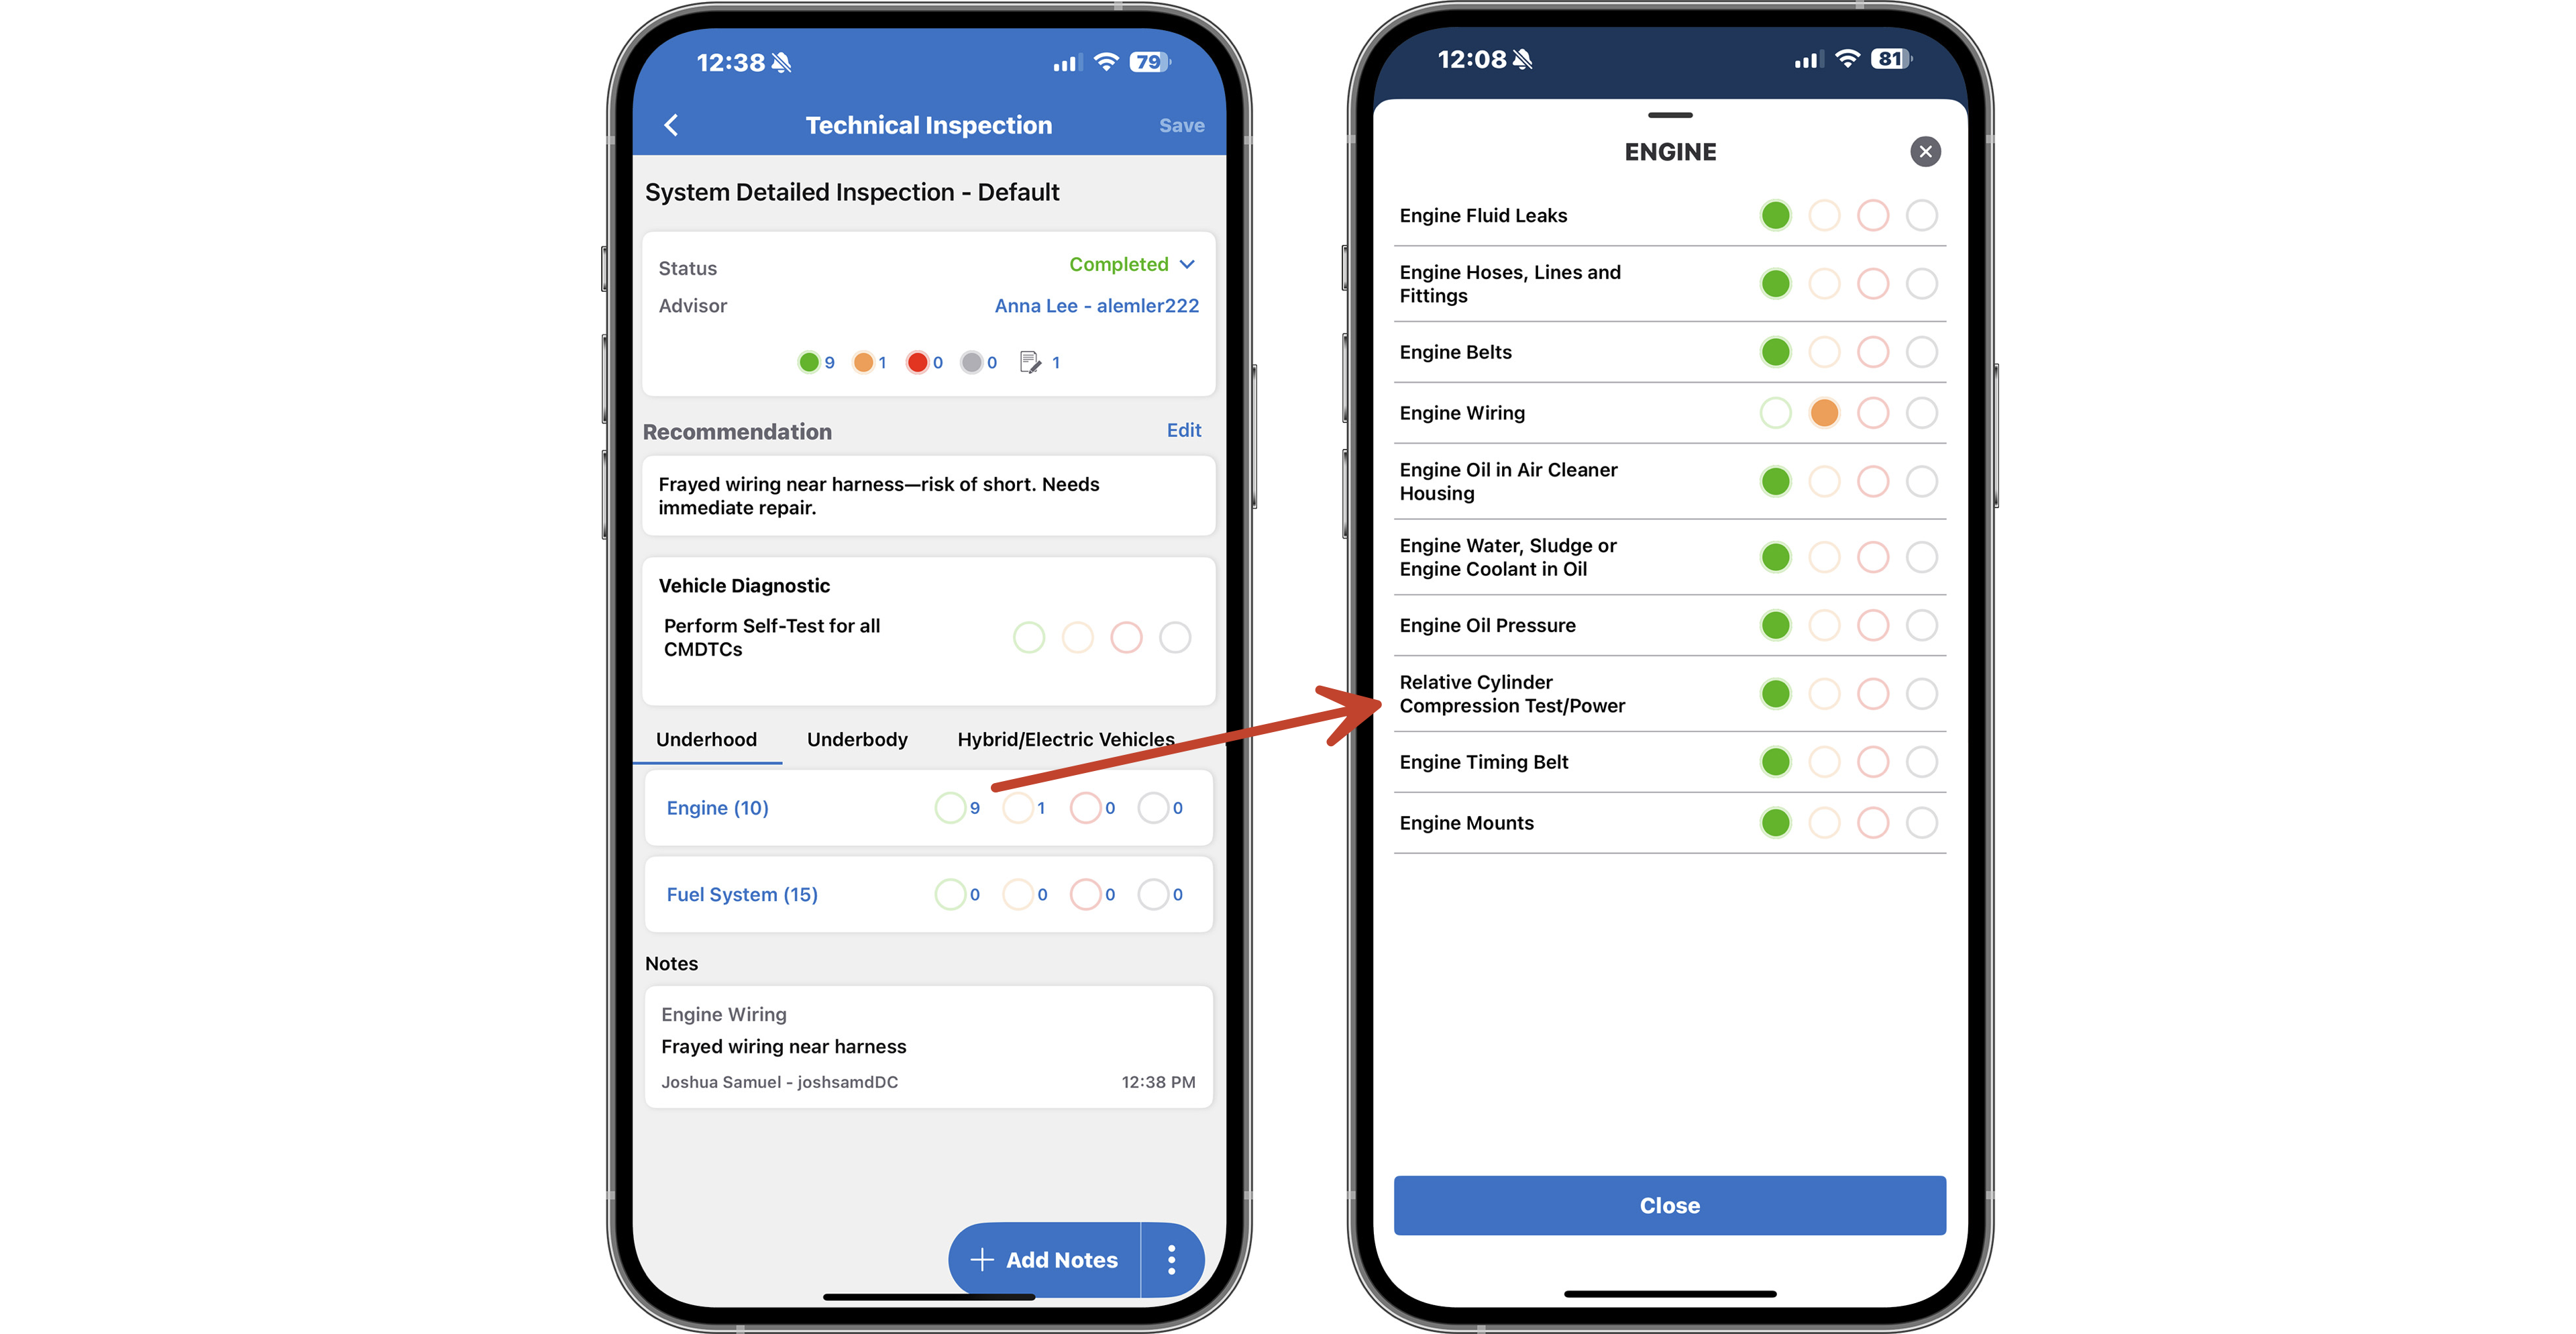
- Use the lower-right menu button to add notes, photos, or recommendations.
- Update the inspection status such as Complete.
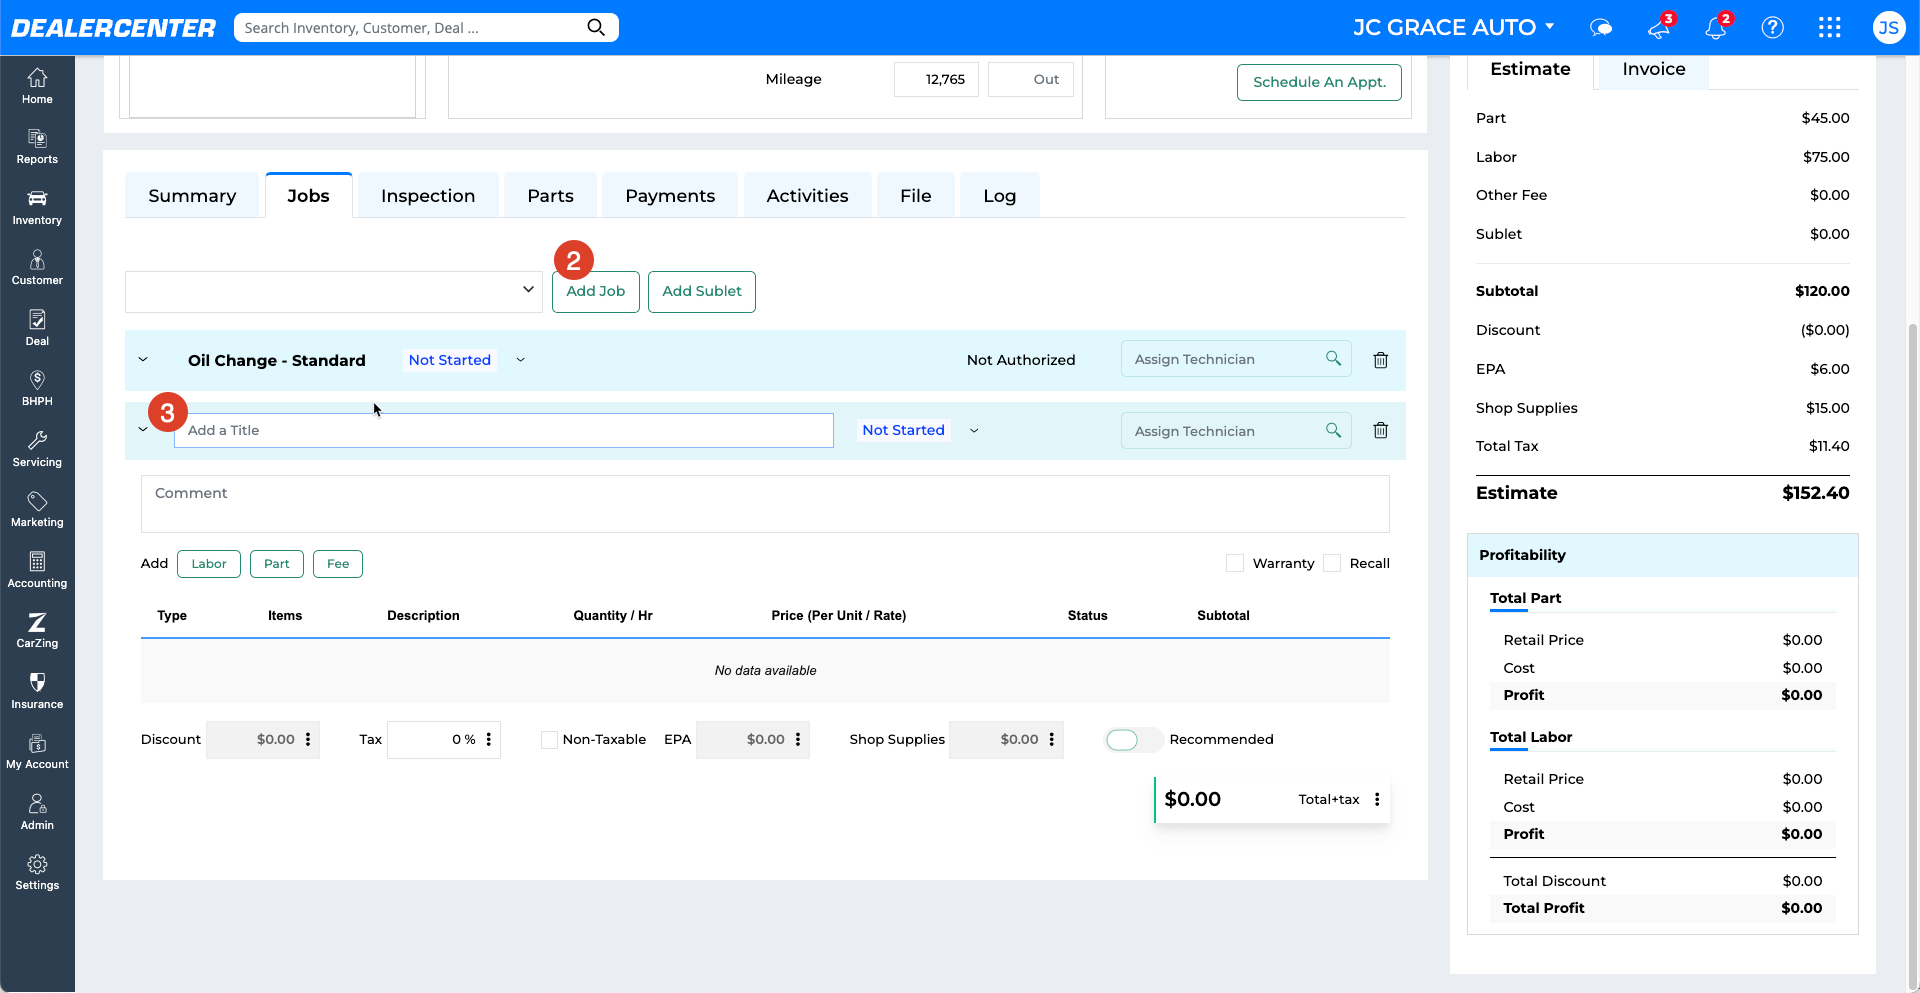
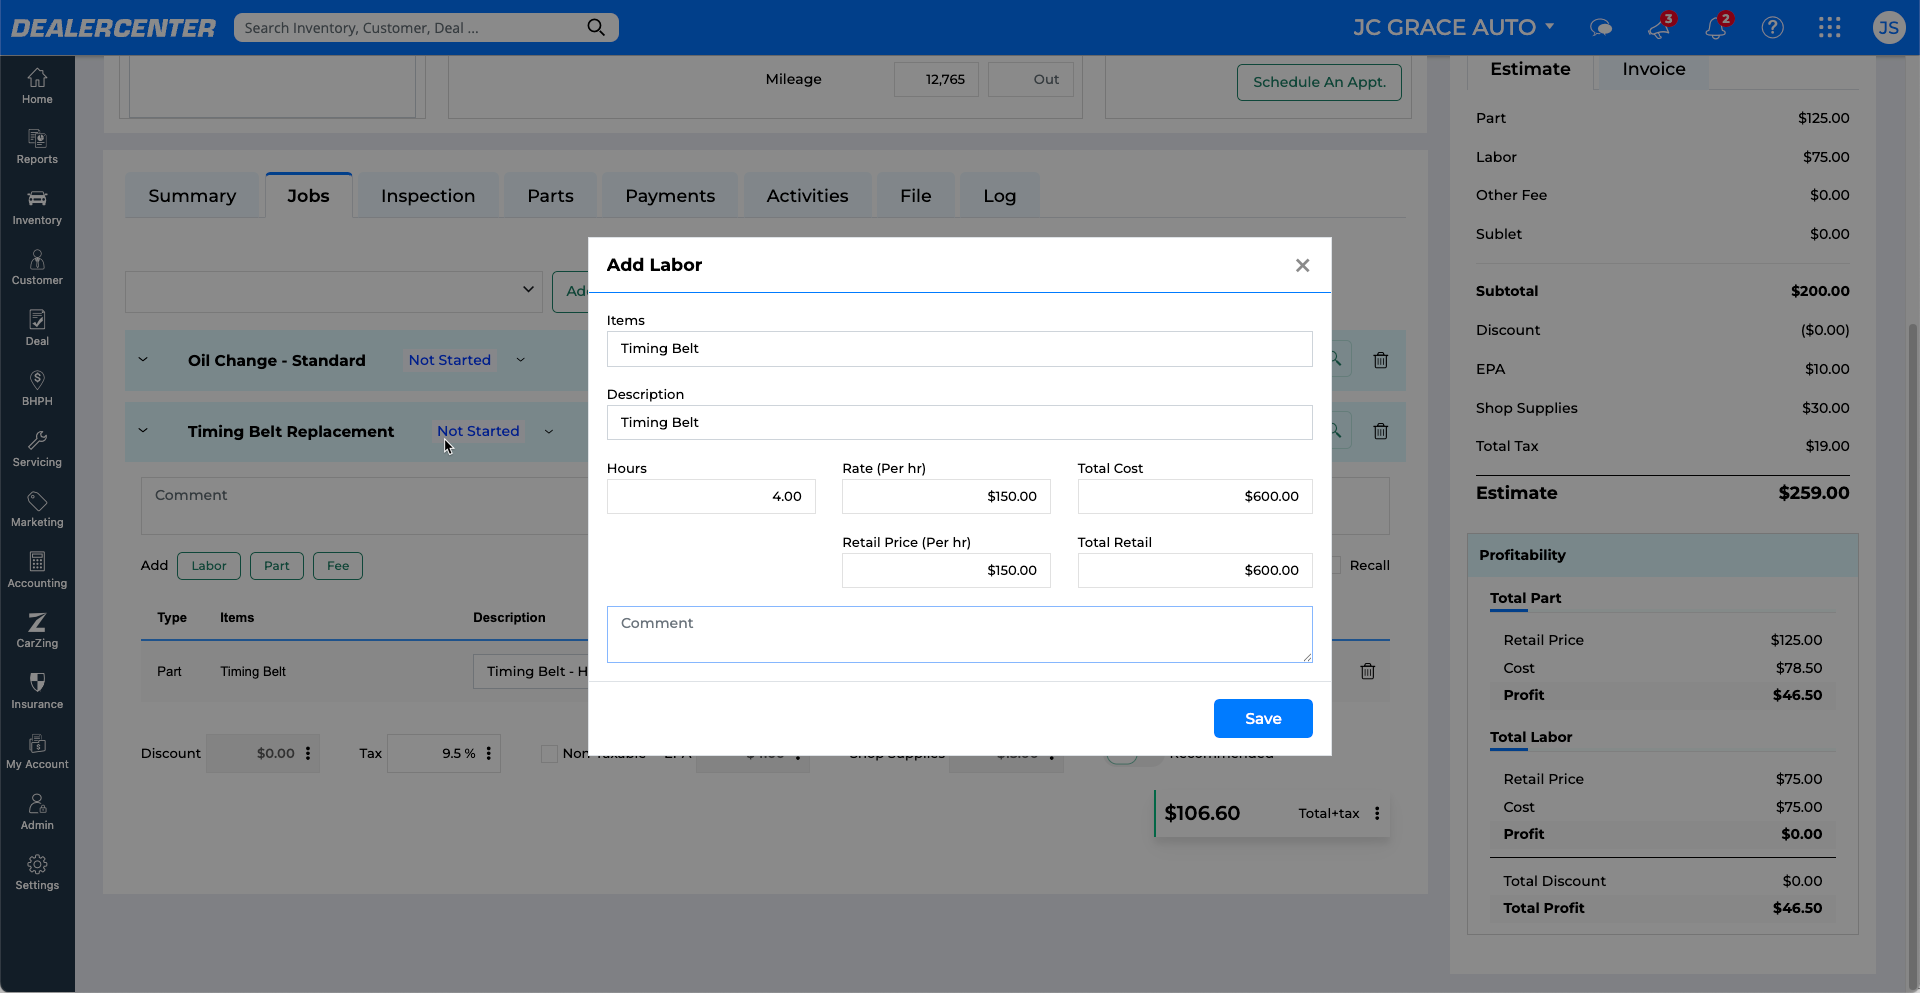
Adding Jobs and Job Packages
To add jobs to a work order, go to the Jobs tab:
- Select a preset Job Package if available (e.g., Oil Change).
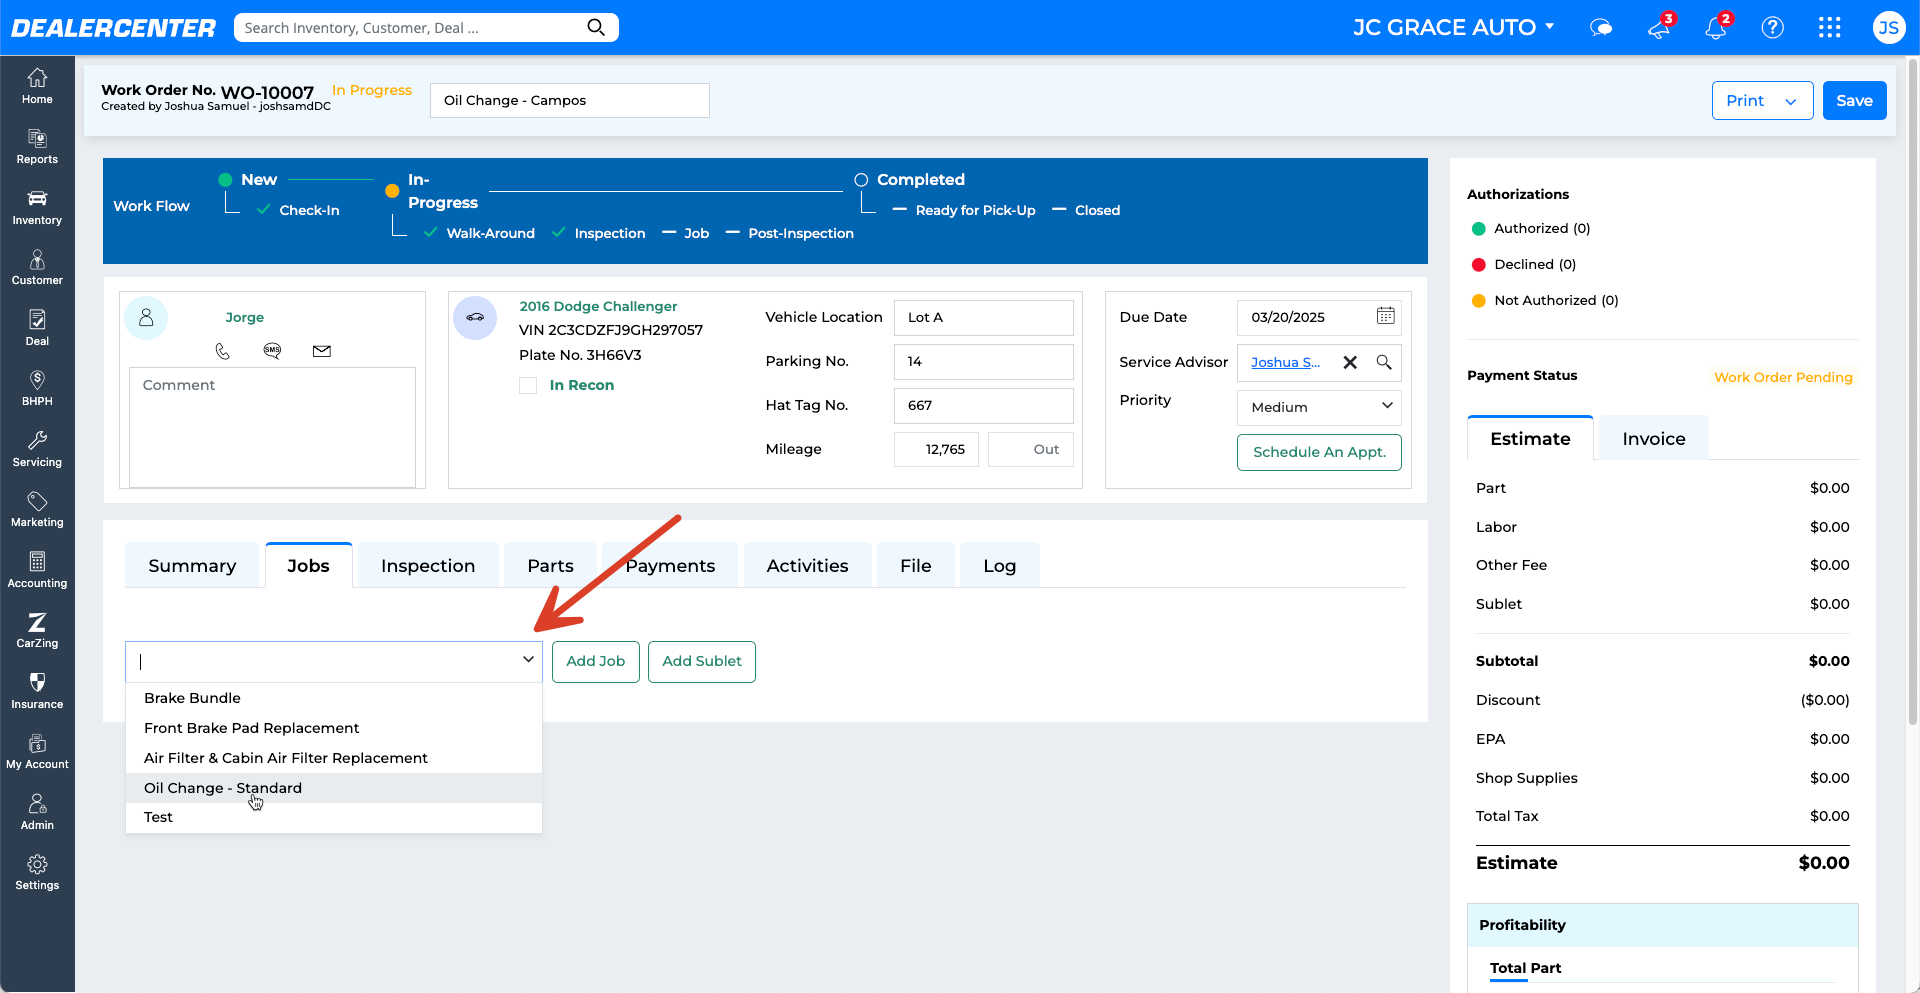
- Or click Add Job to create a new job manually.
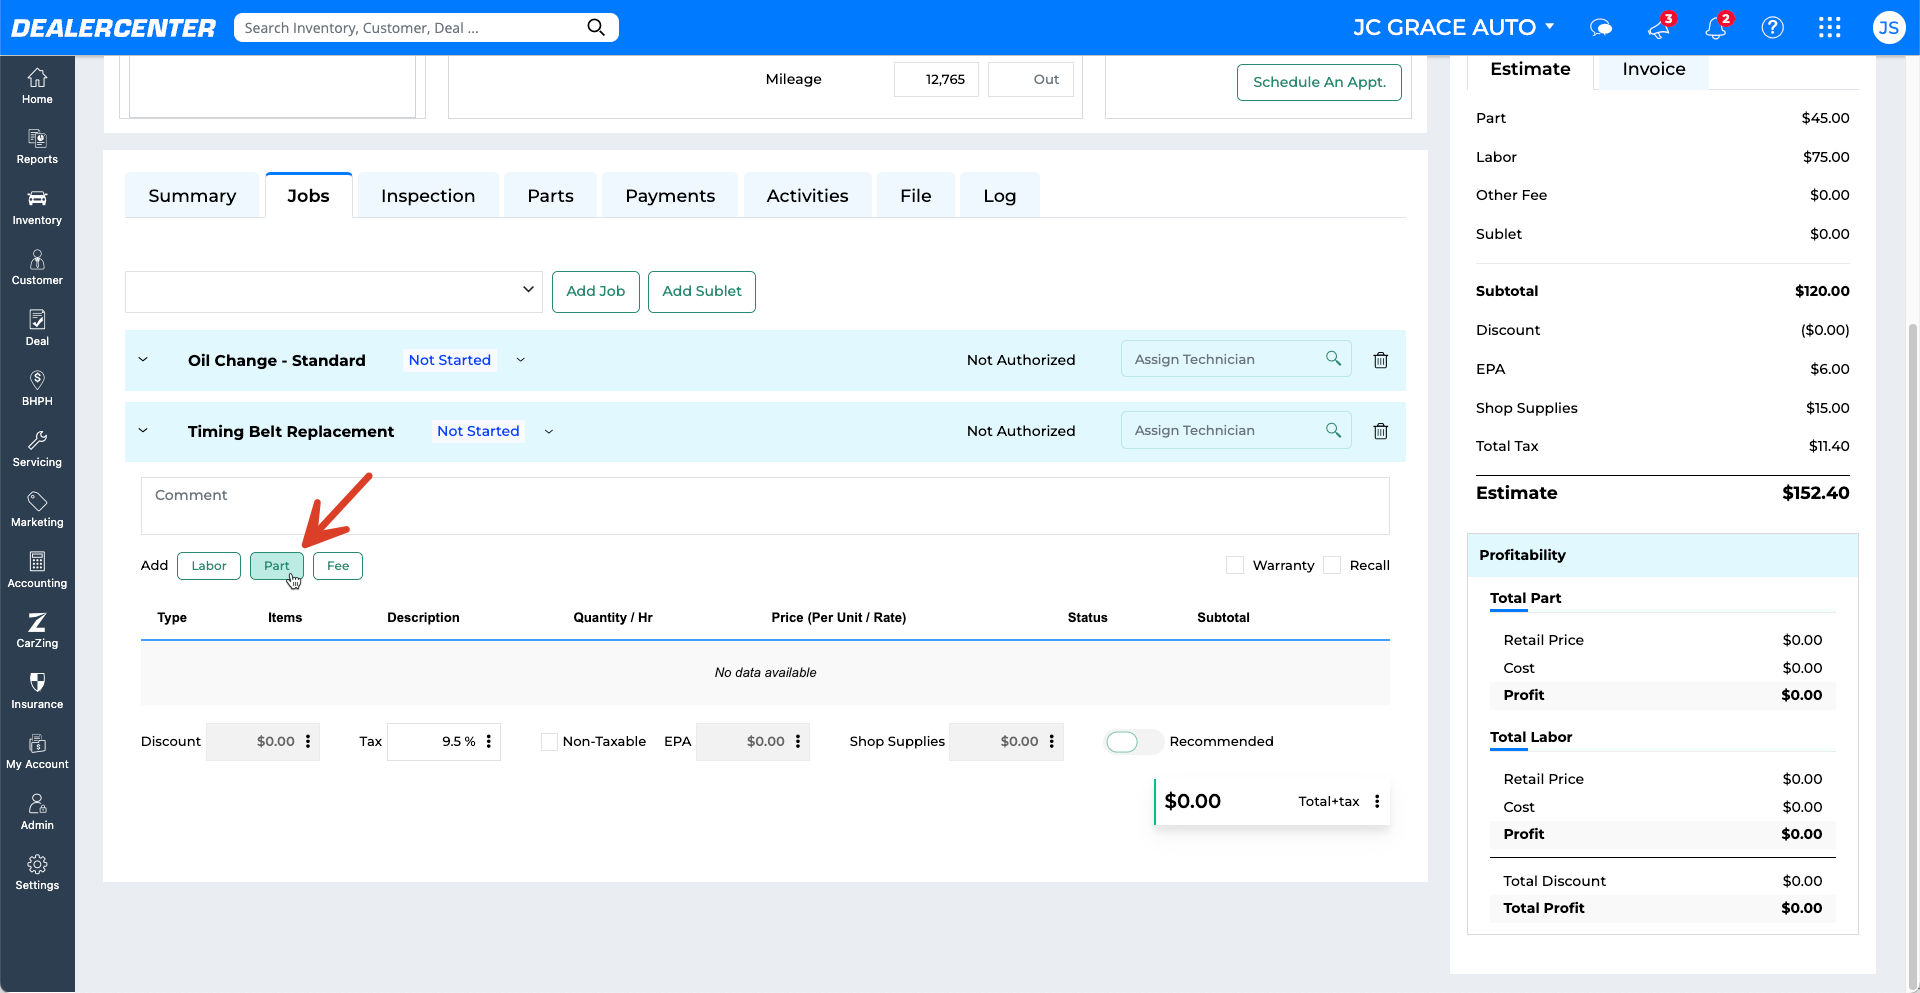
- Enter a title for the job.
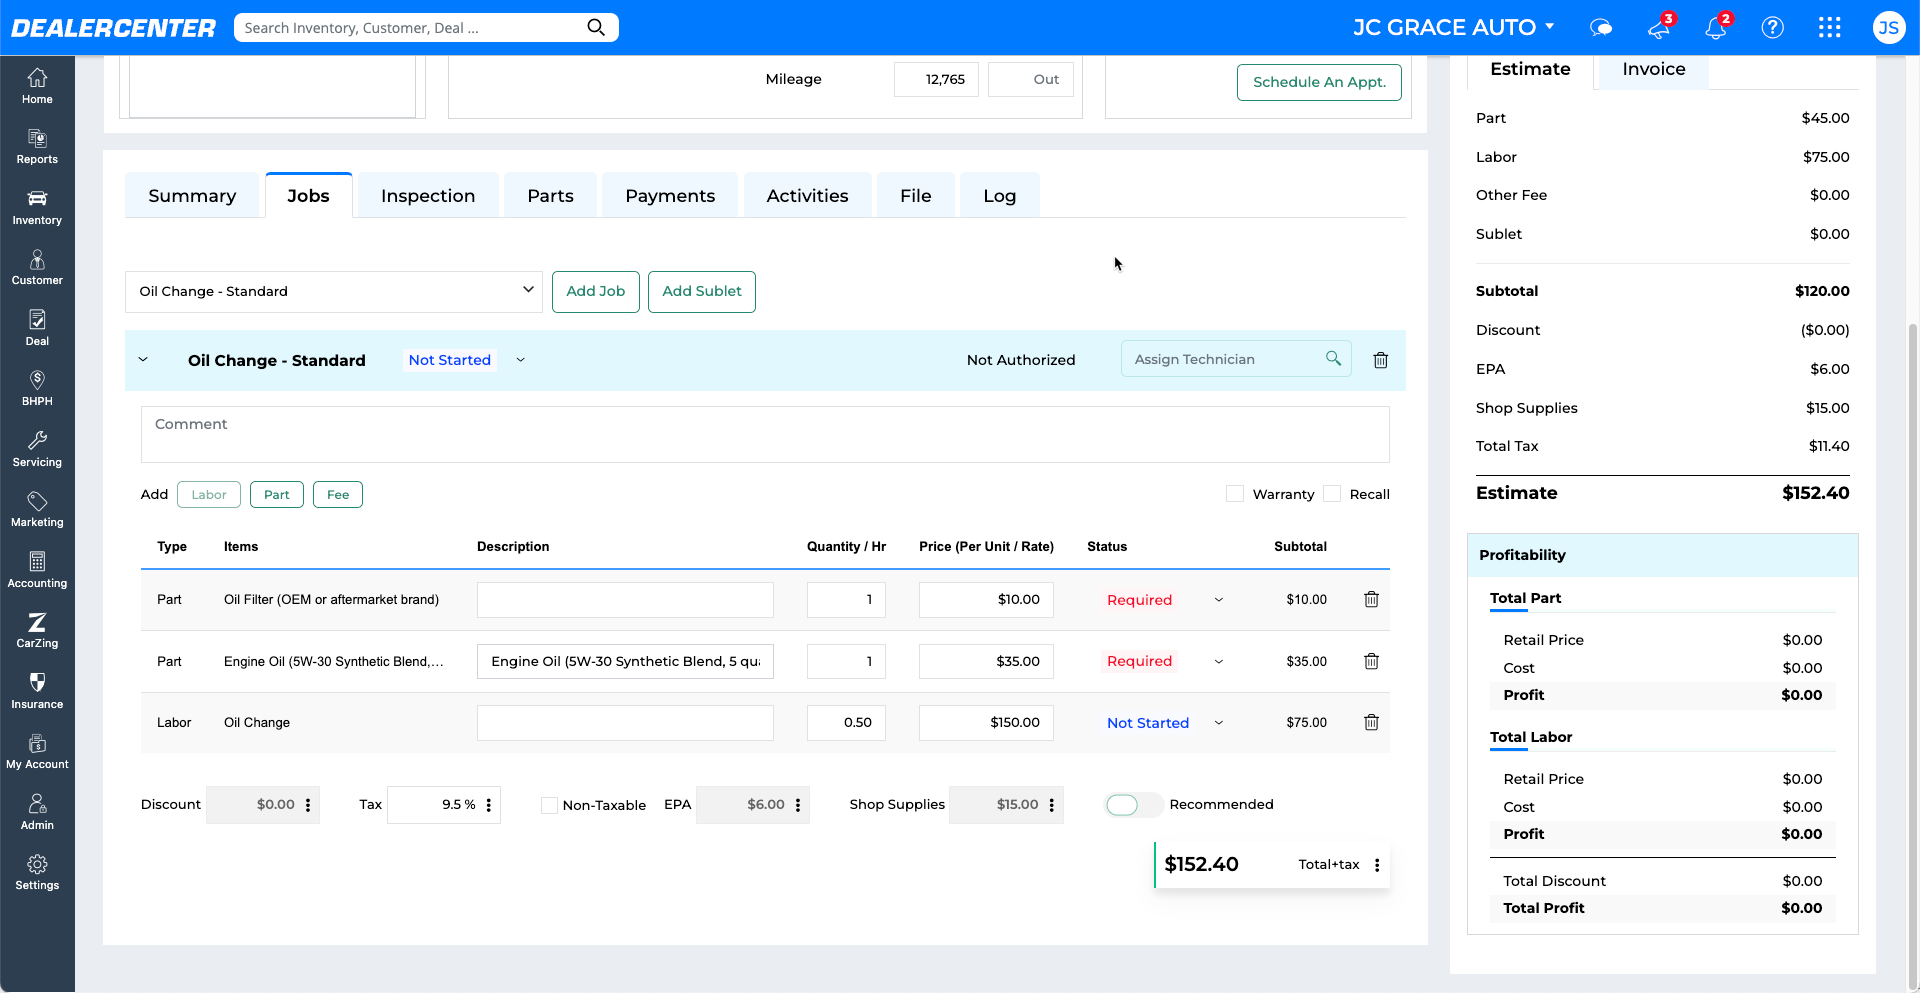
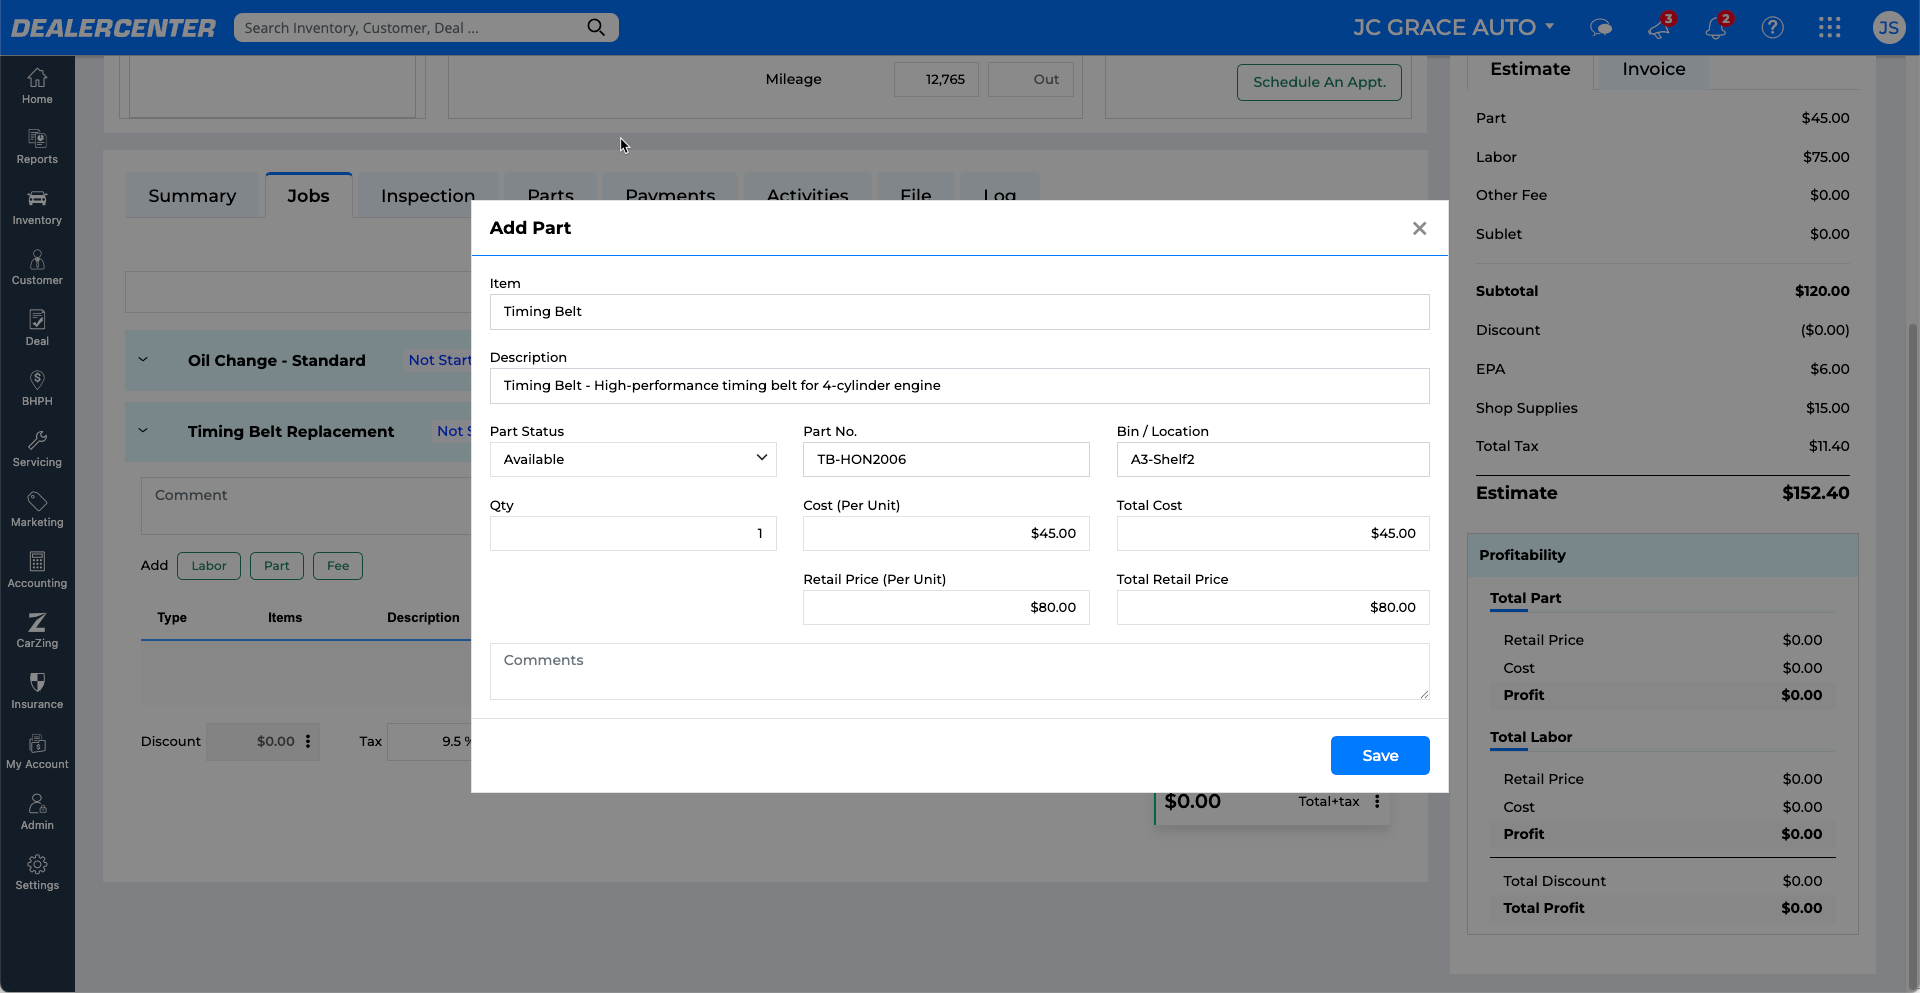
- Click Part to add part(s) and enter item name, part number, quantity, cost, vendor, and delivery date if applicable.
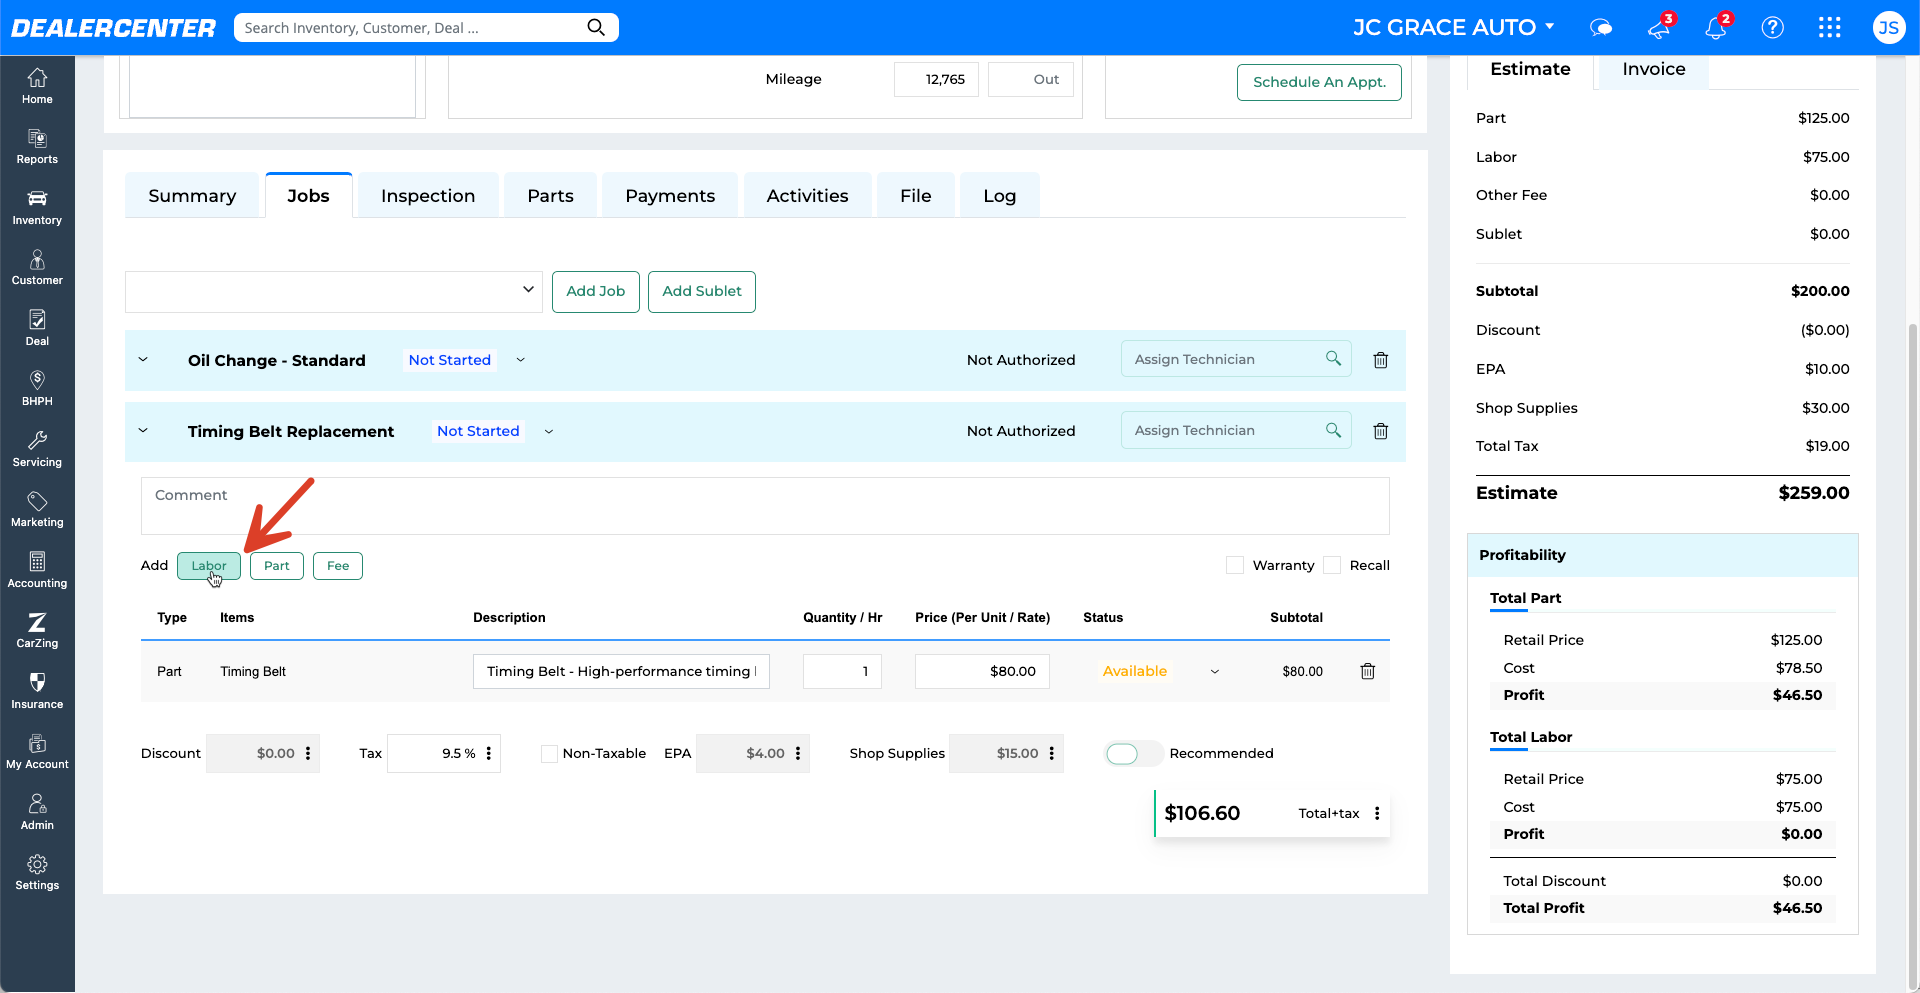
- Click Labor to add labor details like hours and rate.
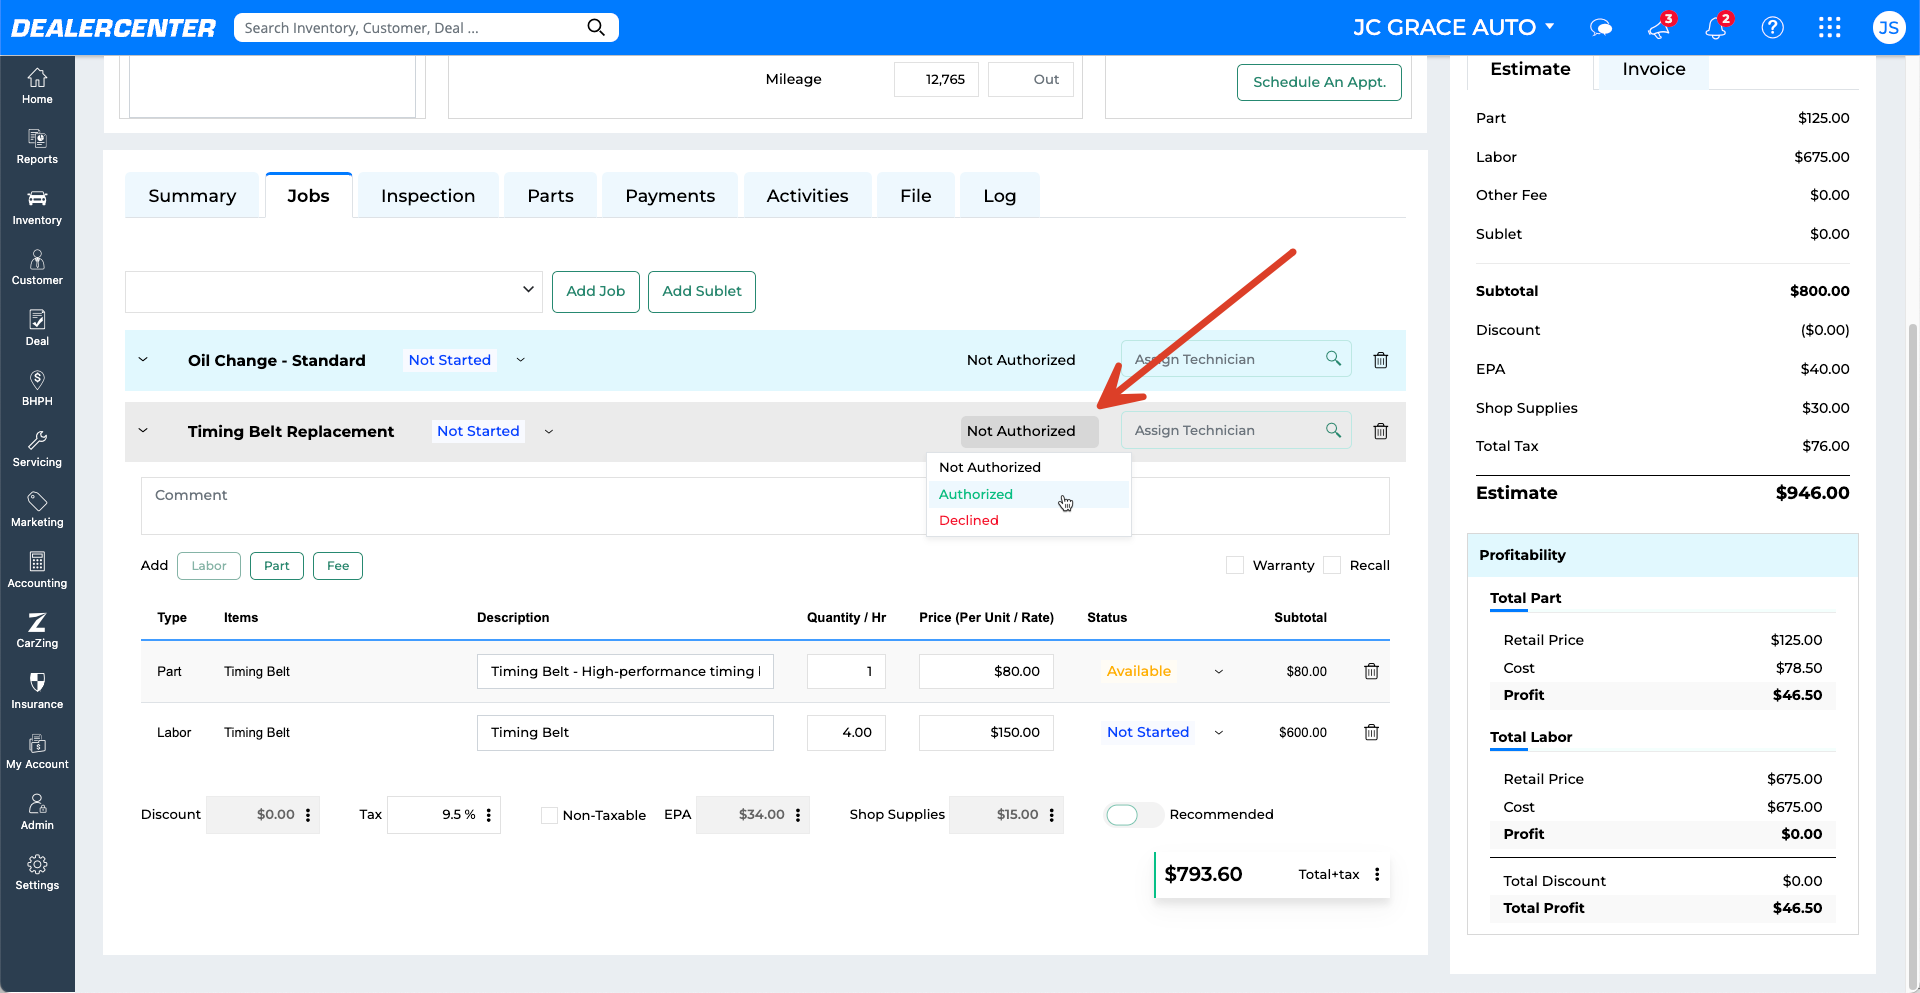
- Click Authorize to approve the job.
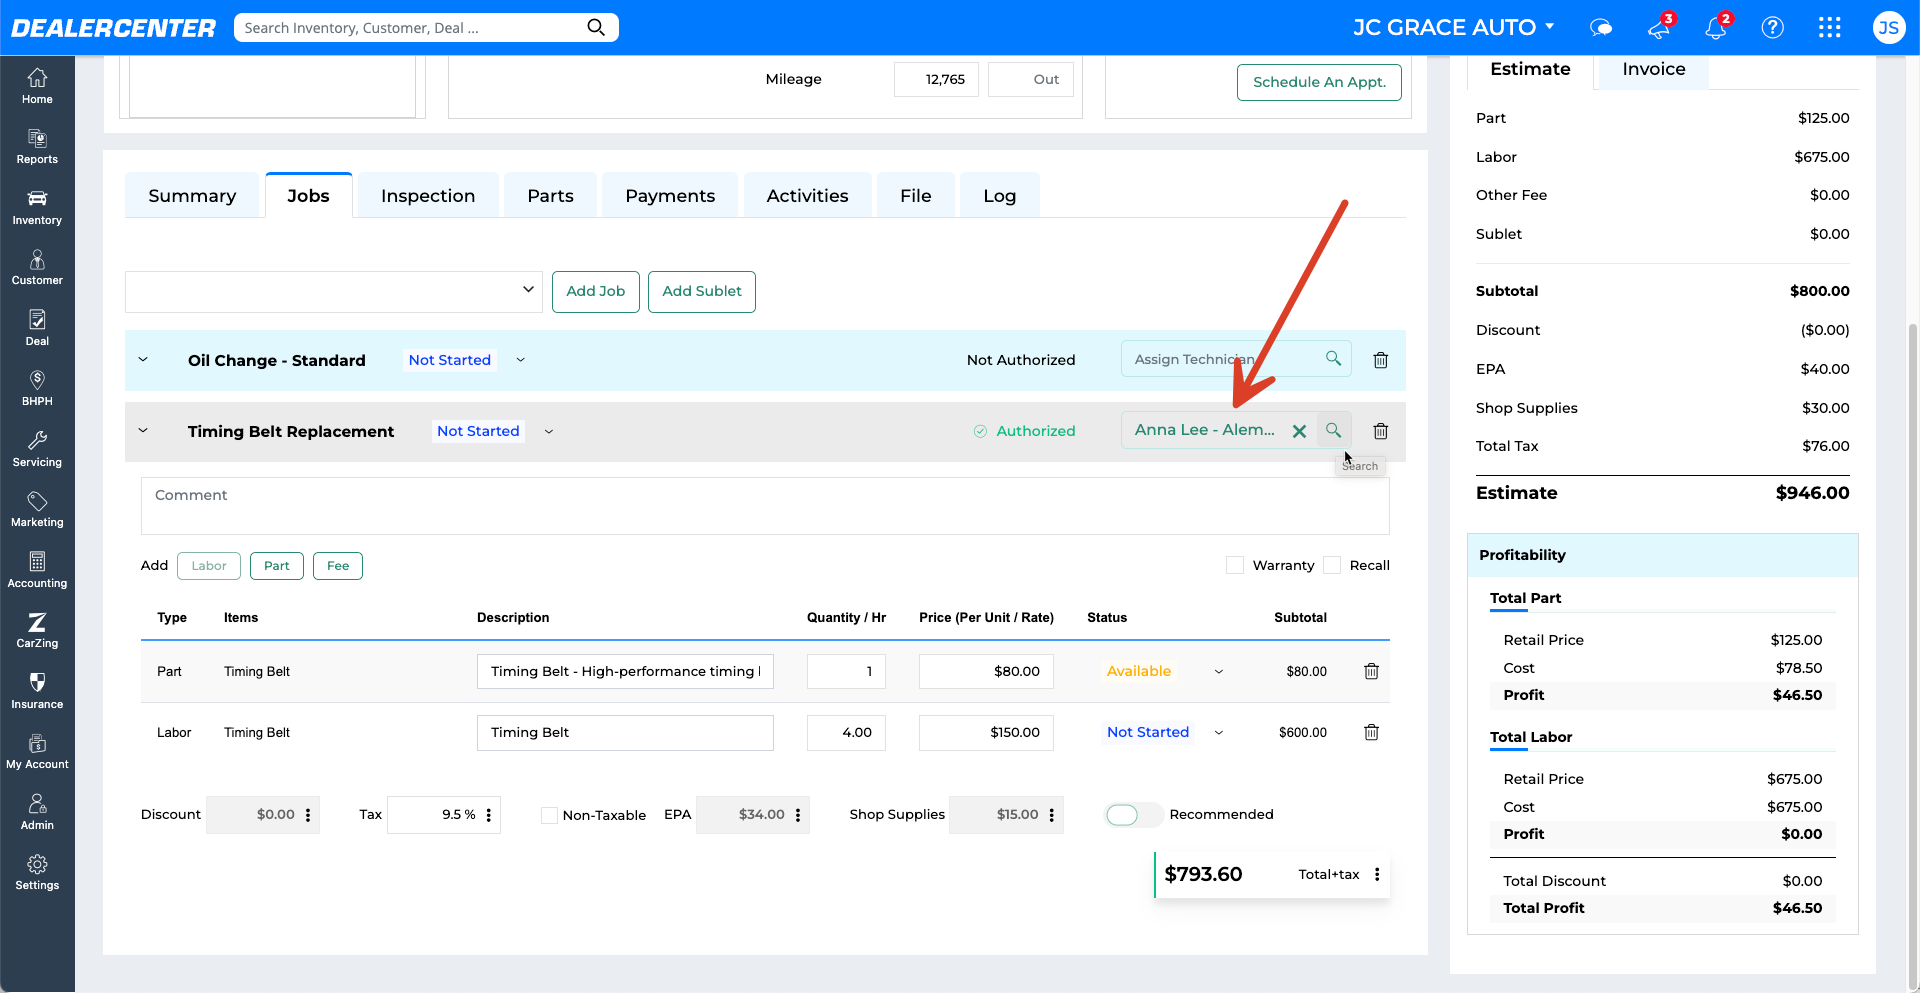
- Assign a technician. They will receive a notification via mobile app and desktop.
- Technicians can update statuses of individual items within each job like In Progress or Completed, or update the entire job status at once.
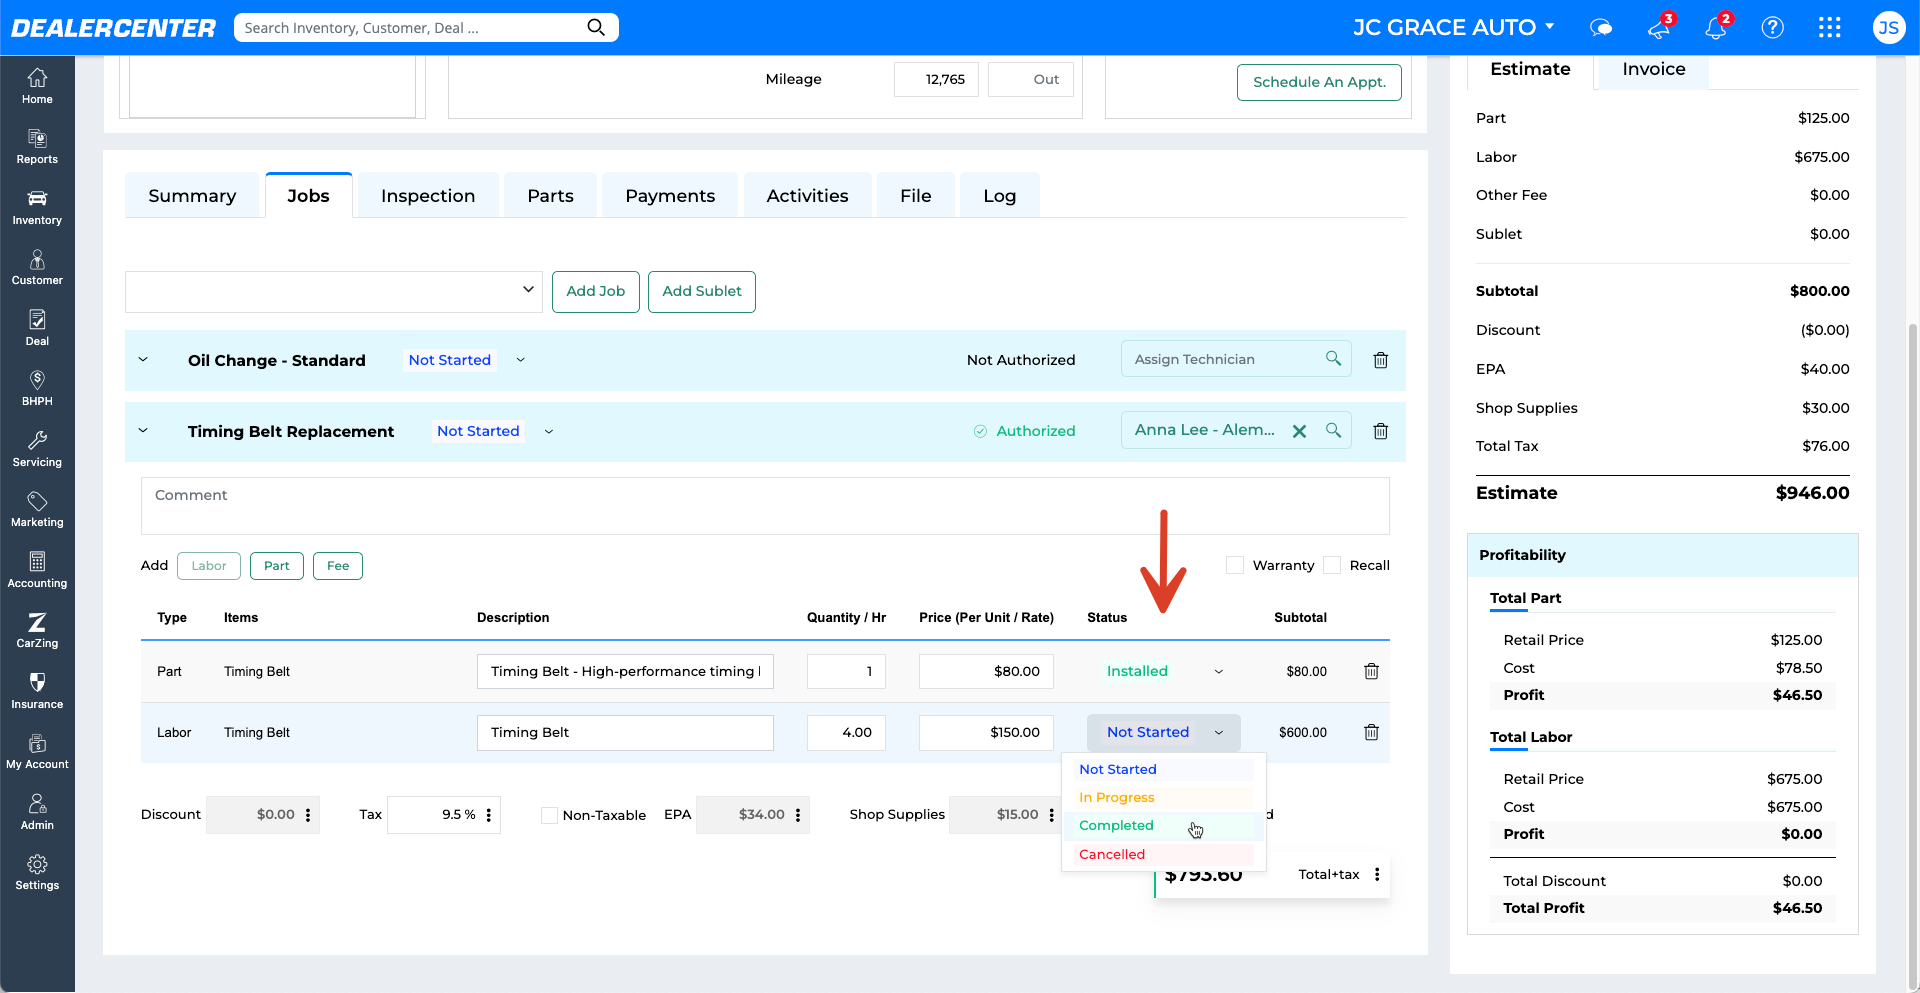
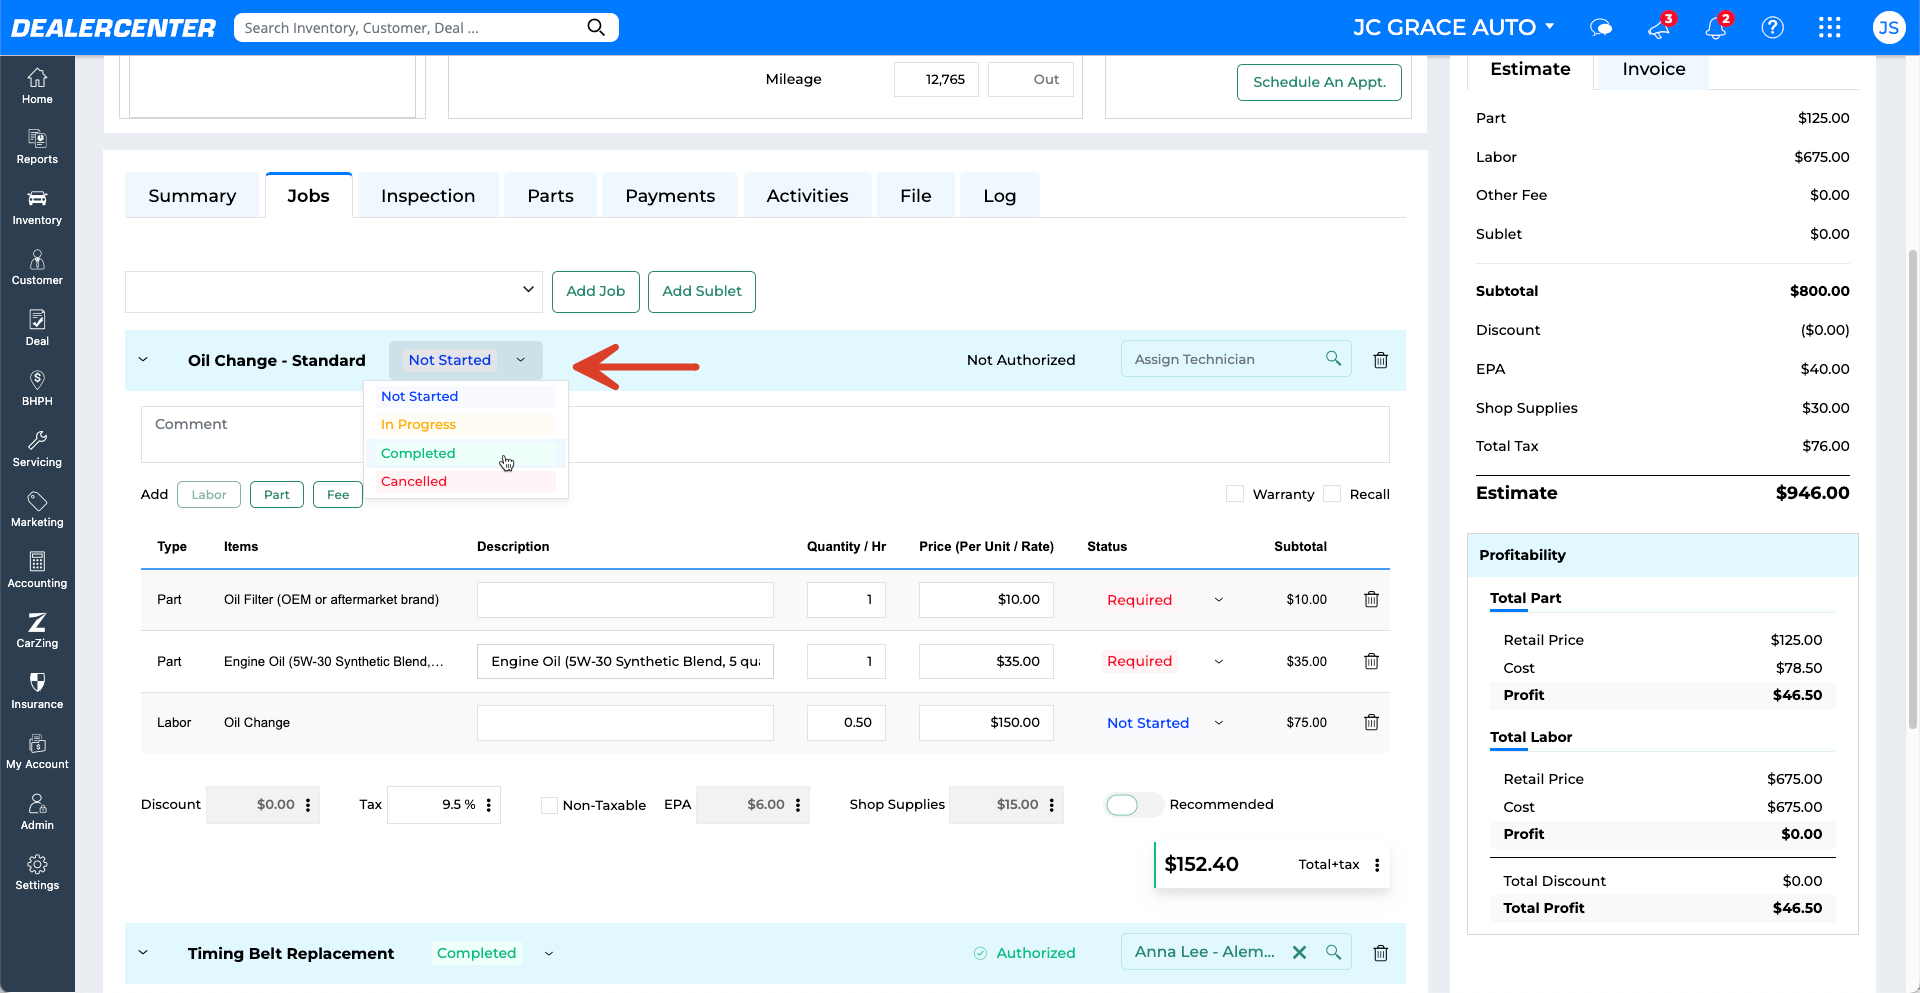
- When all job items are marked complete, the workflow tracker updates with a checkmark.
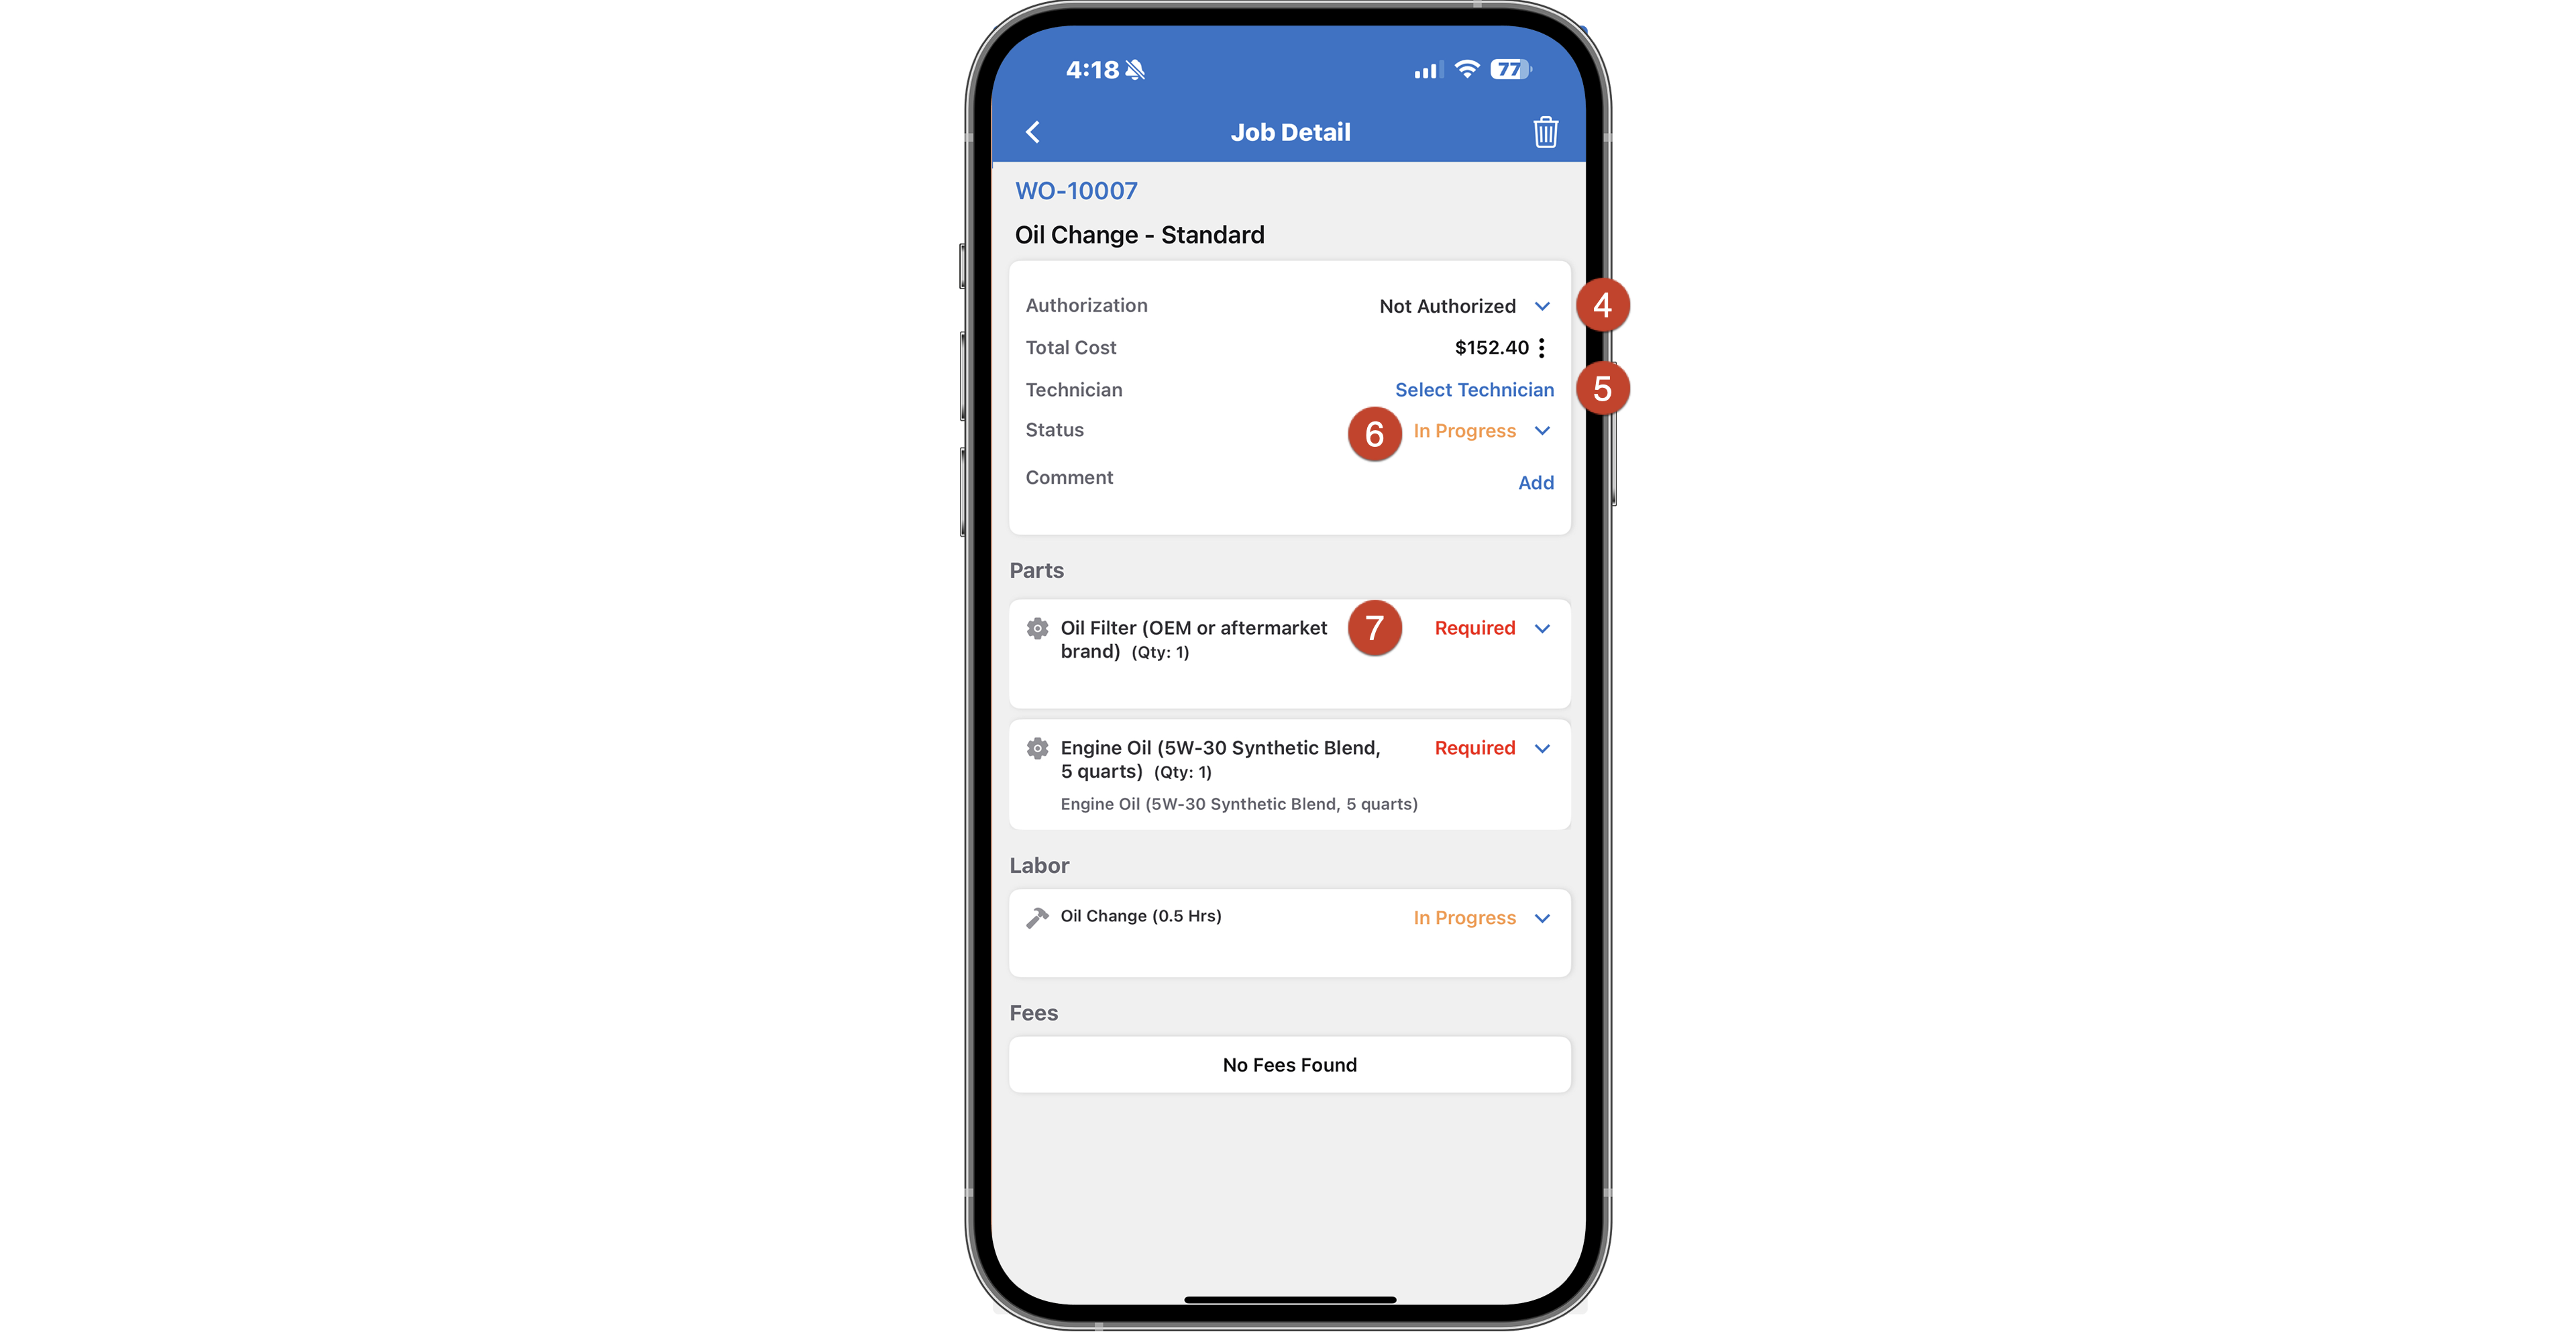
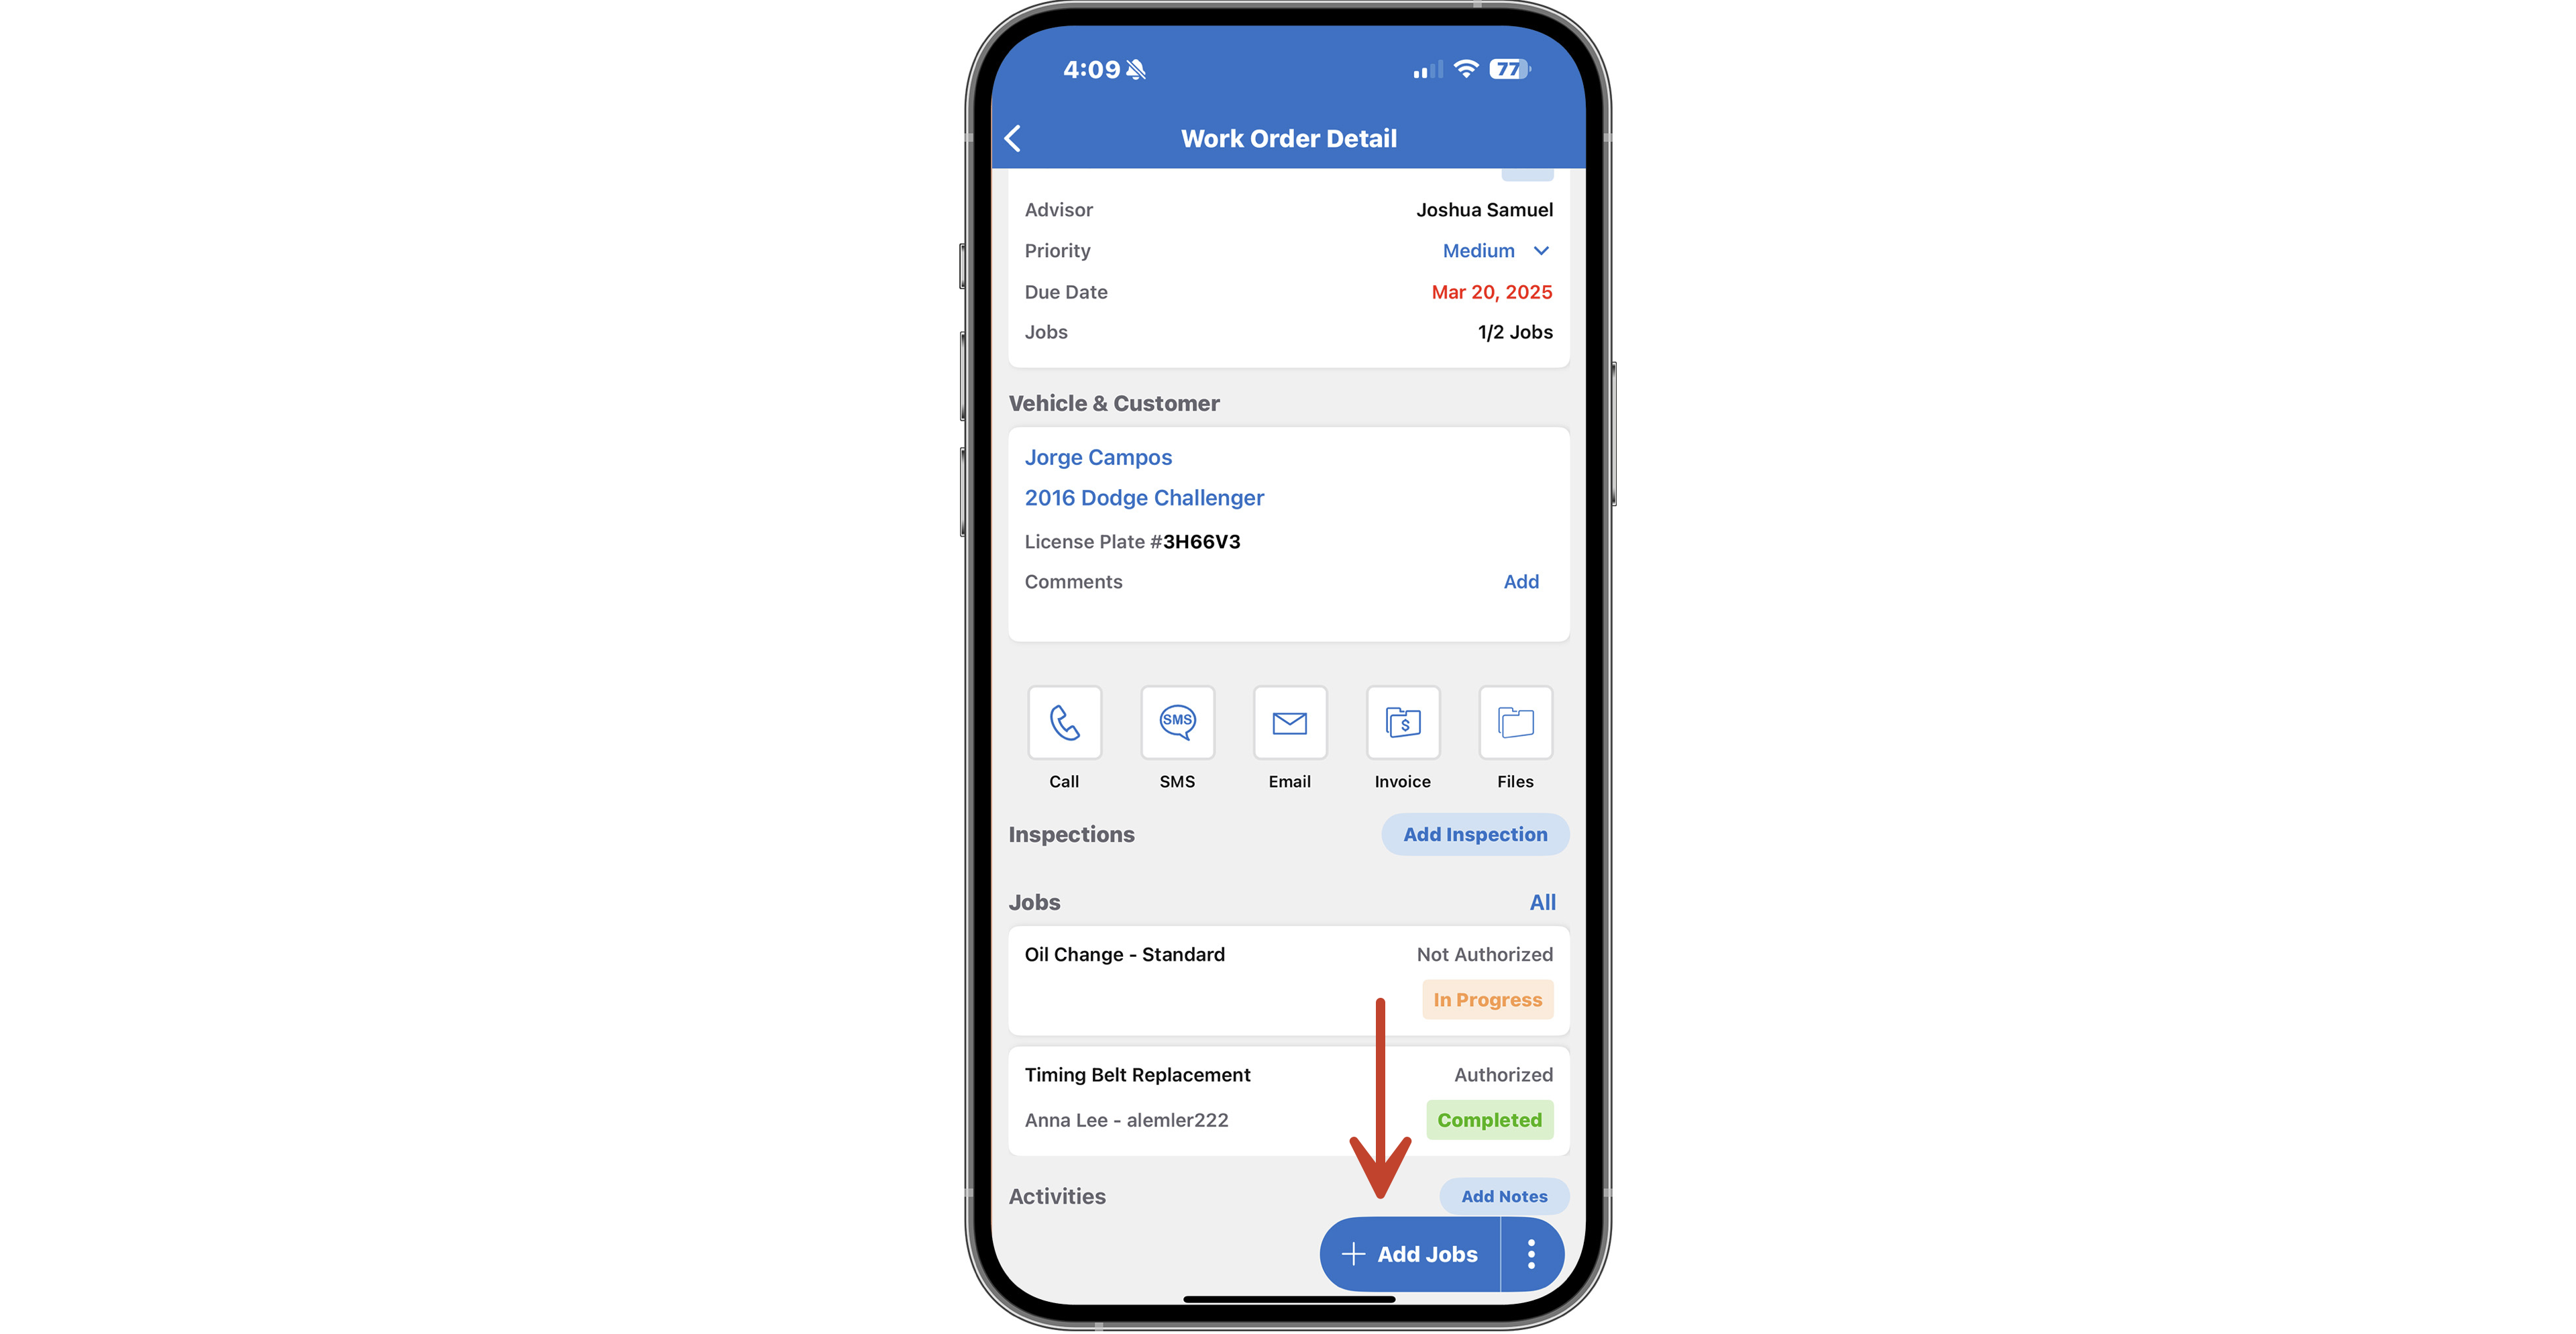
Jobs on Mobile
- From the mobile app menu access Work Orders from the Homescreen or the Work Order List from the Menu.
- From Work Order List tap to open a Work Order
- Tap on any job to view details.

- Tap to Authorize
- Tap to Assign to Technician
- Tap update the job Status.
- Tap to update update statuses of individual items within each job like In Progress or Complete.
- Use the lower-right menu button on the Work Order Detail page for additional options, like to Add Jobs or Add Notes
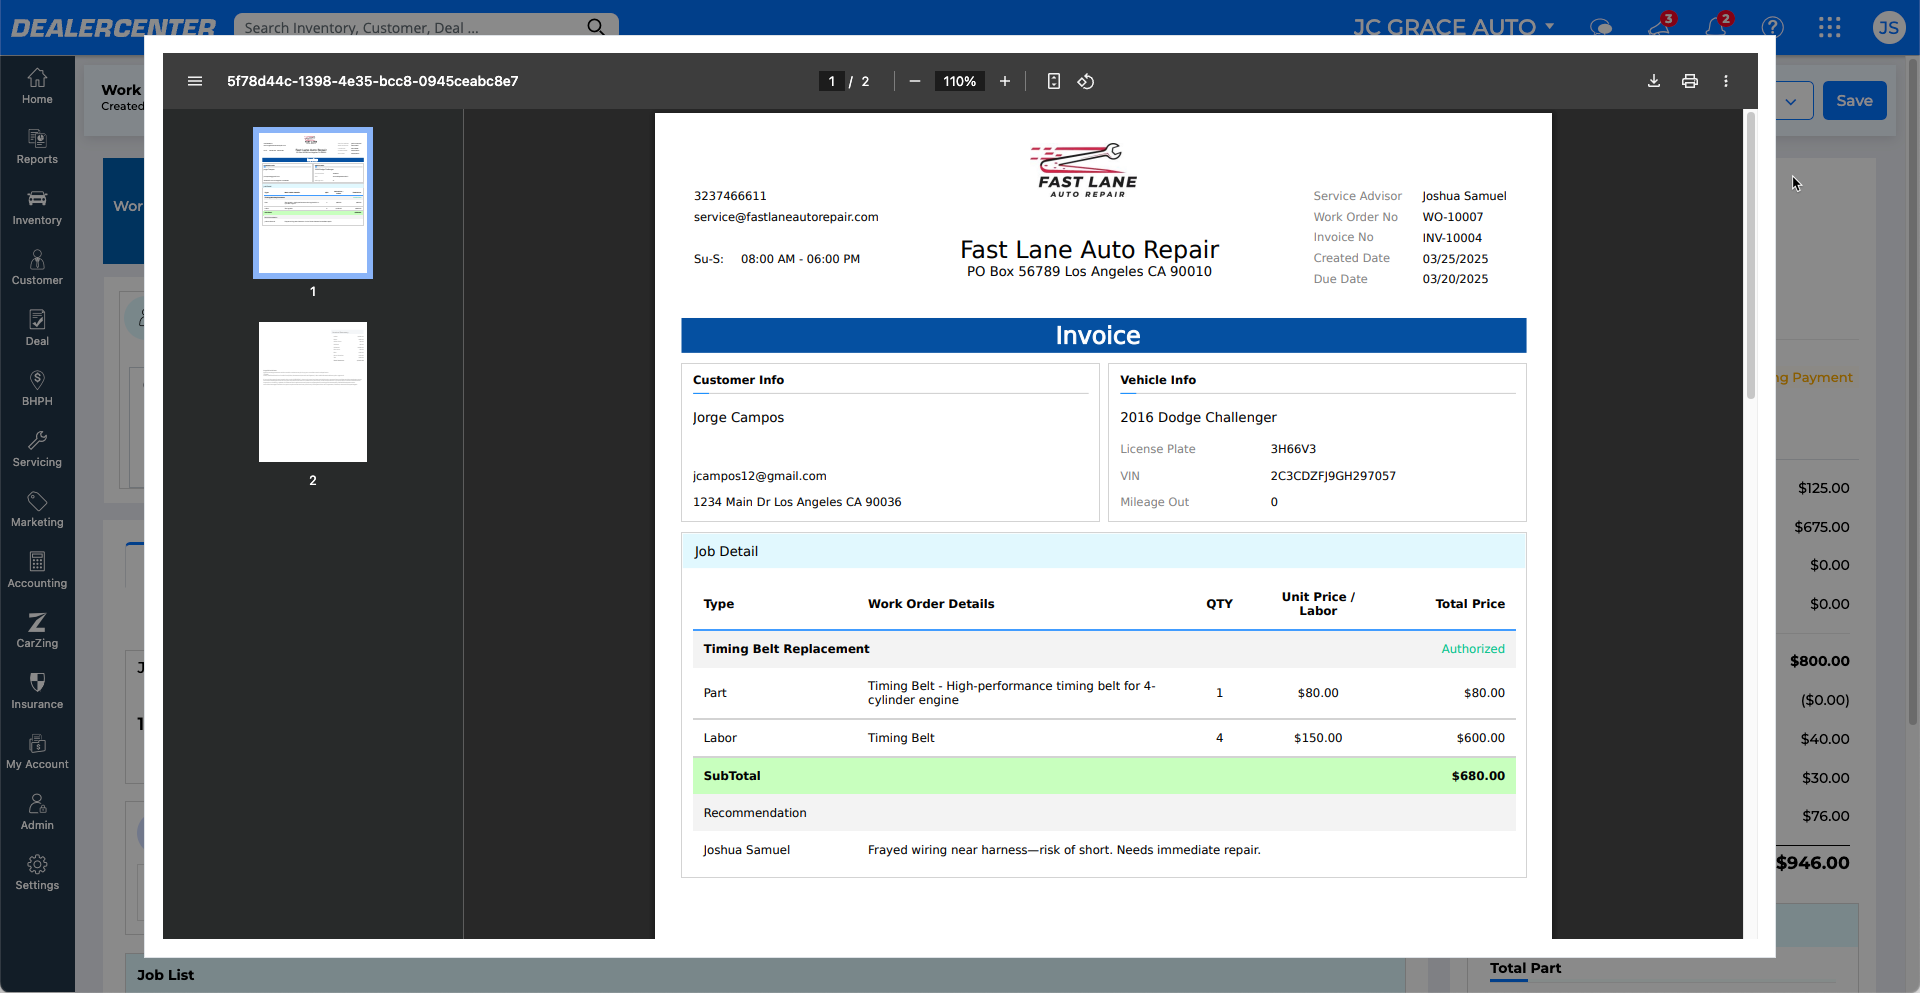
Estimates and Invoices
To generate an estimate or invoice:
- Click the Print button at the top of the work order page.
- Select either Estimate or Invoice.
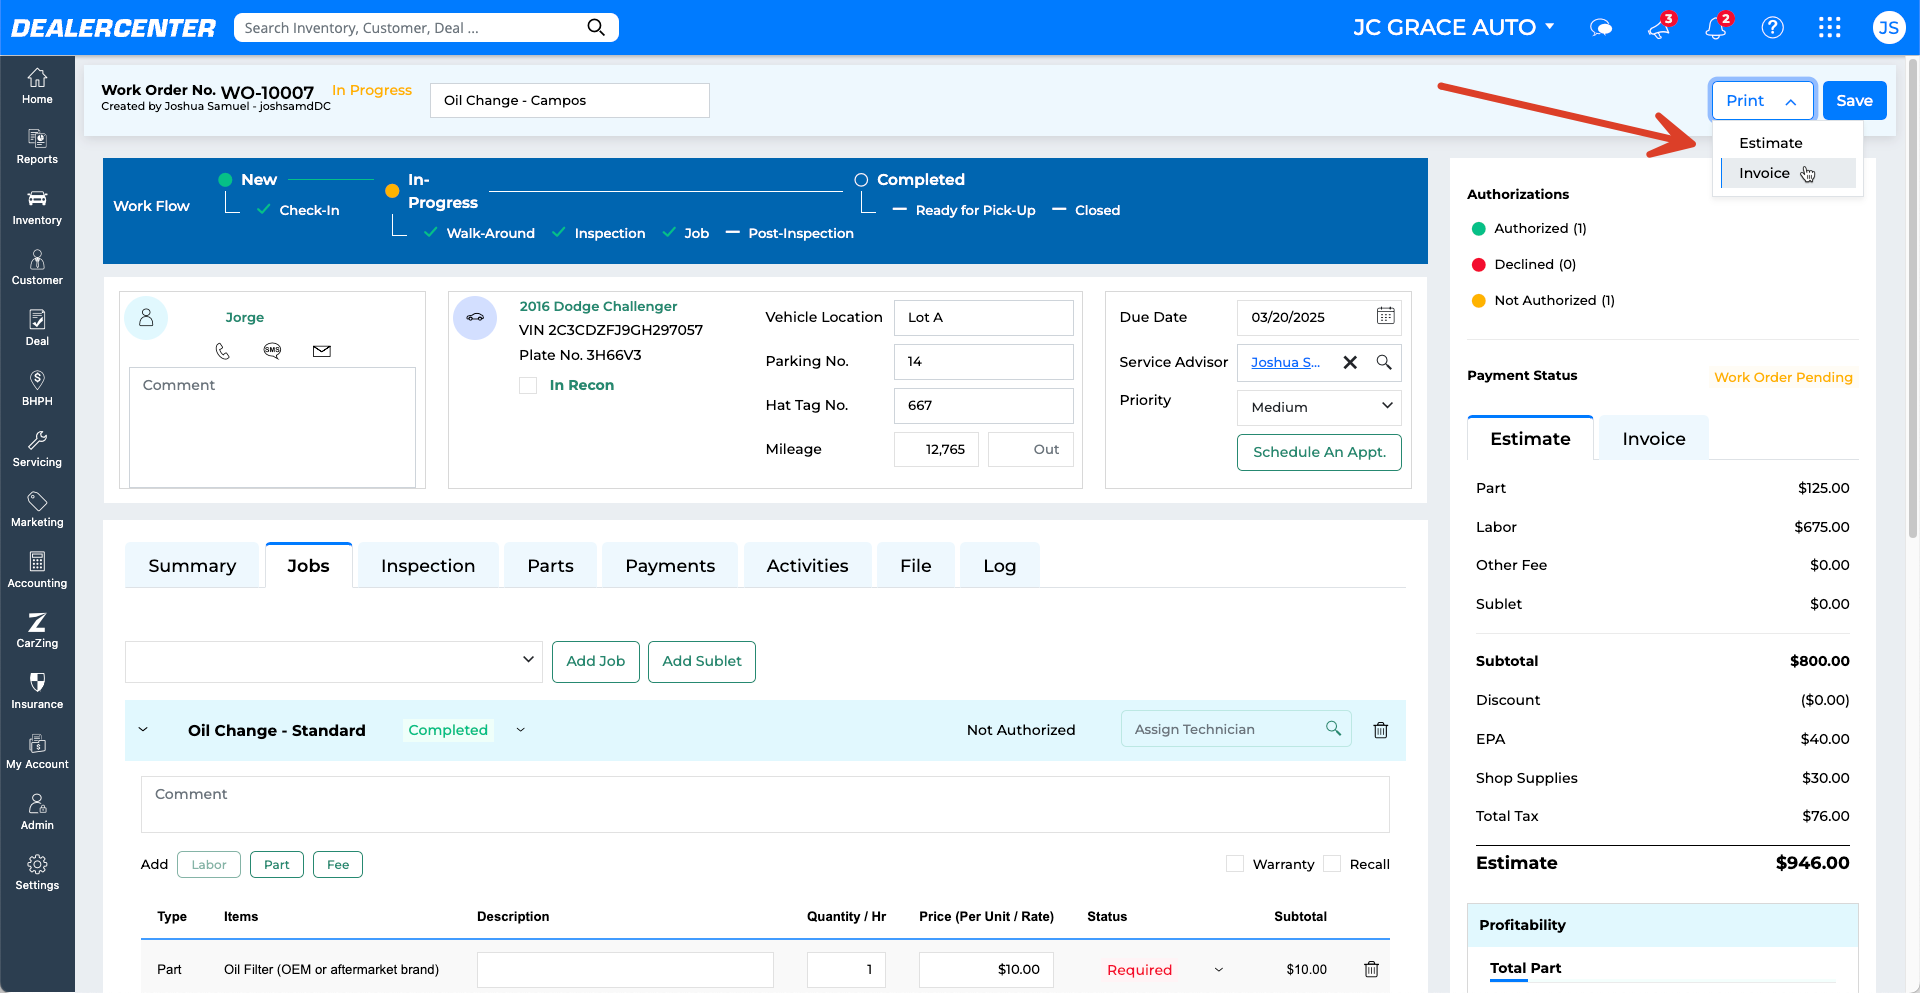
- Review the document with itemized breakdowns of labor, parts, and fees.
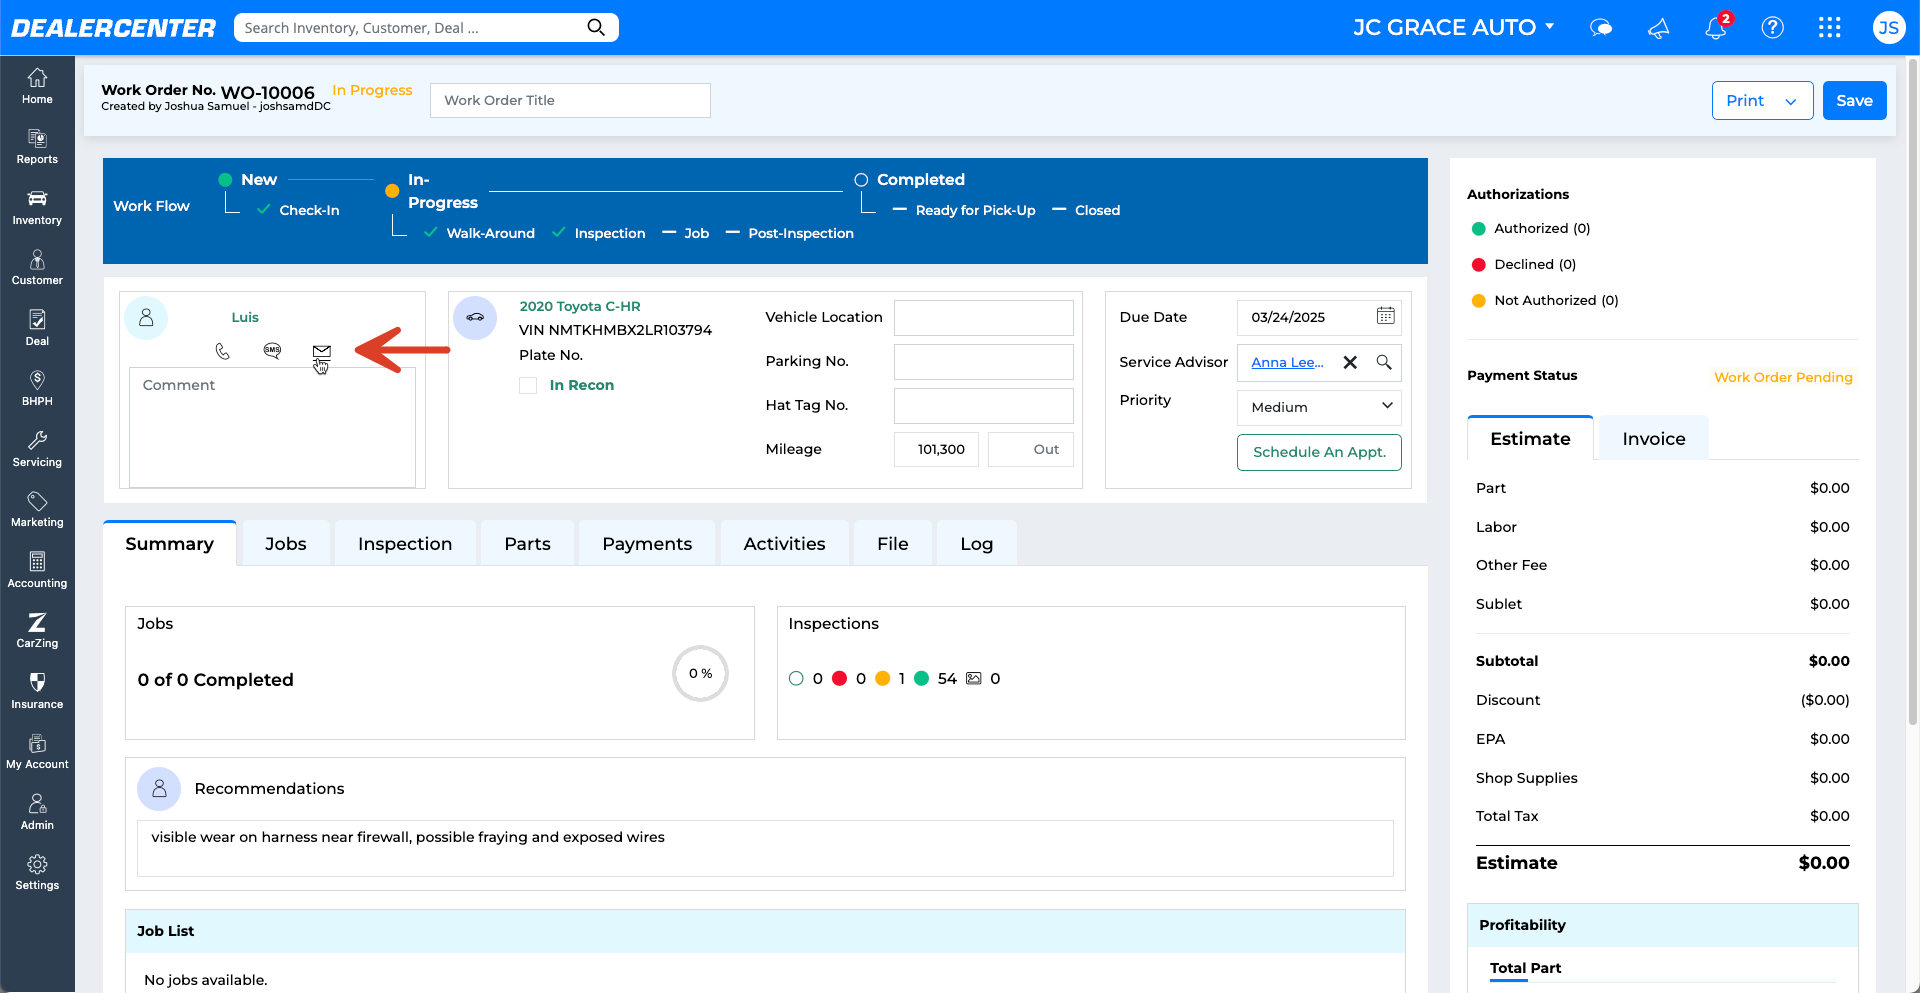
Customer Communication
To email or text customers:
- Click the phone, SMS, or email icon next to the customer’s name.
- In the compose window, click Attach, then choose Files to include estimates or invoices.
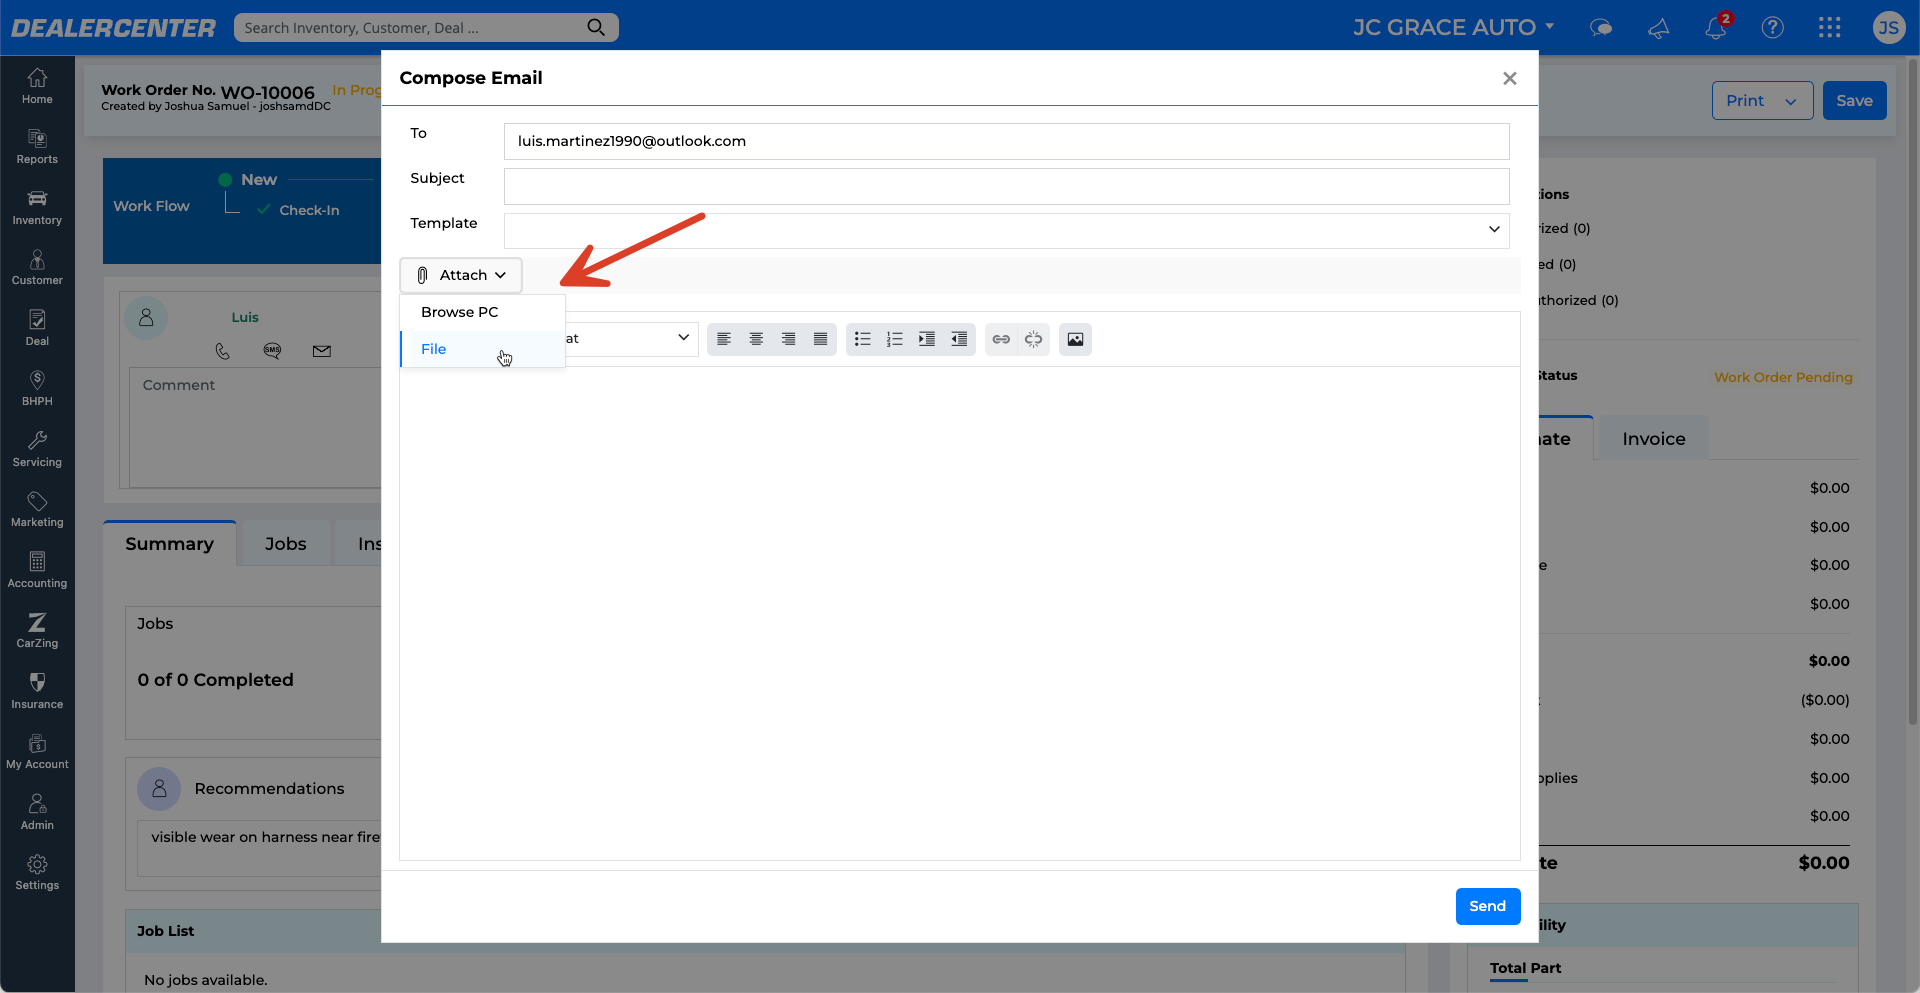
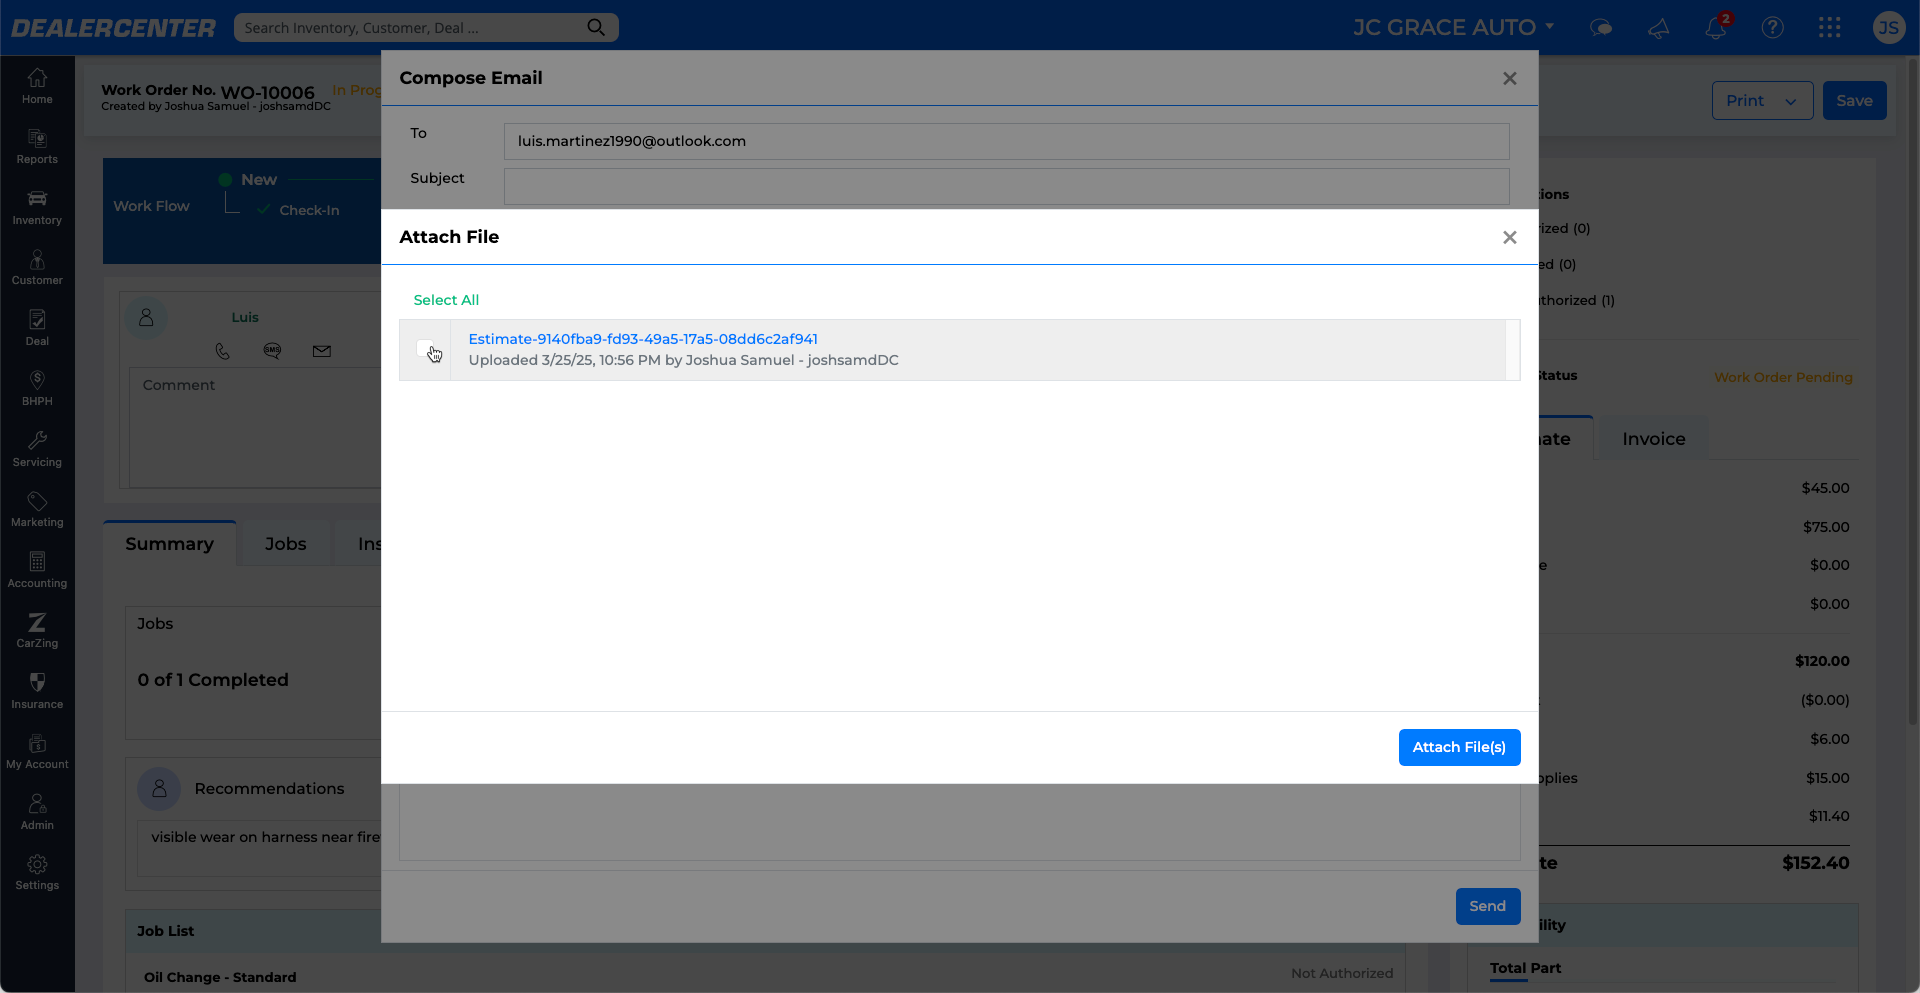
- Choose a template or write a custom message.

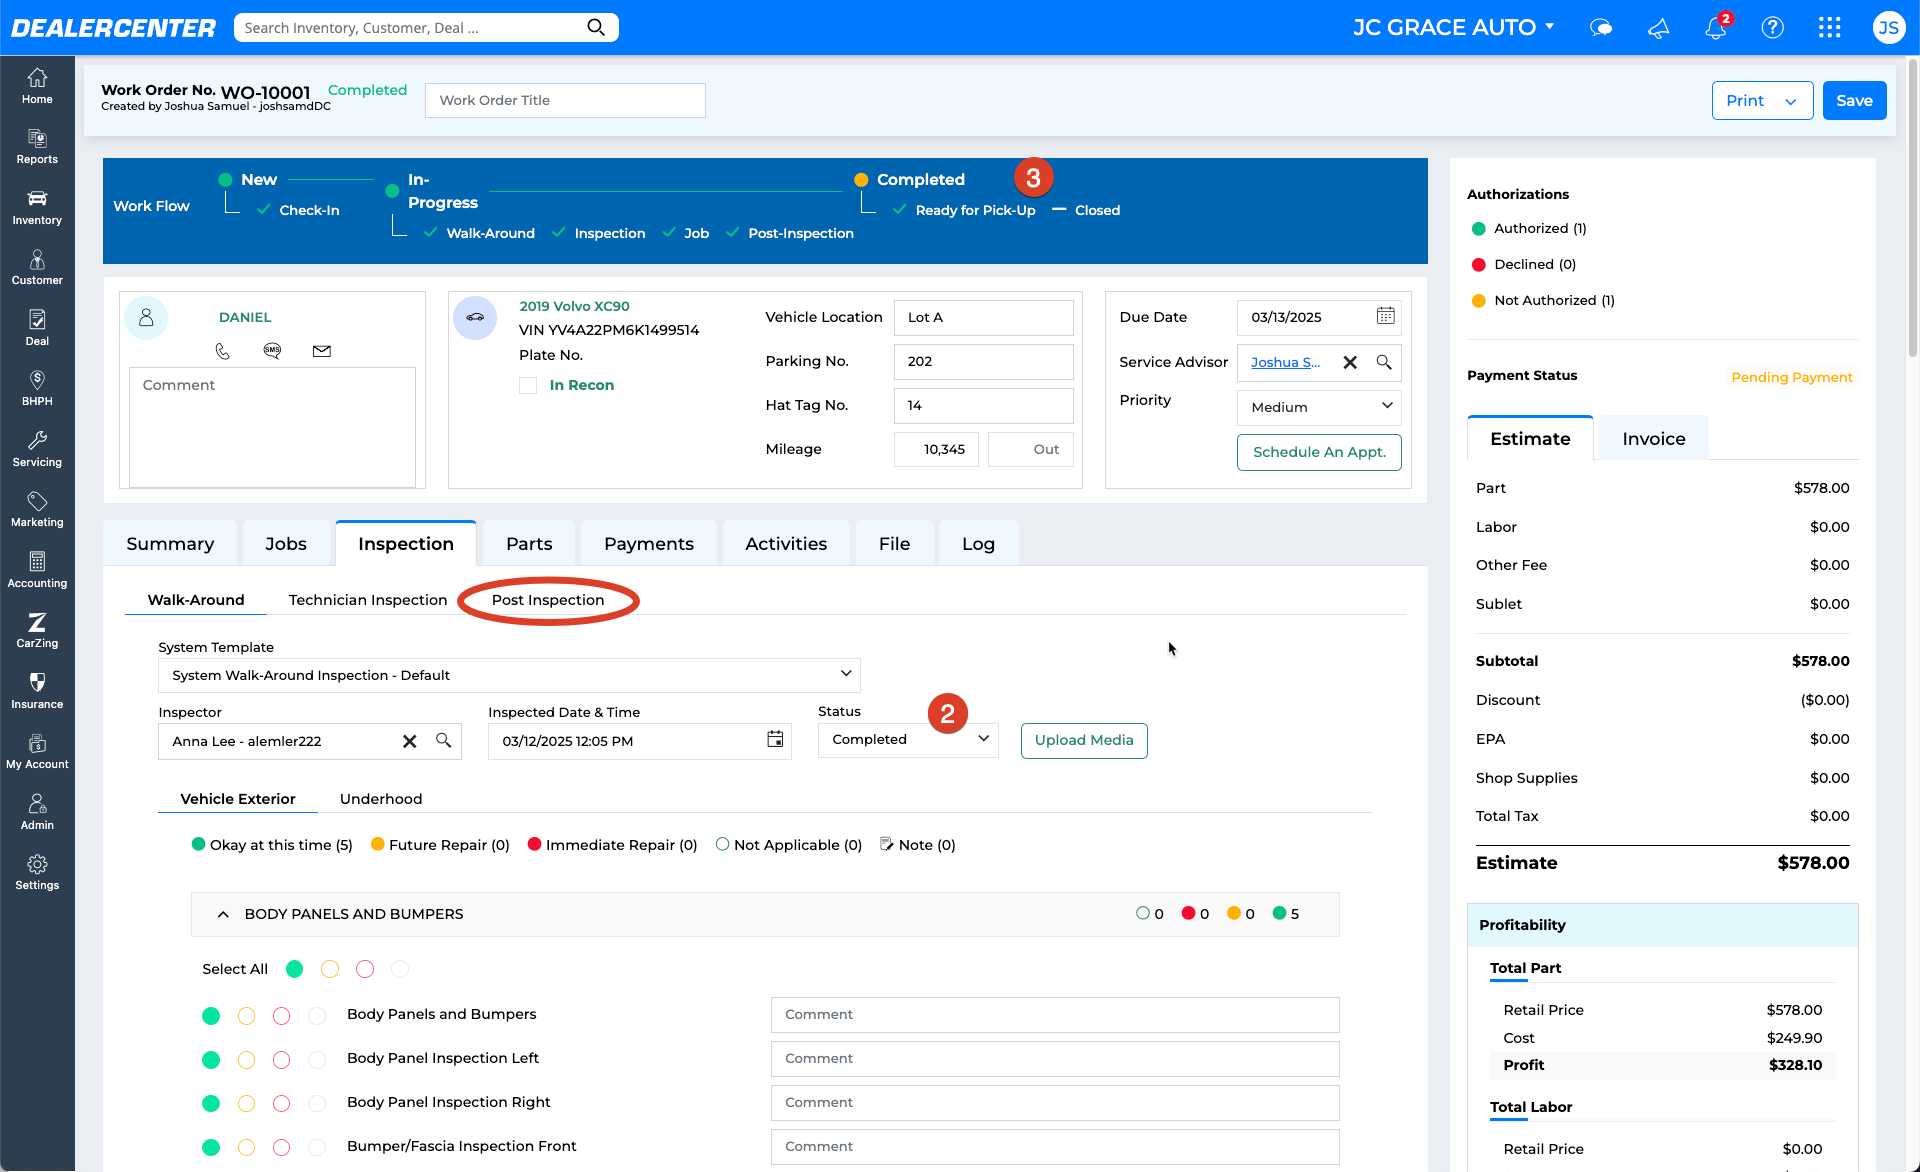
Post-Inspection and Ready for Pickup
Once all jobs are complete, perform the final post-inspection:
- Go to the Inspection tab and select Post-Inspection.
- Complete the checklist and update the inspection status to Completed.
- The work order status will change to Ready for Pickup, and a notification will be sent to the customer.
Taking Payments
To close out a work order with a payment:
- Go to the Payments tab and click Take Payment.
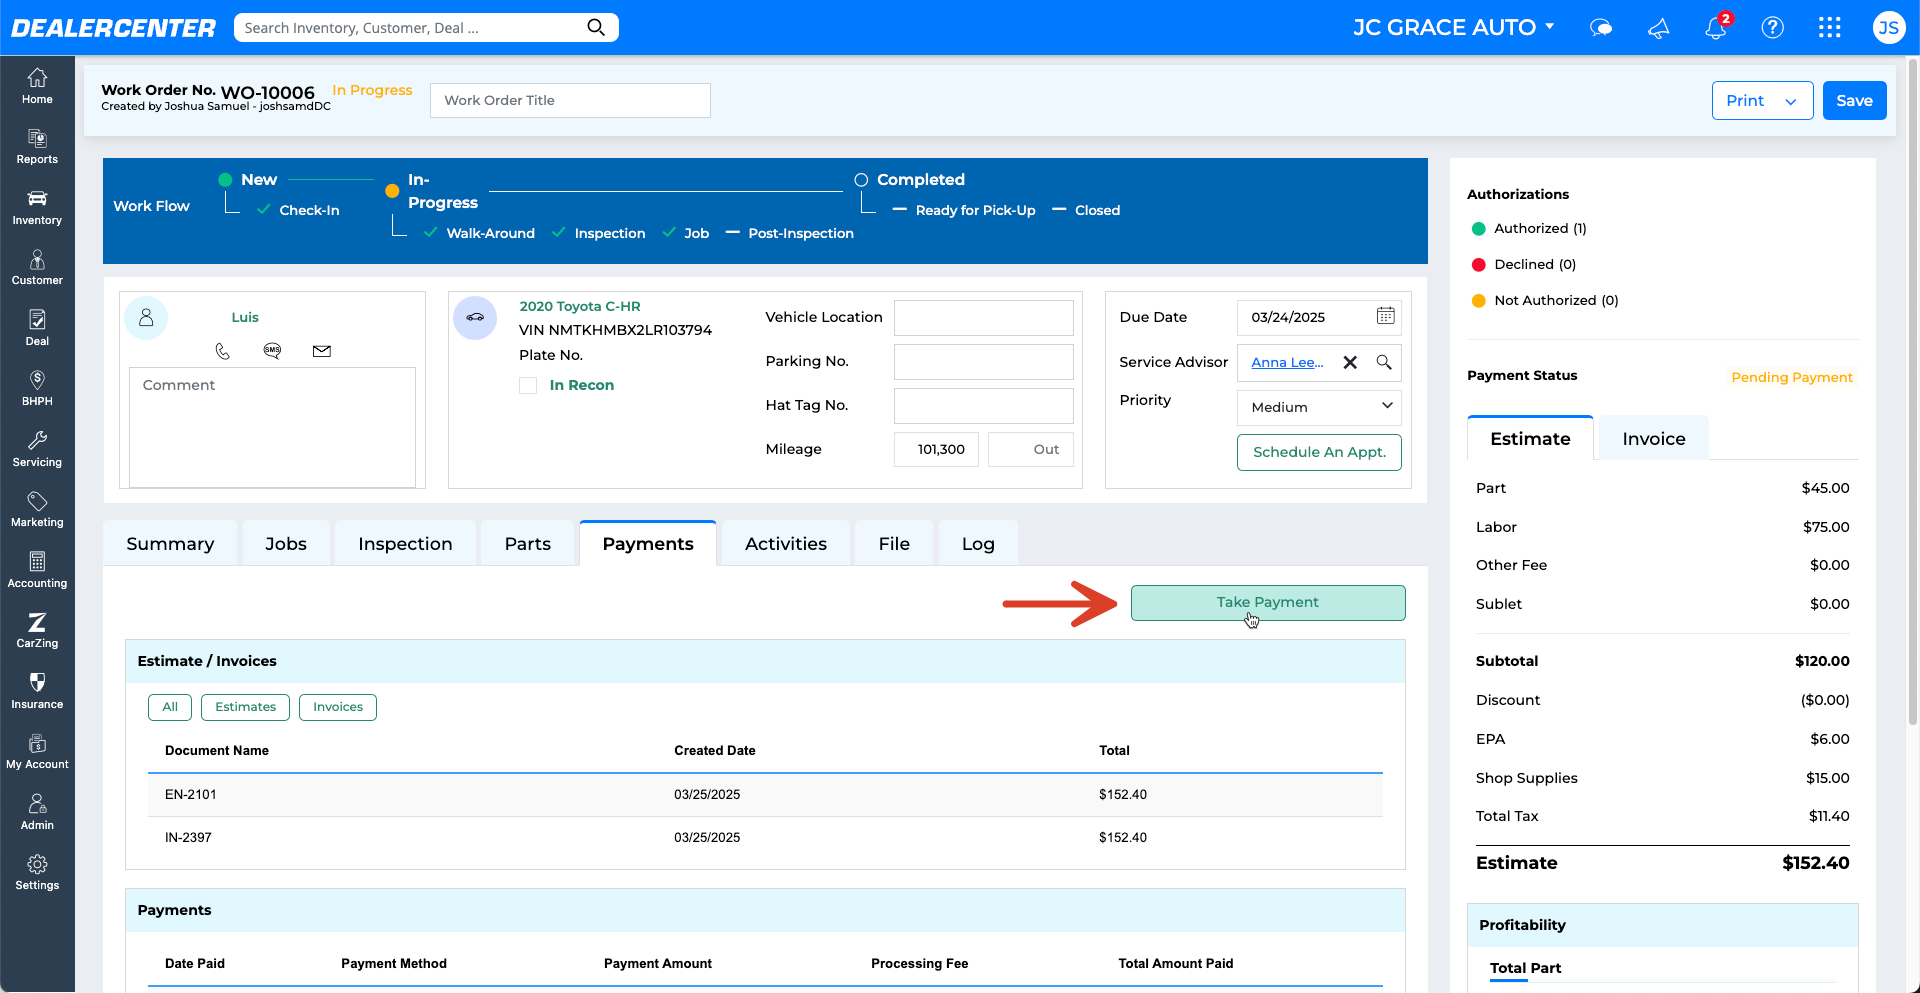
- Confirm the payment amount and select the payment method.

- Click Save. The work order status will update to Closed.
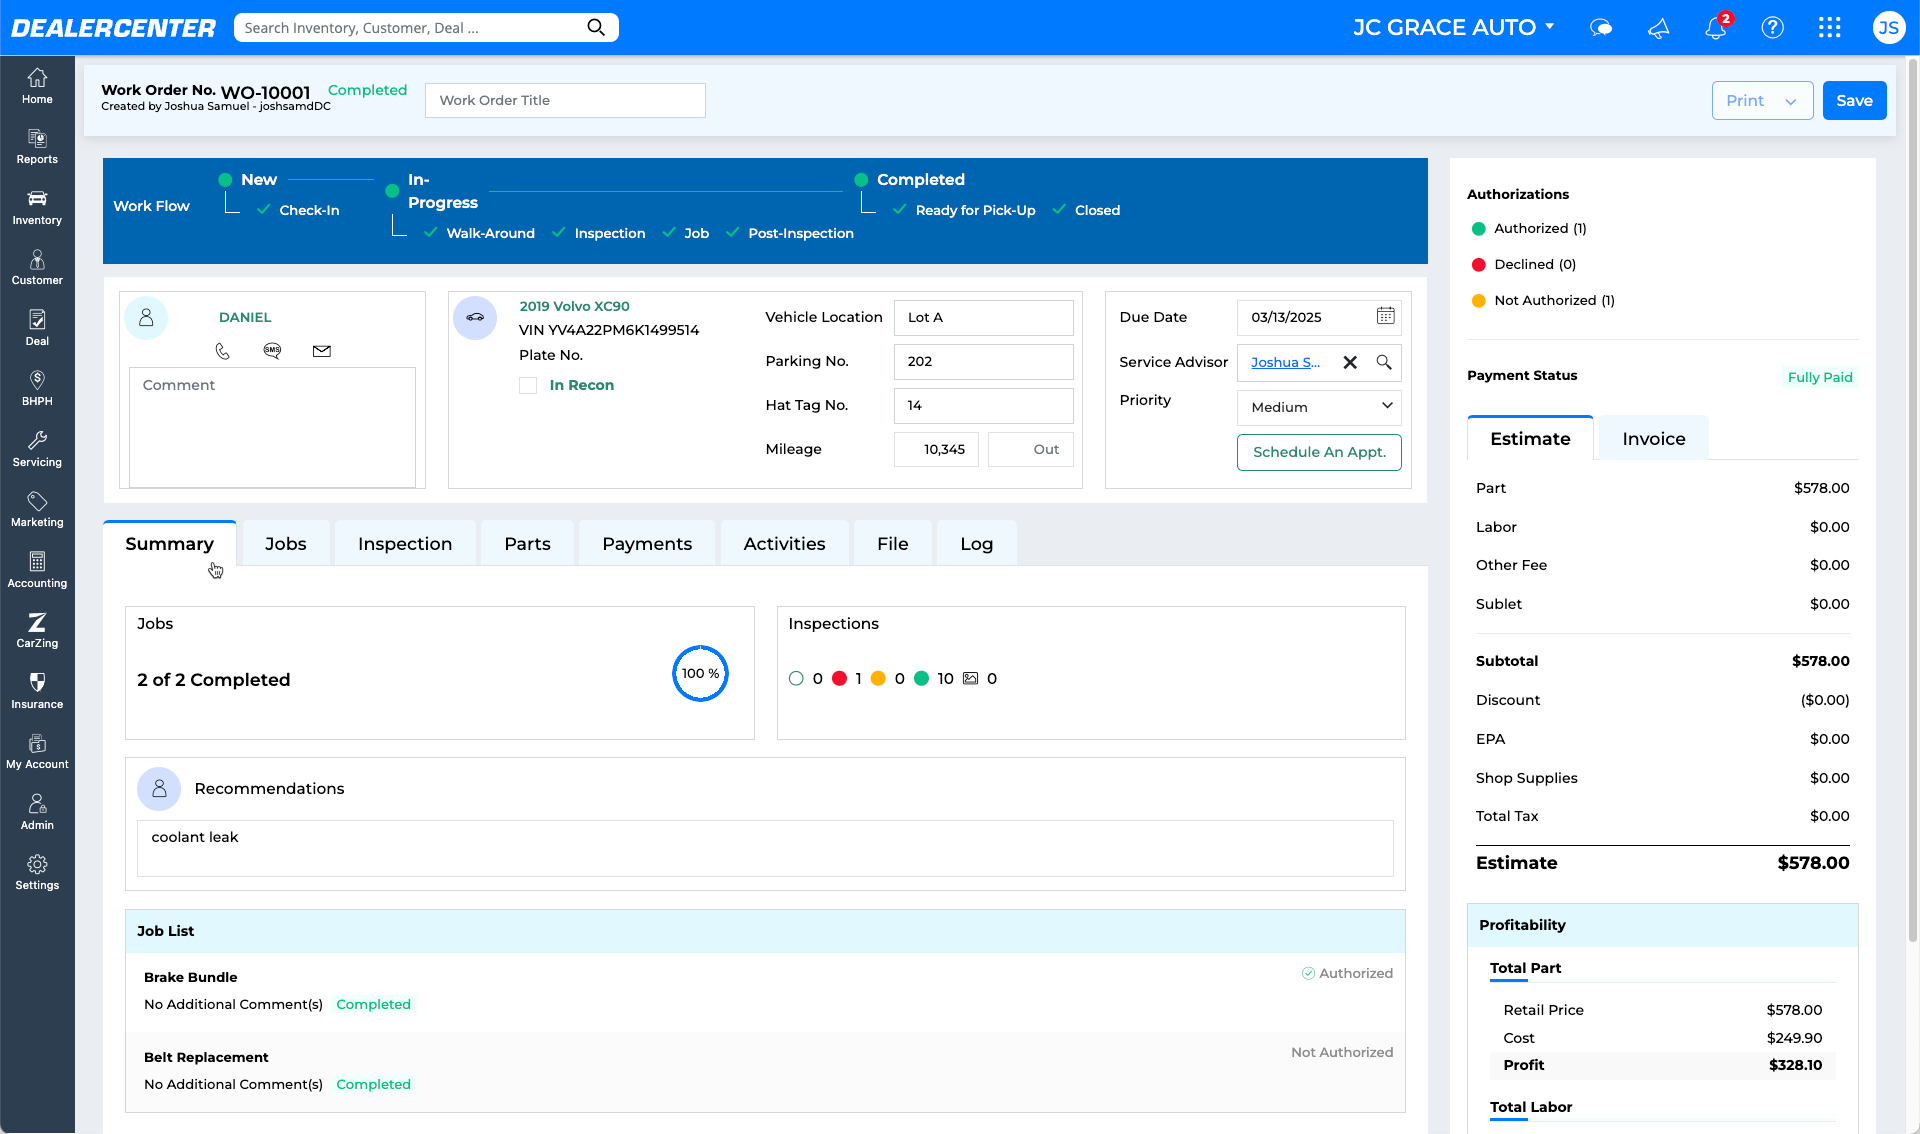
Additional Tabs
Work orders include several tabs for tracking key information:
-
Summary: Overview of completed jobs, inspections, and recommendations.
-
Parts: Tracks parts statuses and vendor info.

-
- Click on part item in any row to open into more detail and edit.

-
Activities: Logs calls, texts, emails, and notes.
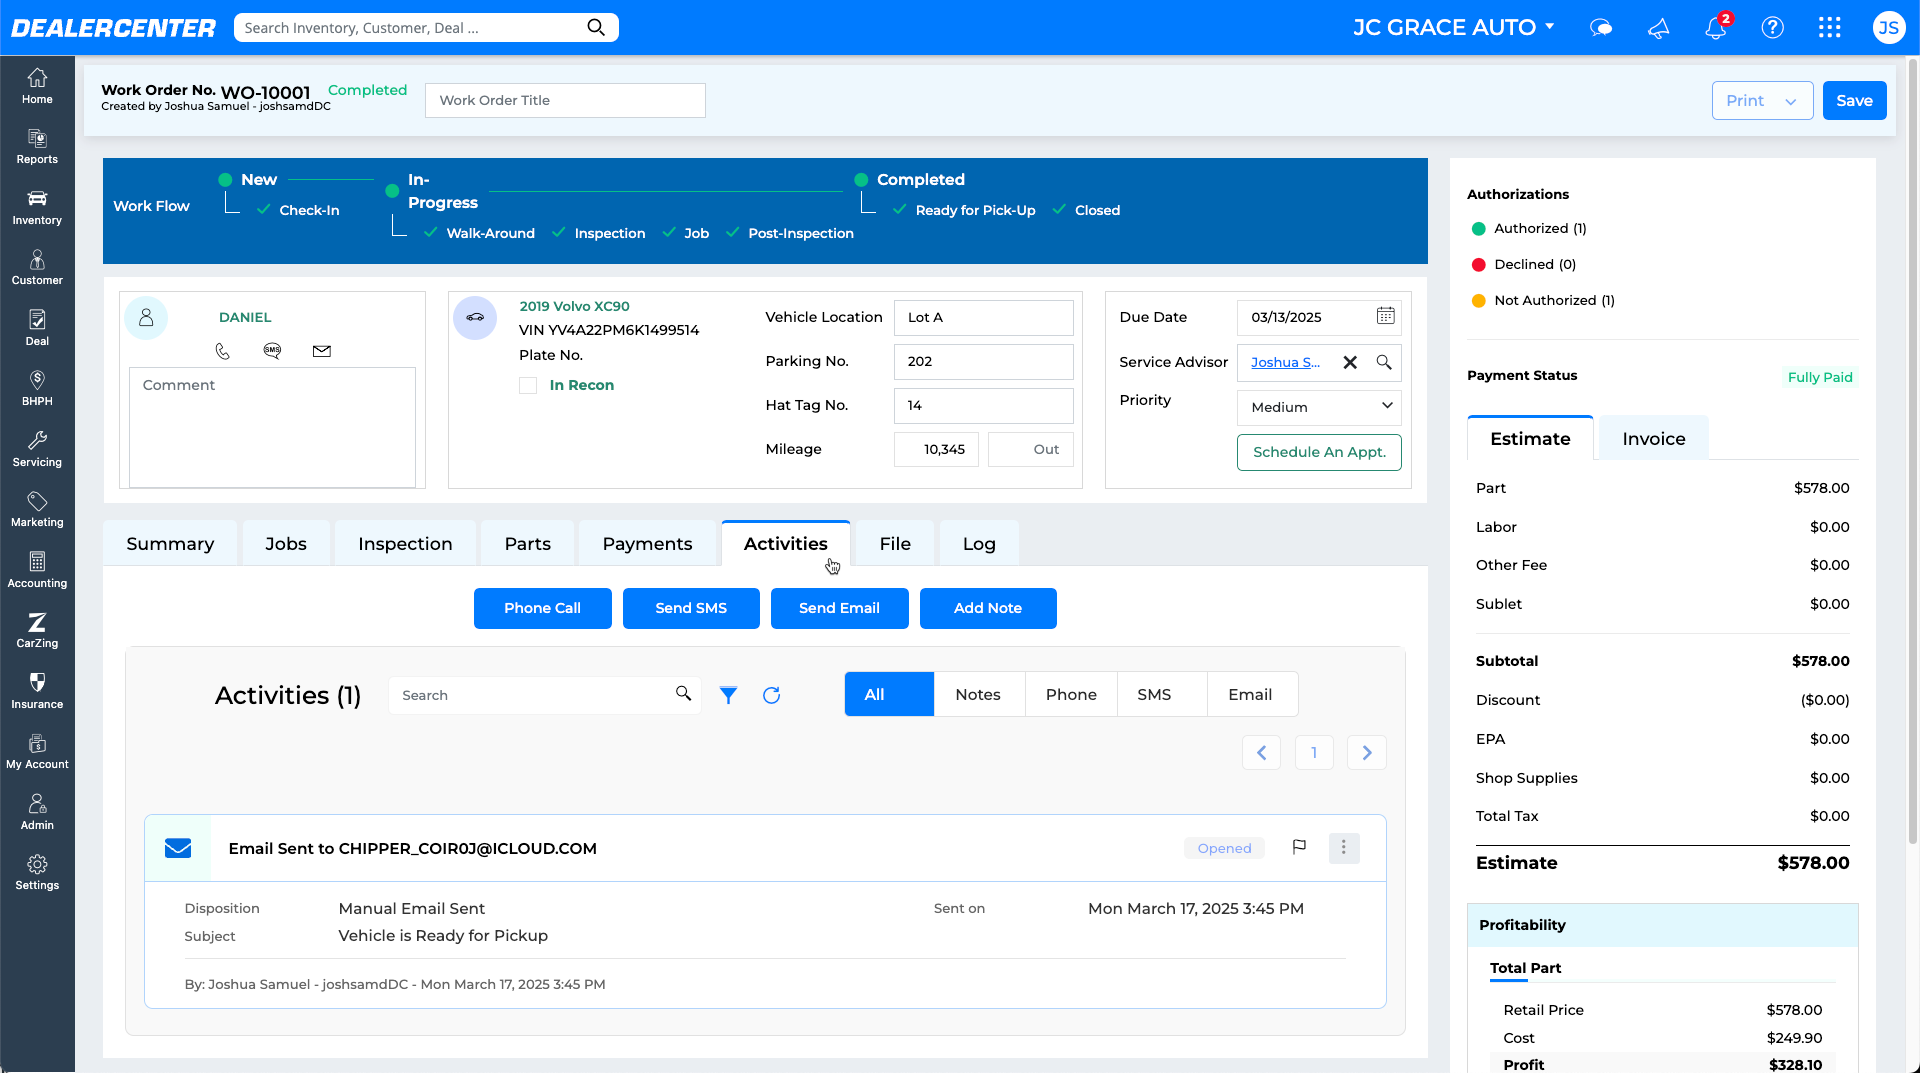
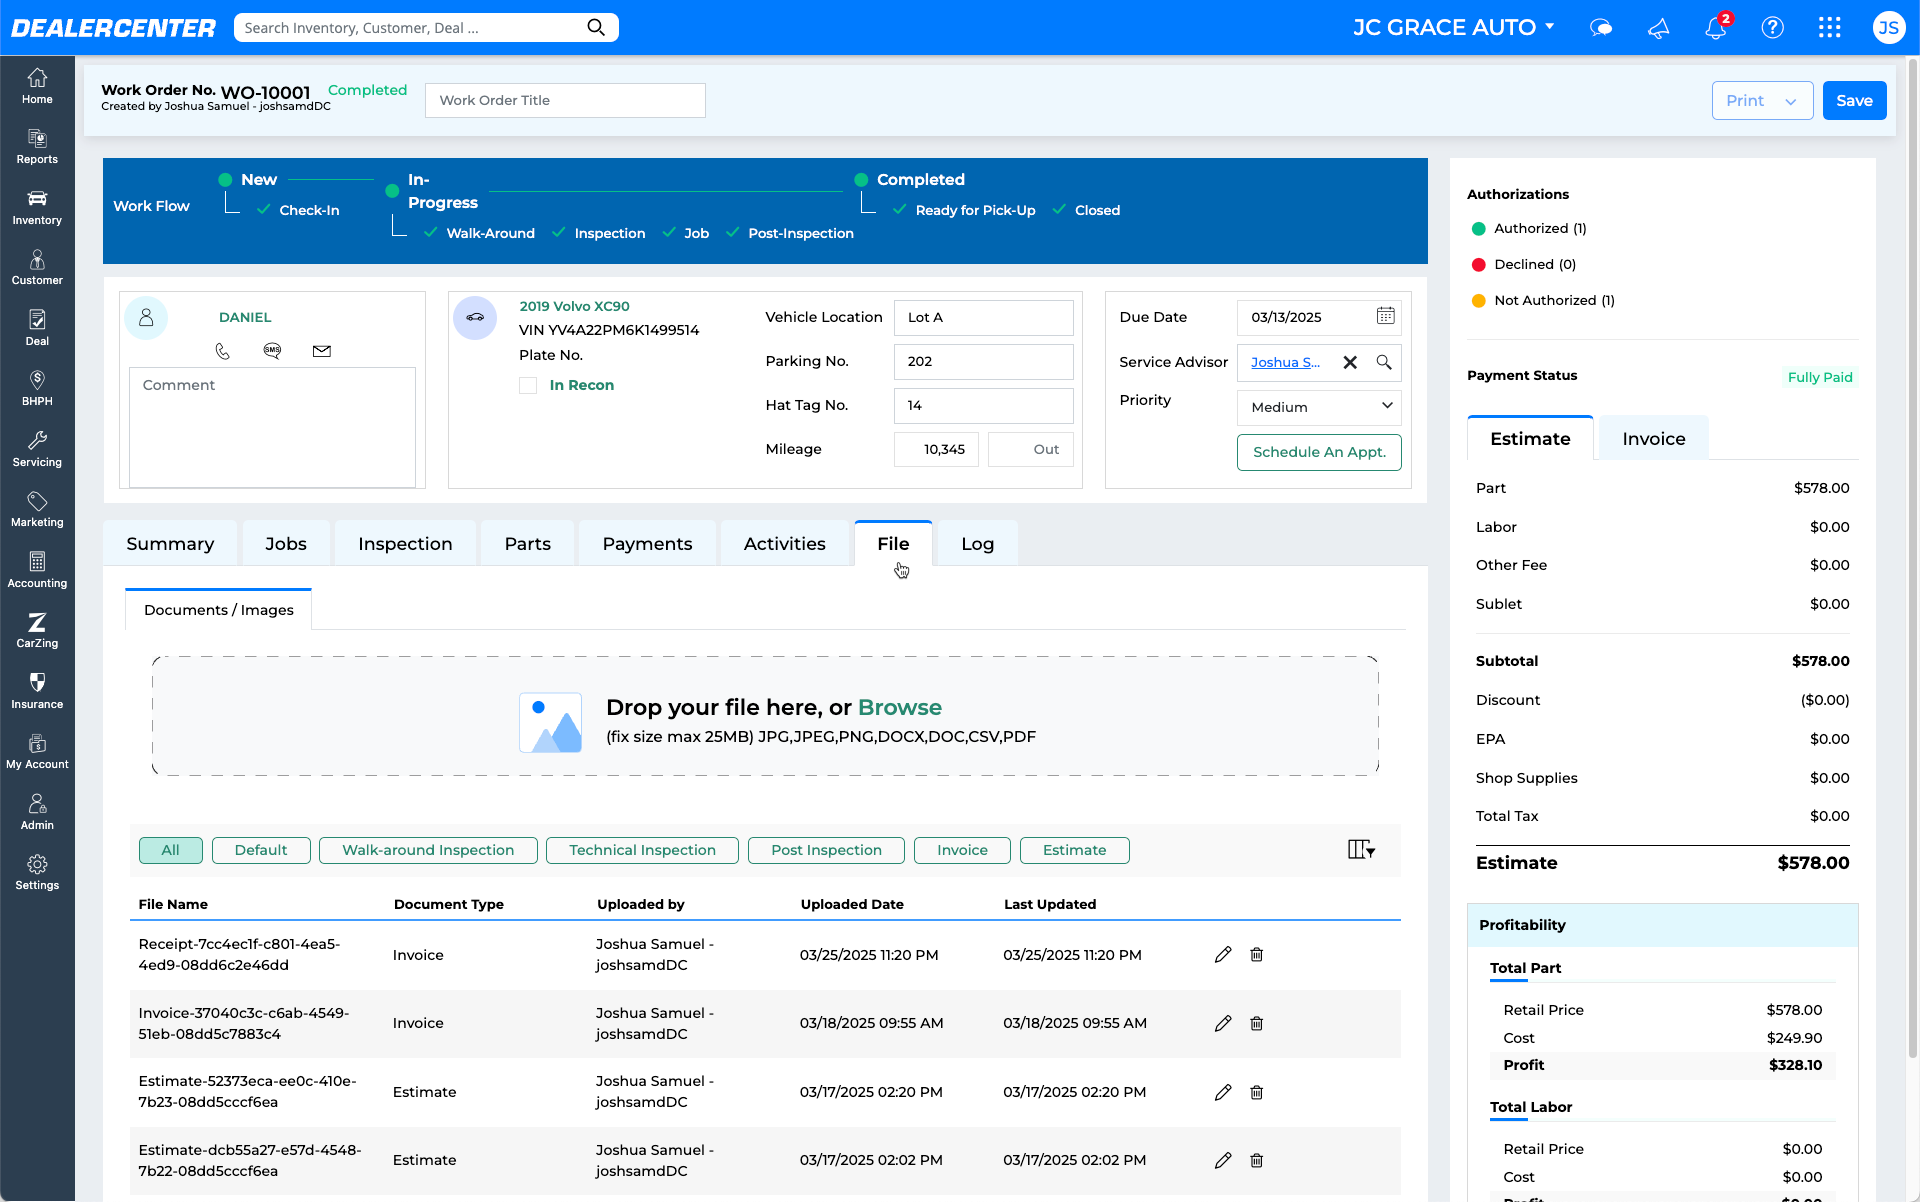
-
Files: Store and access inspection reports, invoices, and photos.
-
Log: Records a detailed history of all actions and updates.

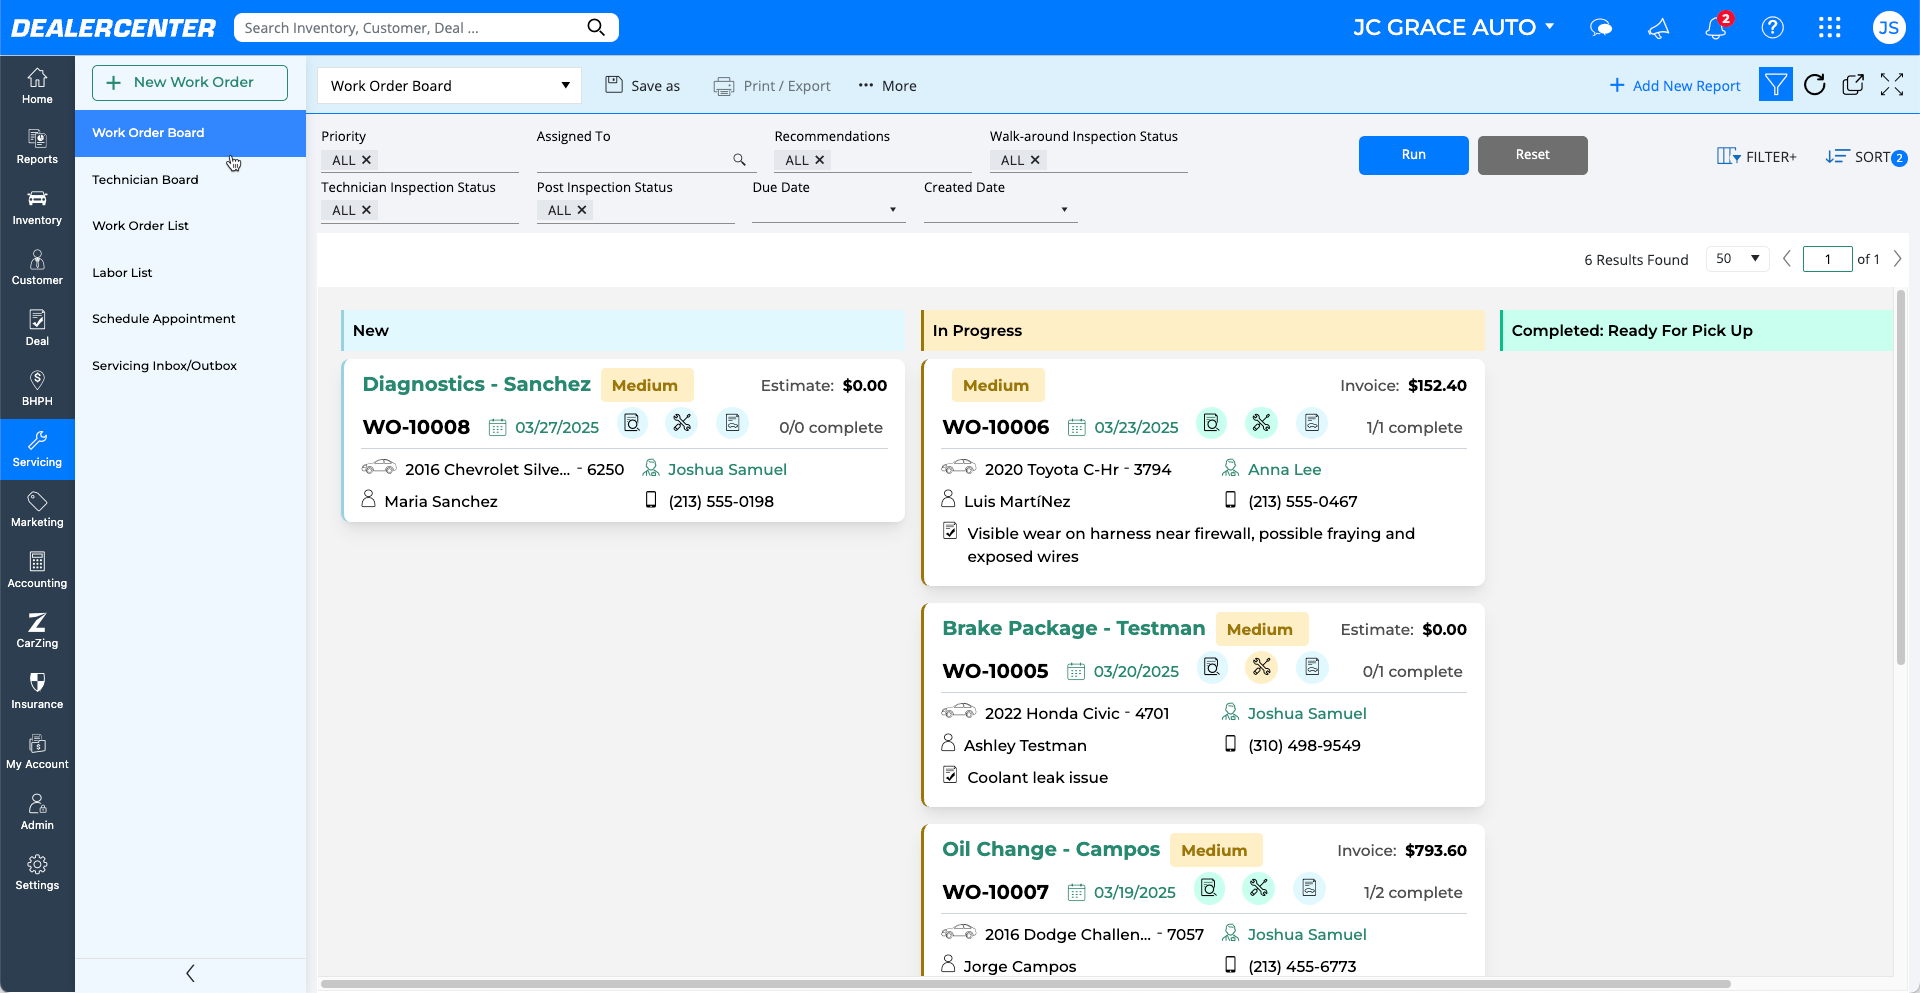
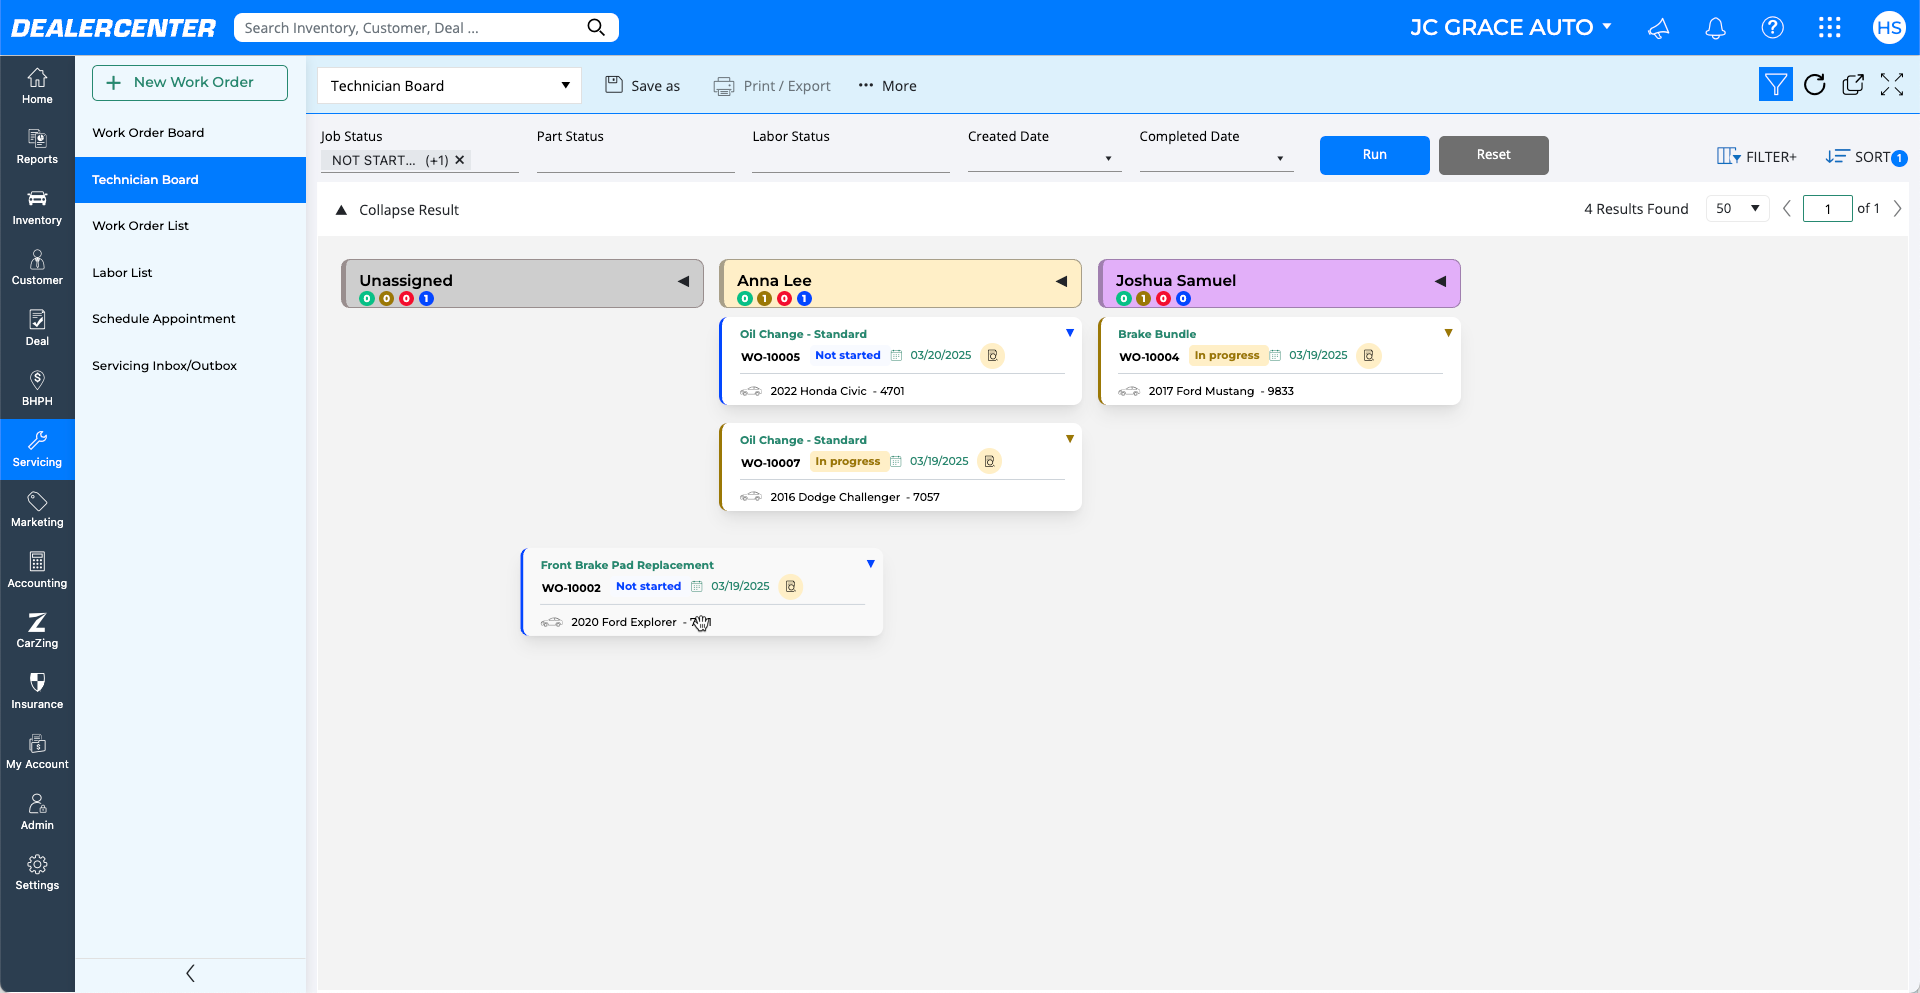
Reports and Boards
DealerCenter provides visual tools for tracking servicing operations:
-
Work Order Board: Displays all work orders by status.
-
Technician Board: Shows assigned jobs by technician to help balance workloads.
-
- Drag and drop job tiles to easily assign to technicians.
-
Labor Report: Tracks labor hours and costs for each technician.

-
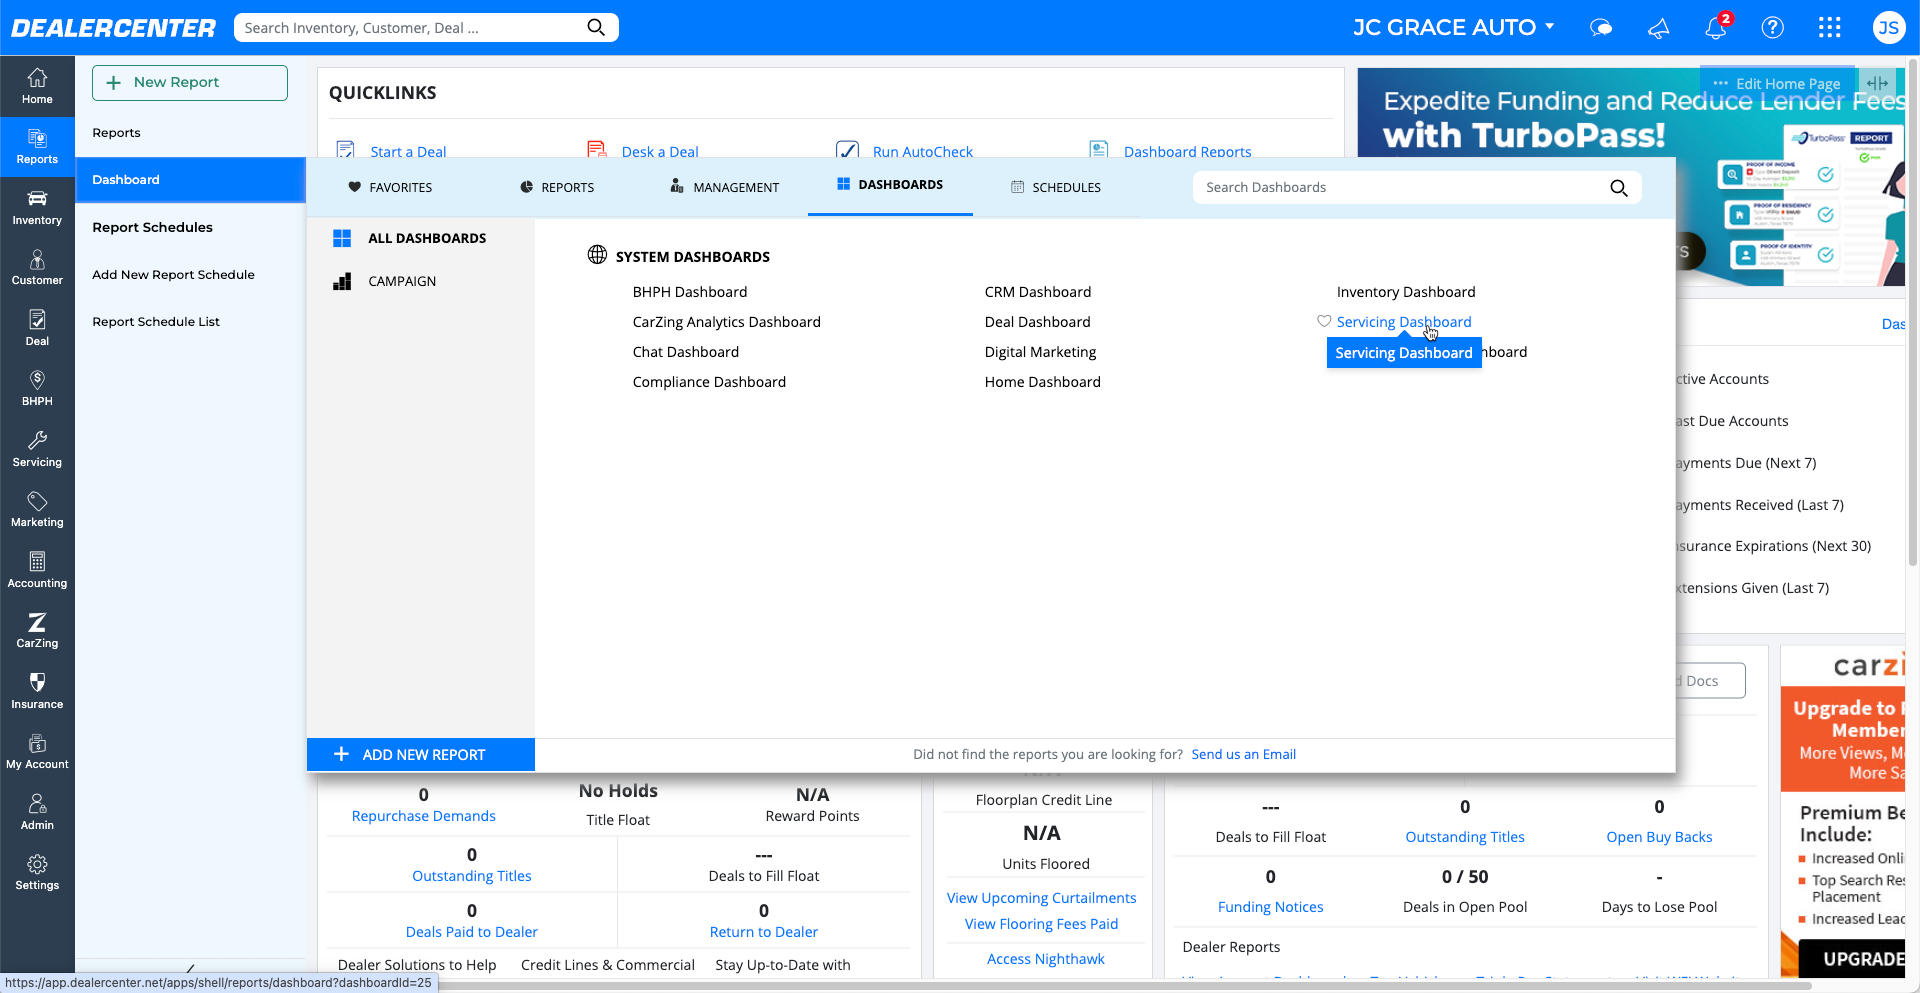
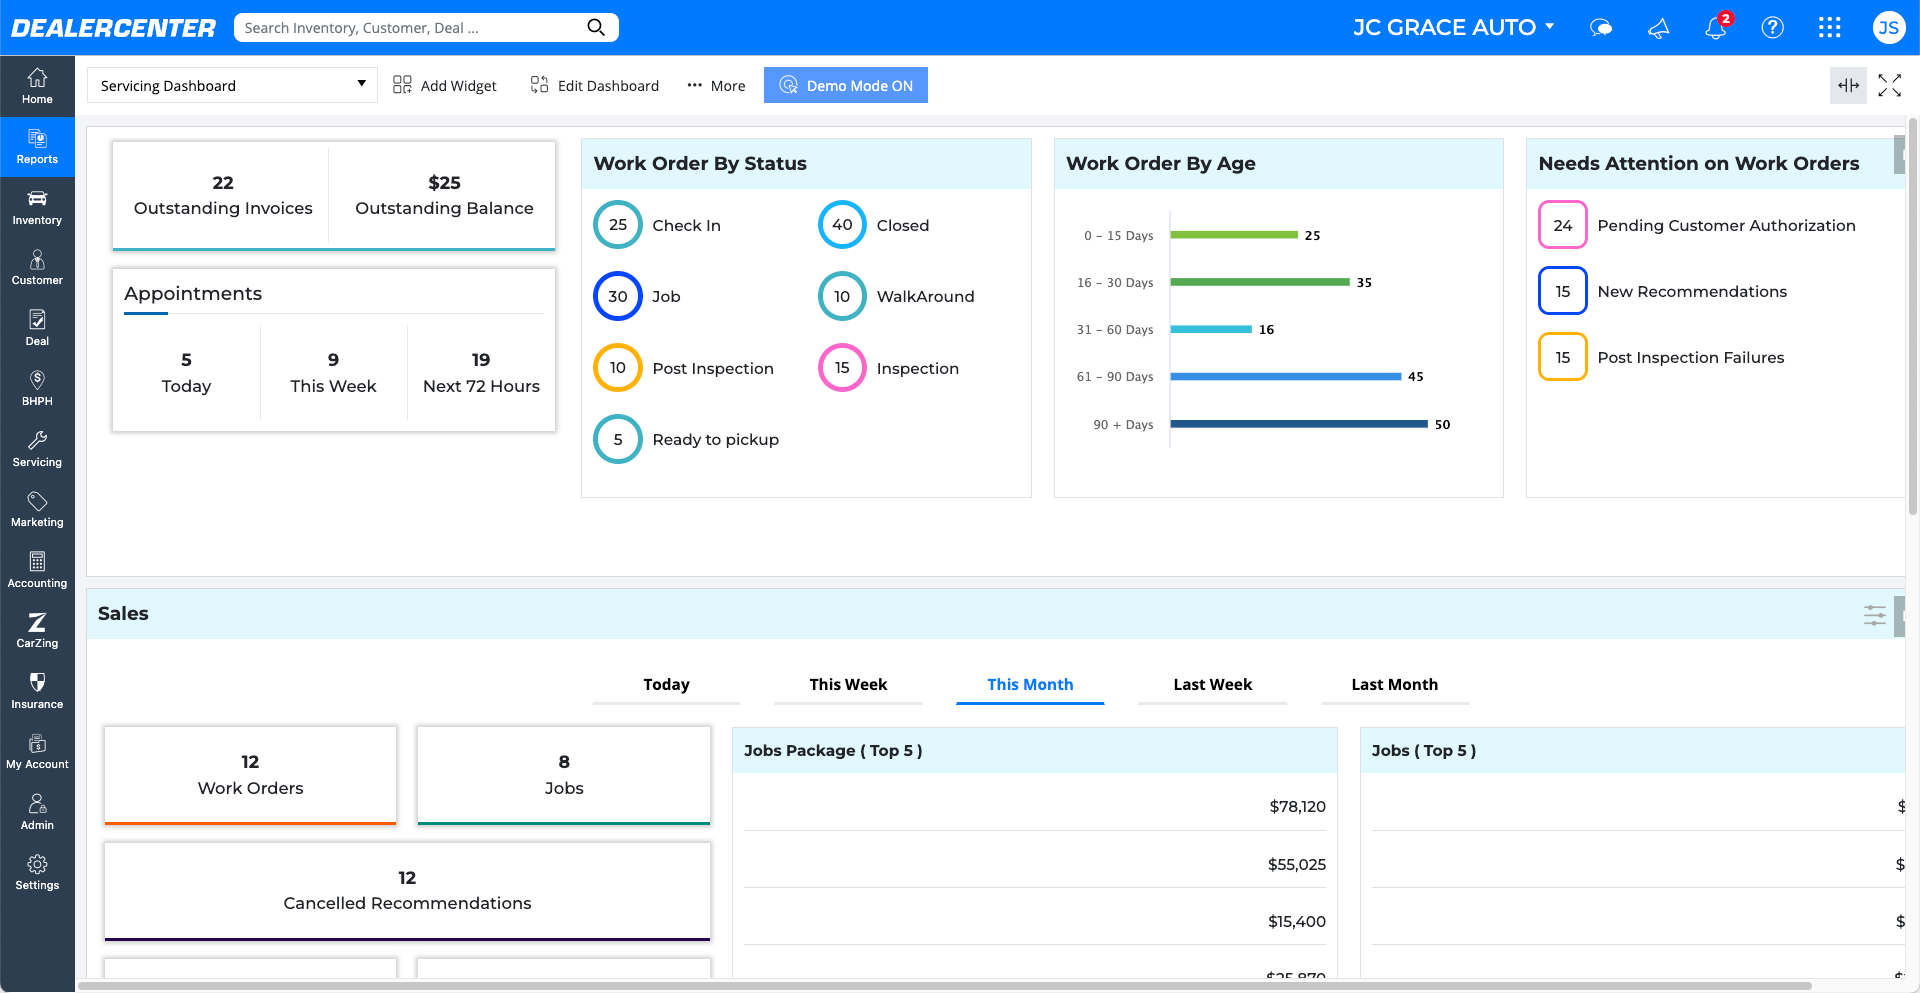
Servicing Dashboard: Go to Reports on the menu, then select Dashboard and click Servicing Dashboard. This dashboard offers high-level insights into department performance and urgent items.