IN THIS ARTICLE
Accessing Servicing Settings
To configure your service department settings in DealerCenter:
- From the left menu, click Settings.
- Select Servicing from the Settings sub-menu.
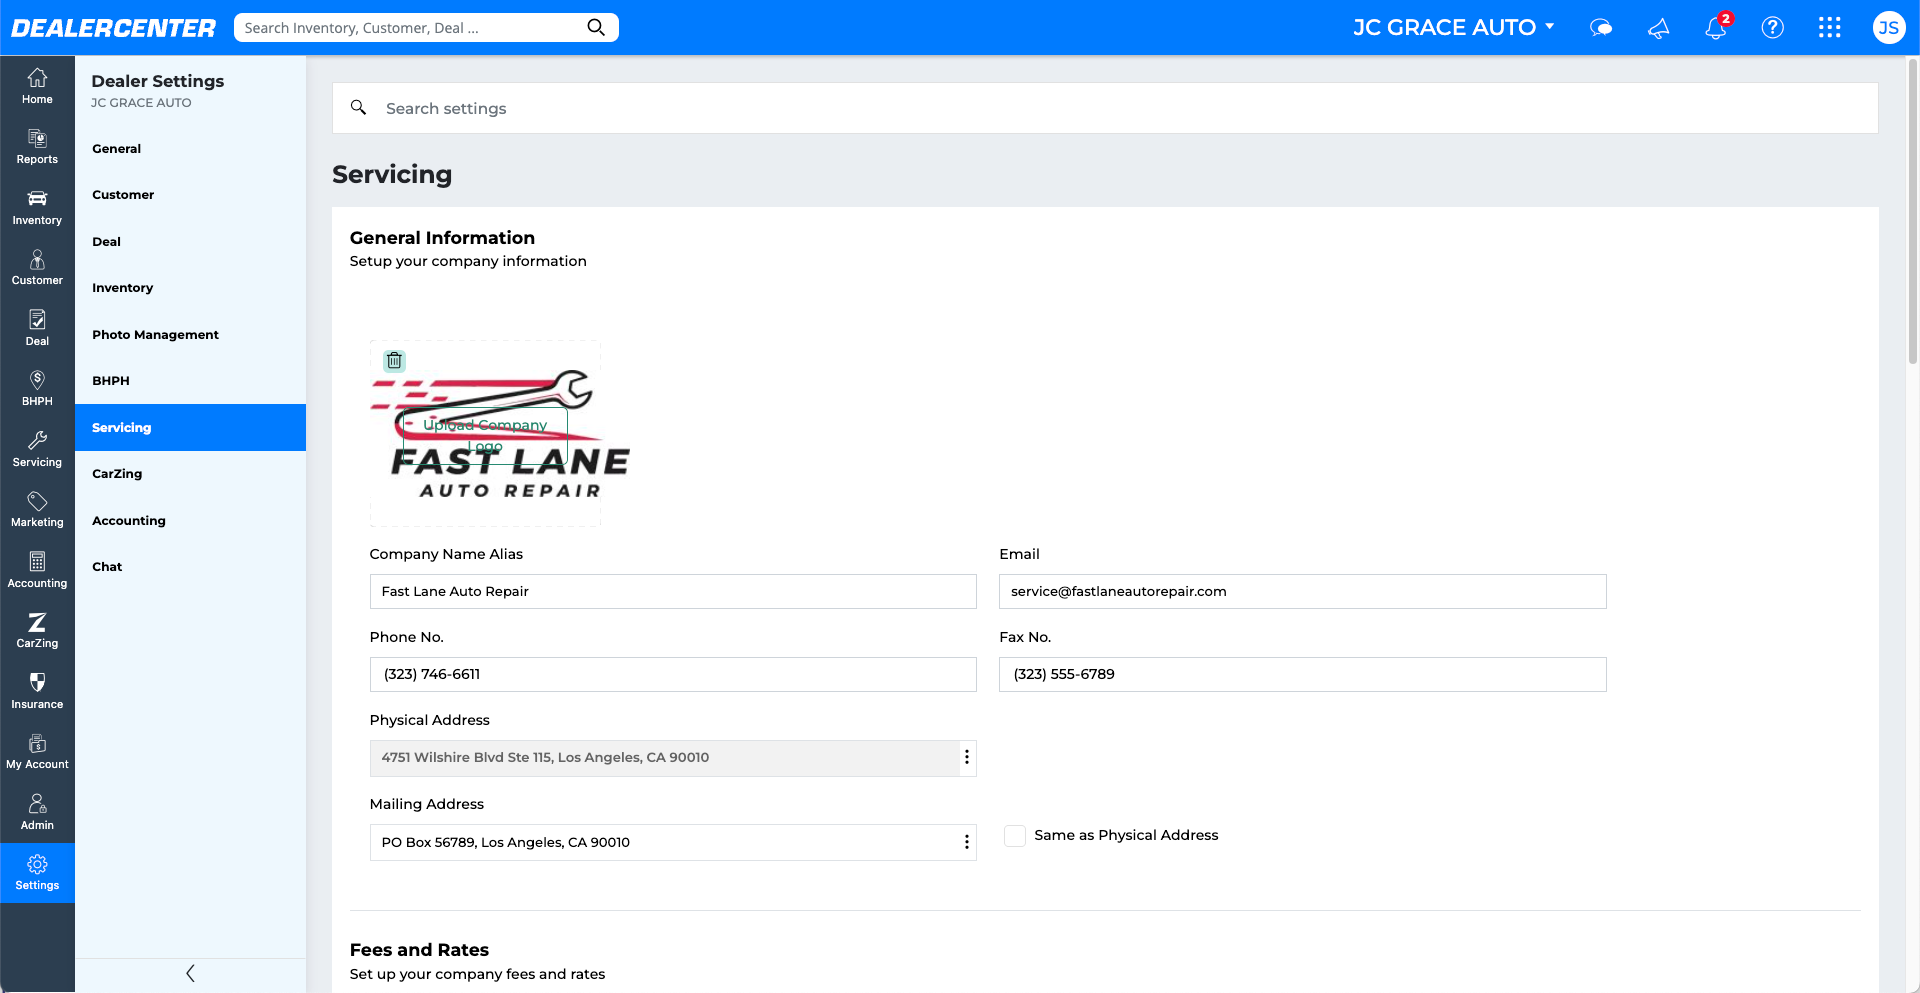
General Information
Enter key details about your service department, including contact info and branding:
- Go to the General Information section.
- Click Upload Company Logo to add your logo. This appears on customer estimates and invoices.
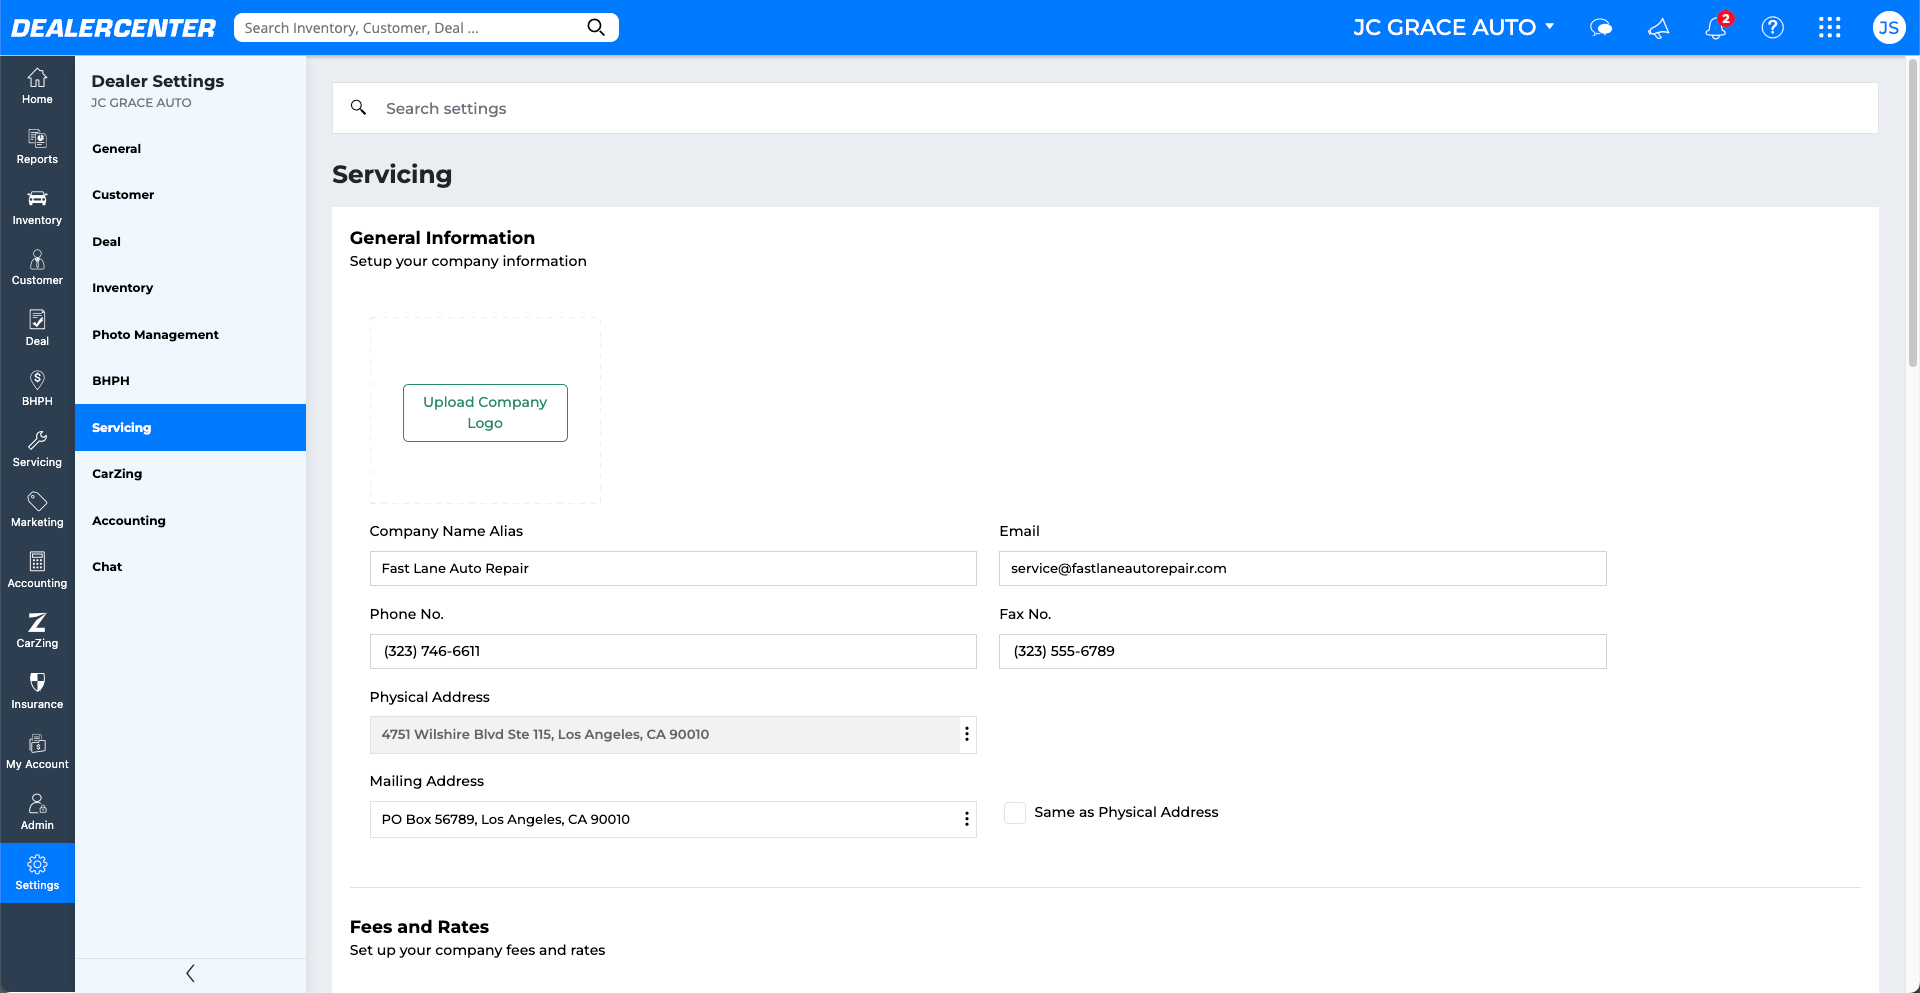
- Enter your Company Name Alias, Email, and Phone Number.
- Fill in your Physical Address and Mailing Address as needed.
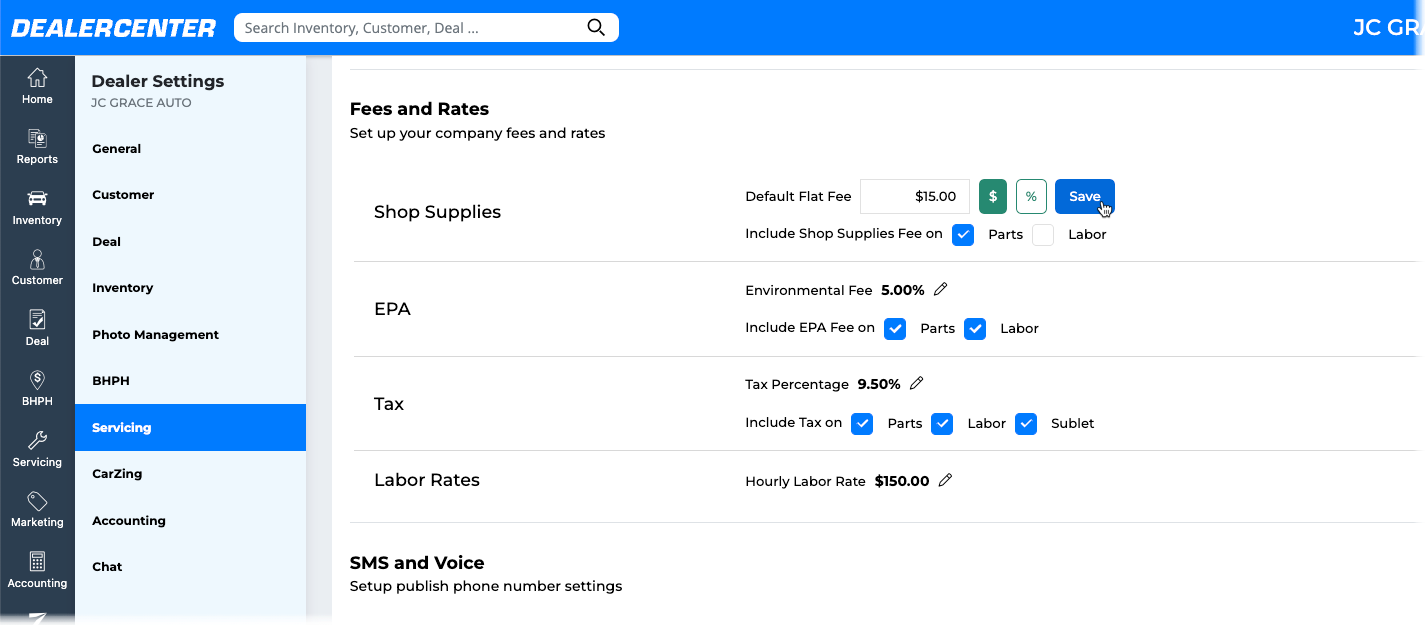
Fees and Rates
Set default fees and rates to apply automatically to work orders:
- In the Fees and Rates section, click the pencil icon next to each item to edit:
-
Shop Supplies: Add a flat fee or percentage for consumables.
-
EPA Fee: Add fees for hazardous materials disposal.
-
Tax: Set a percentage and choose to apply it to parts, labor, and sublet work.
-
Labor Rates: Define your hourly labor rate for service jobs.
- Click Save after updating each section.
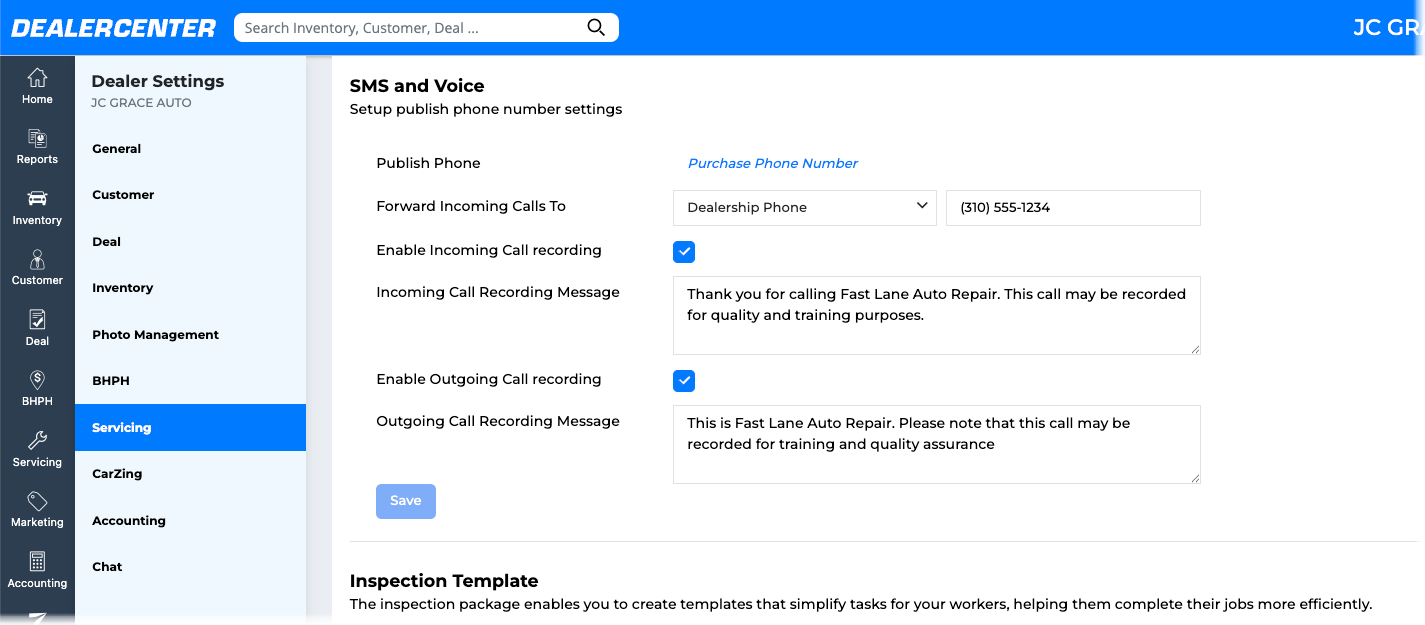
SMS and Voice Settings
Configure phone communication for your service department:
- In the SMS and Voice section, click Purchase Phone Number to assign a unique number for your servicing department.
- Choose whether to Forward Incoming Calls to a specific number.
- Enable Incoming and Outgoing Call Recording as needed.
- Customize the Recording Message fields to play a message to callers.
- Click Save to apply your settings.
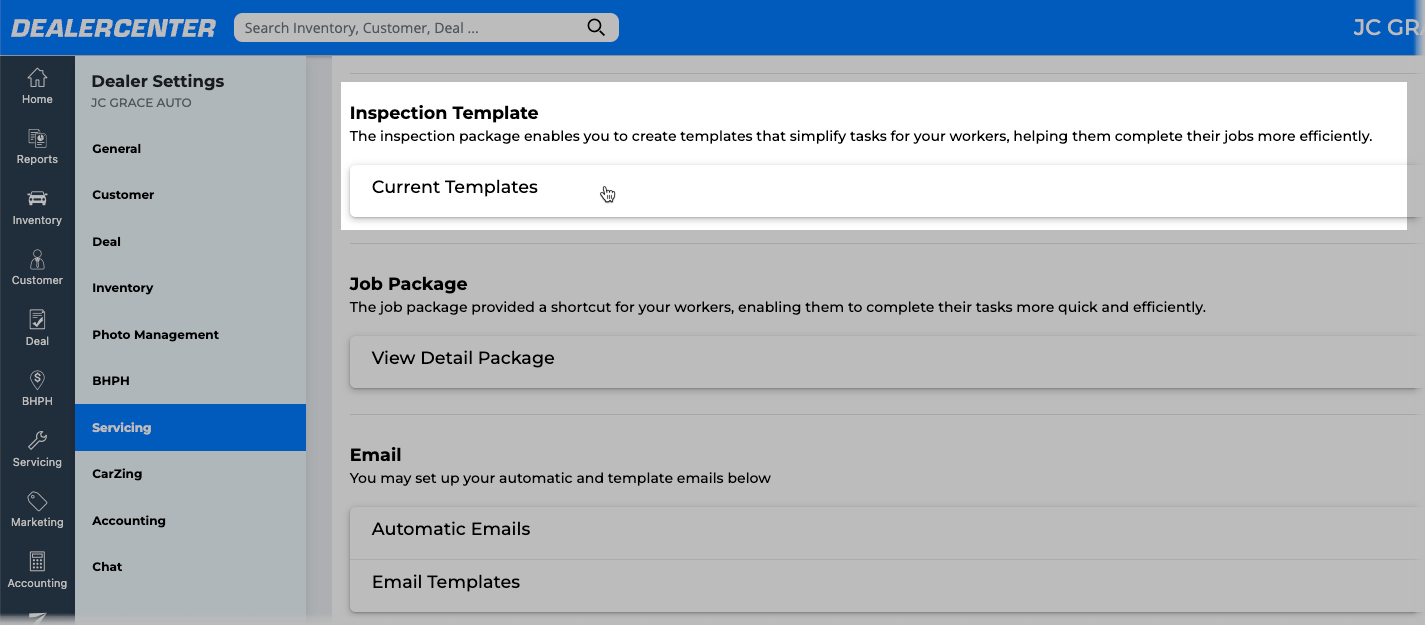
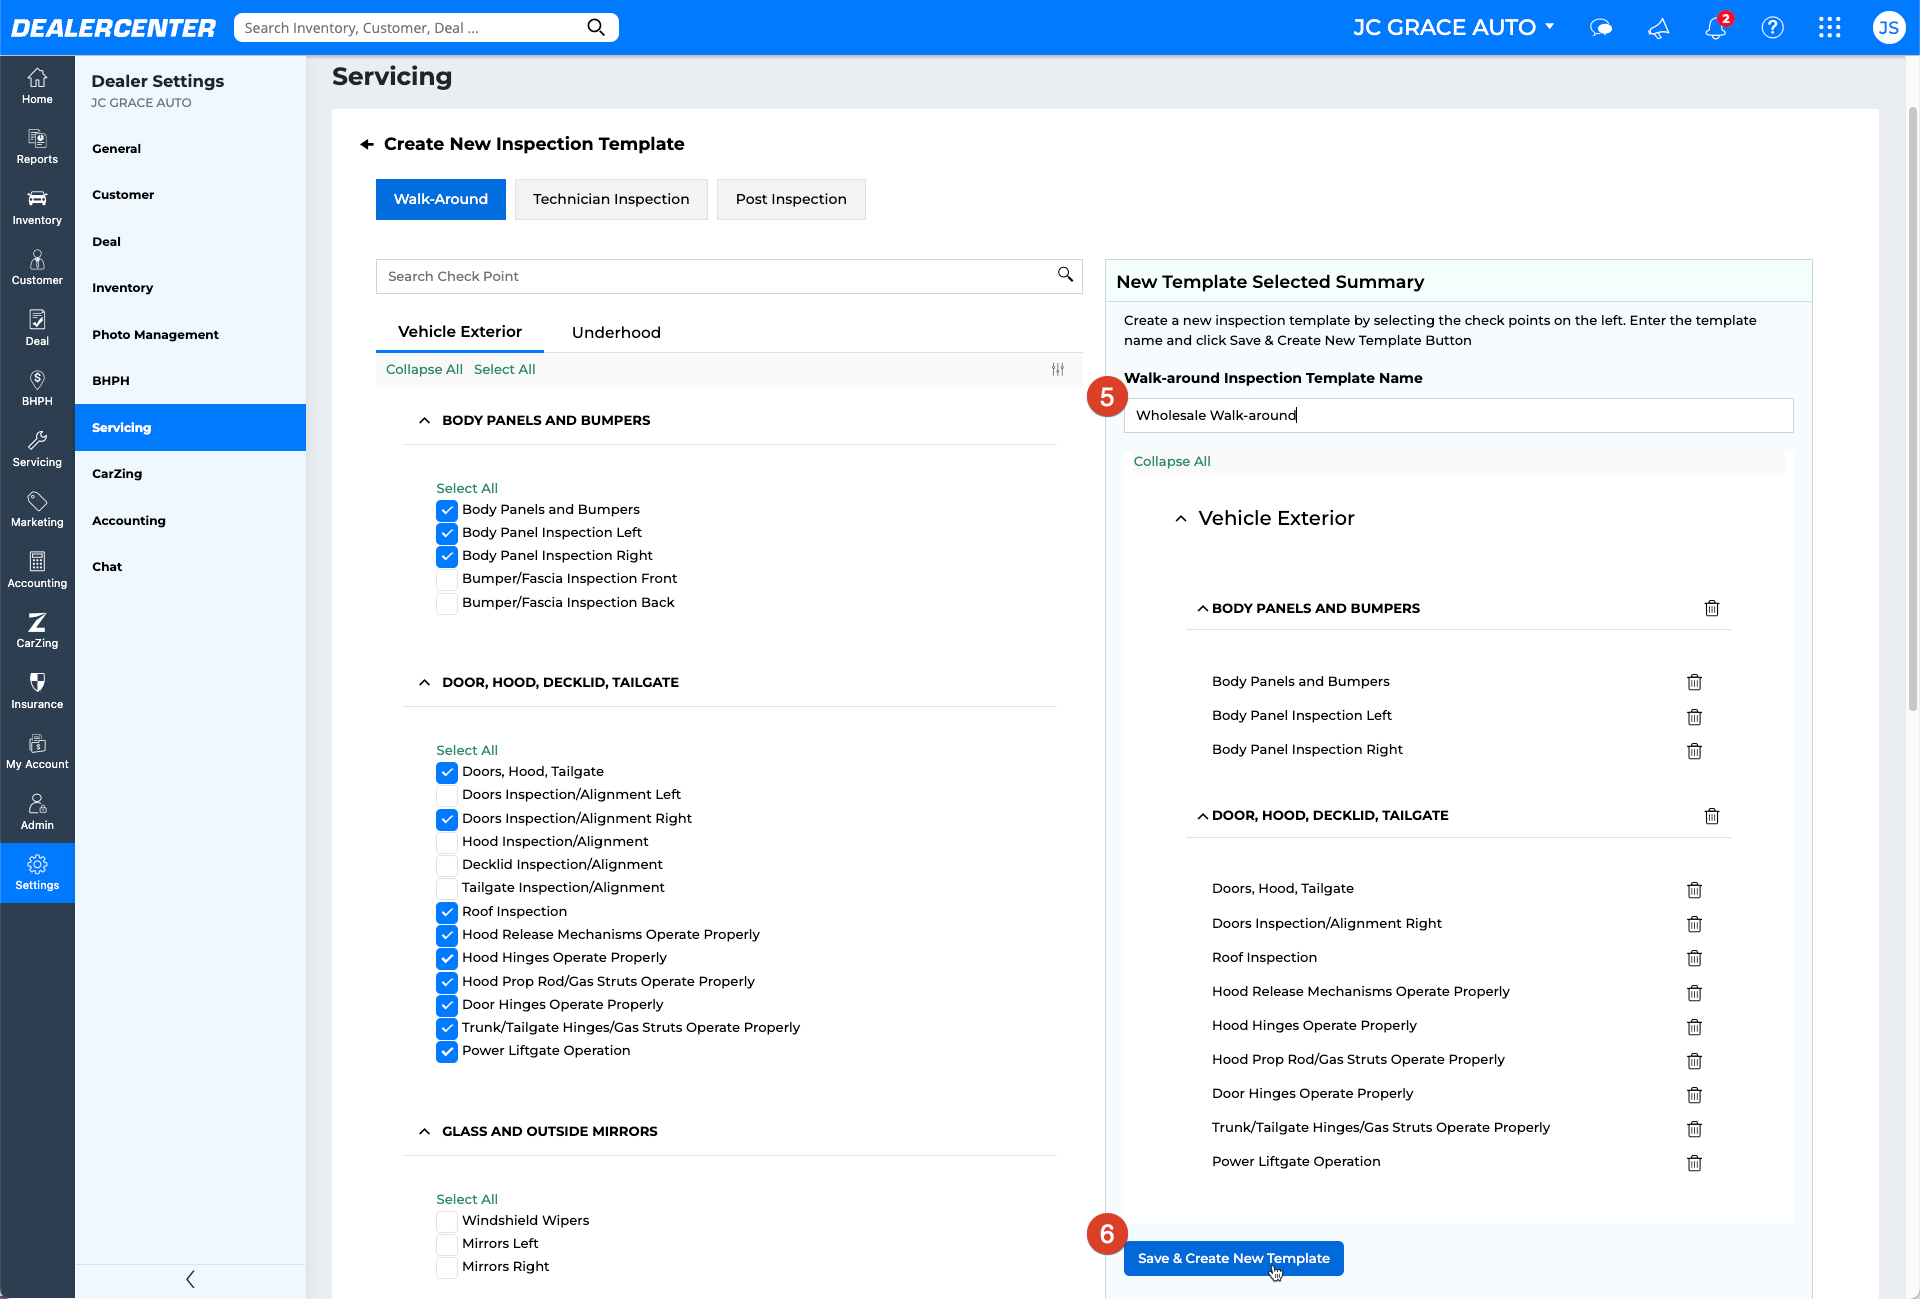
Inspection Templates
There are three types of inspections available: the initial walk-around, a detailed technical inspection performed by the technician or mechanic, and a final quality check or post-inspection. These inspections can be customized by selecting which standard checklist items to include or exclude.
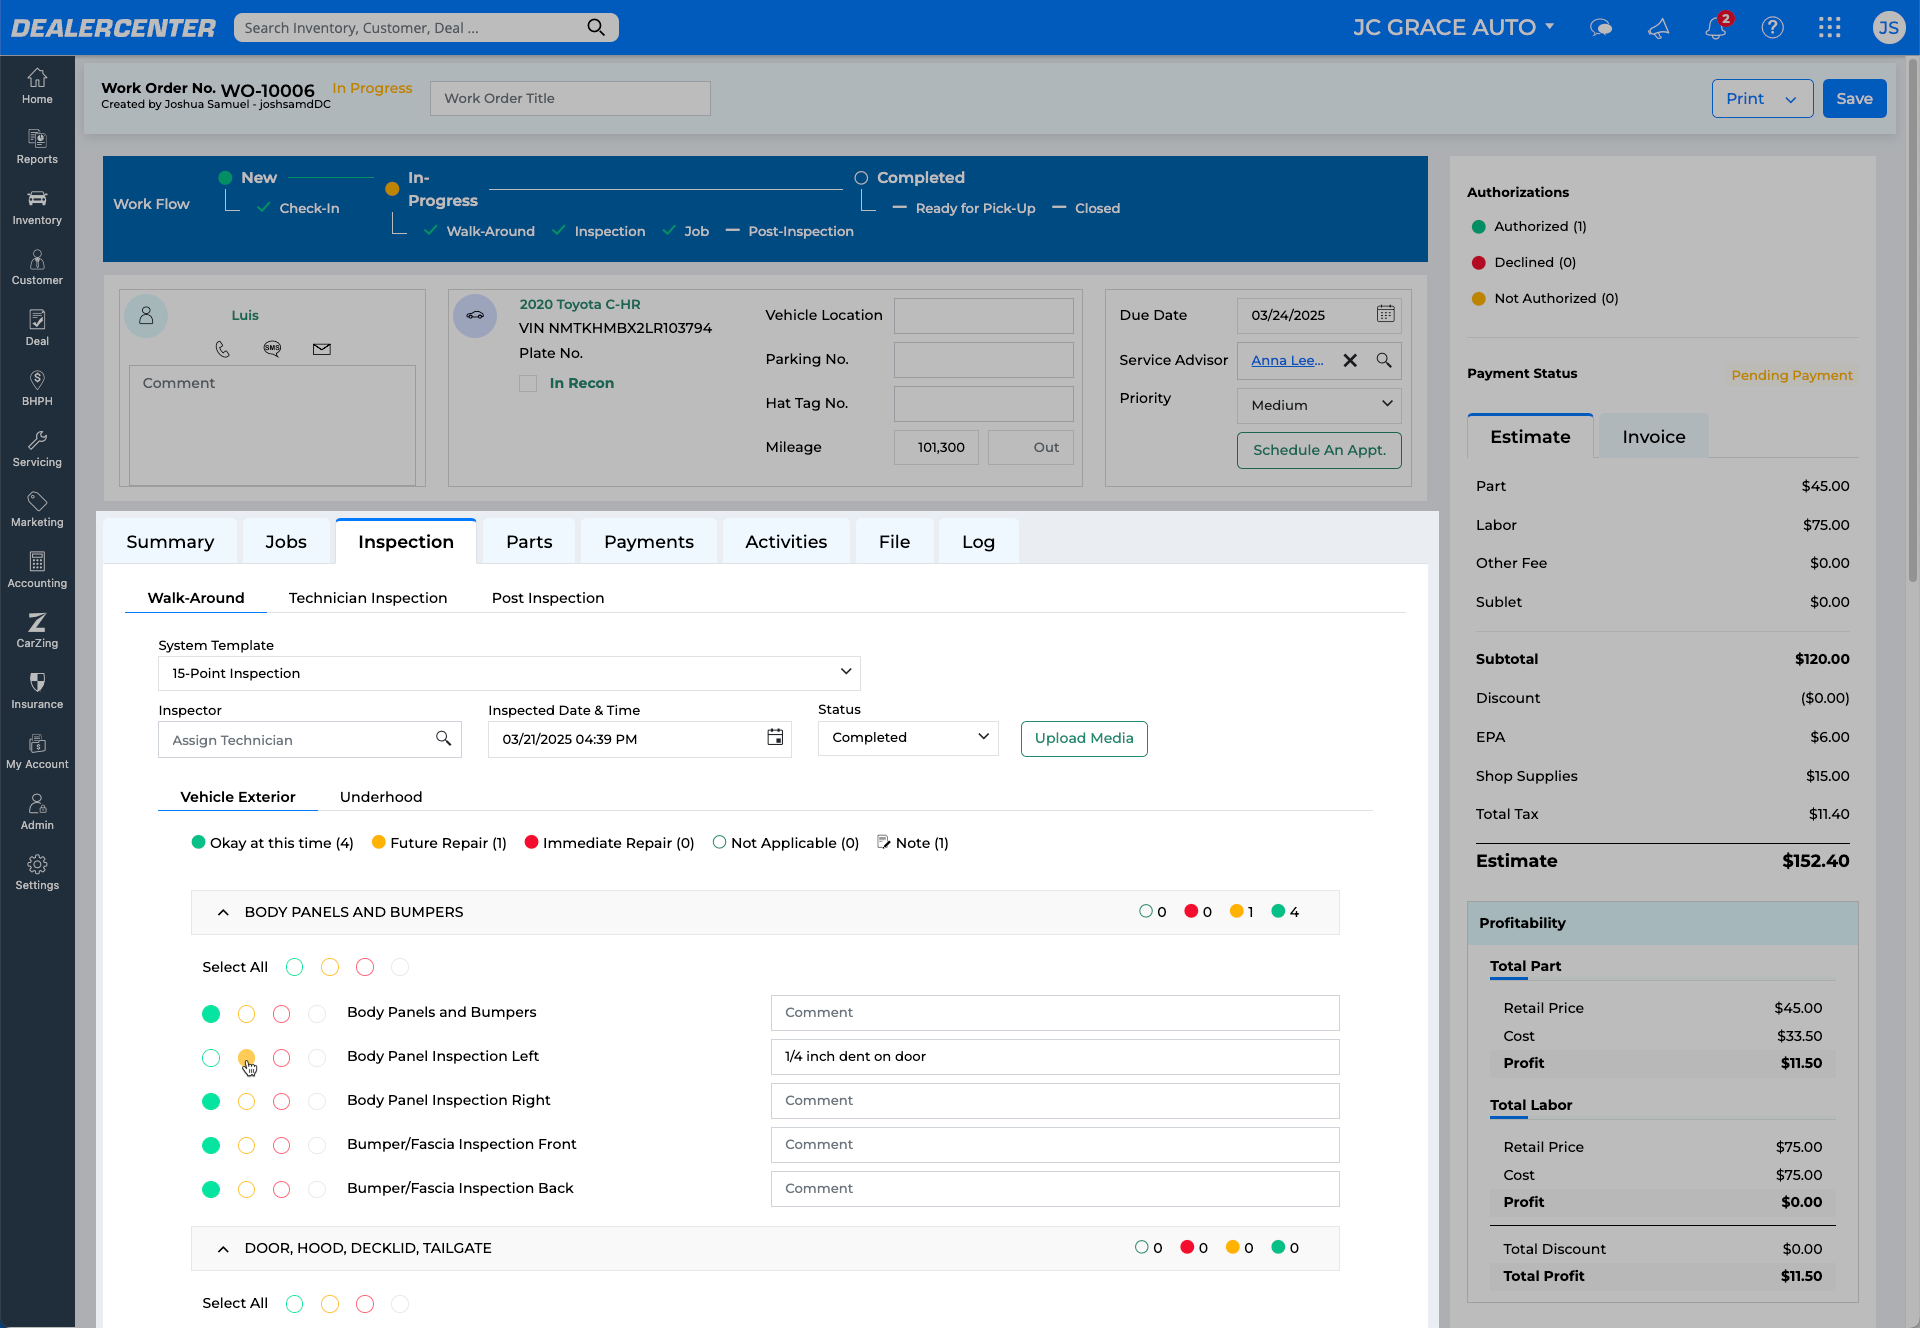
Inspection templates appear directly within the work order. For each inspection type—Walk-Around, Technician Inspection, and Post-Inspection—team members can choose which custom template to use.
- Under Inspection Templates, click Current Templates to open into Template page.
- Under Inspection Templates, click New Template.
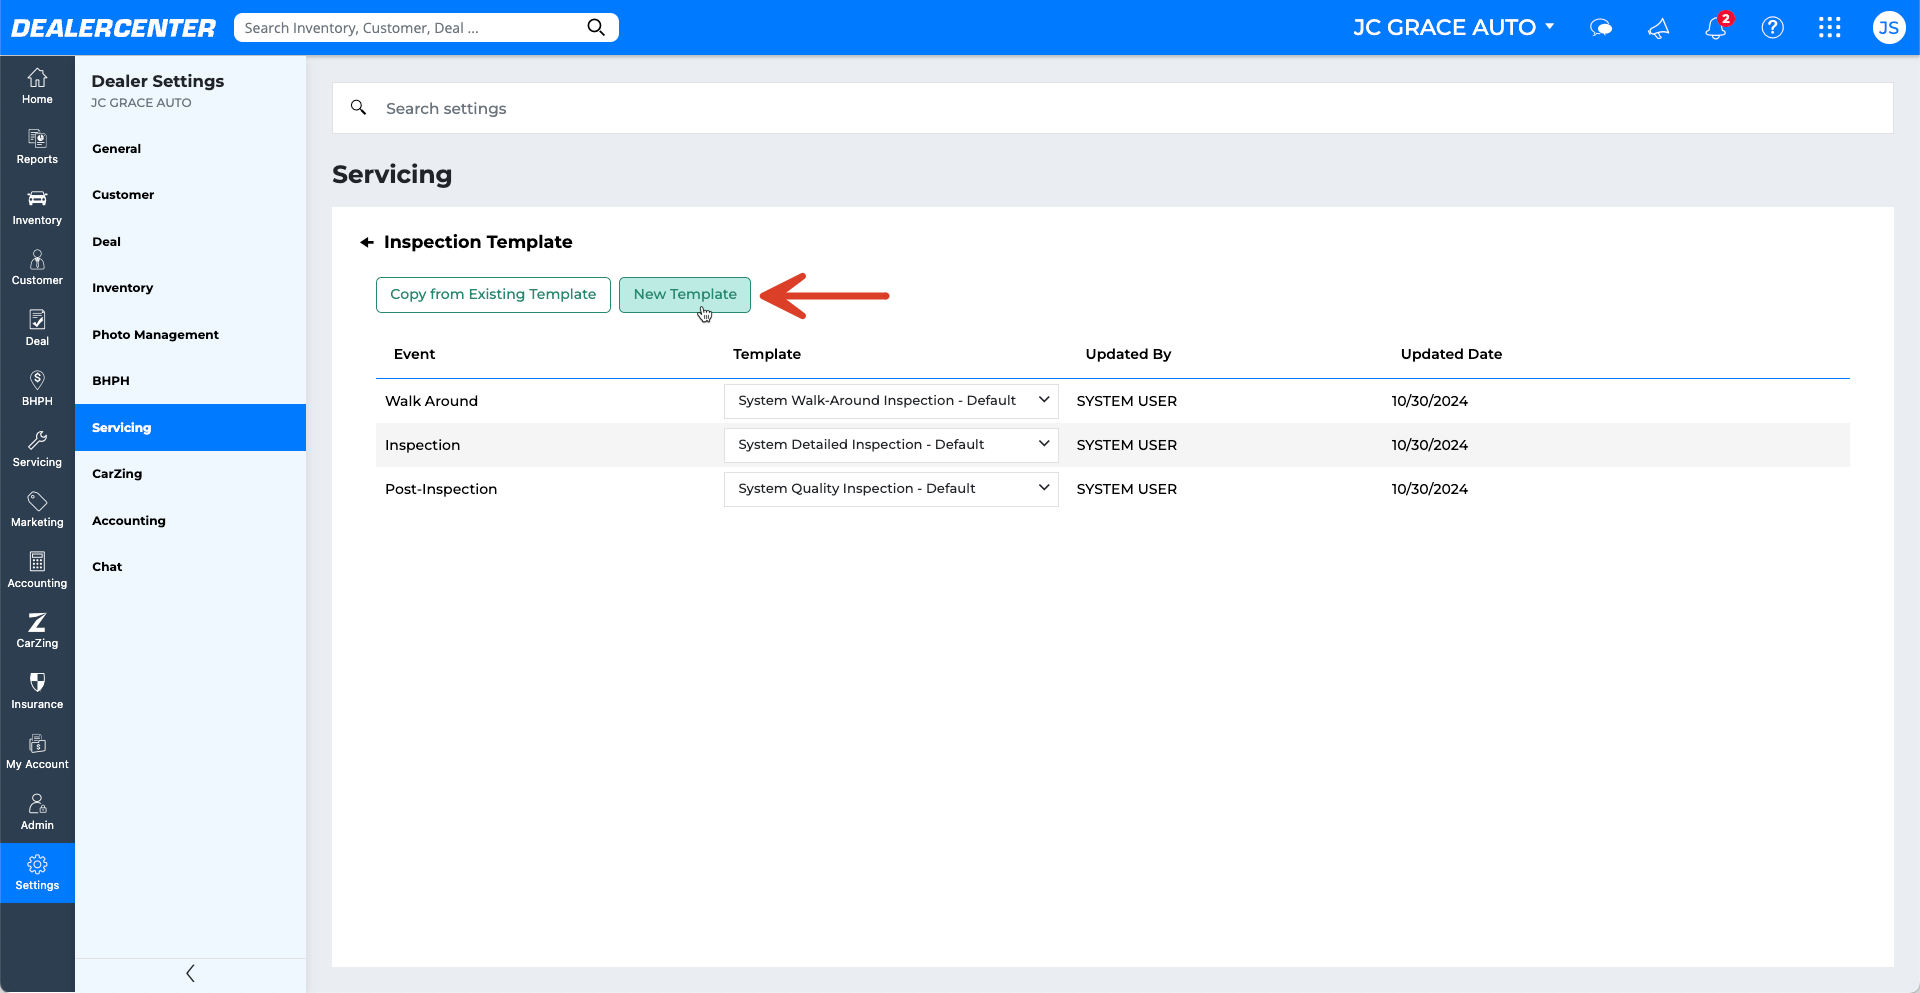
- Select a template type: Walk-Around, Technician Inspection, or Post Inspection.
- Choose checklist items from inspection categories and subcategories—for example, checklist items related to Body Panels and Bumpers under the Vehicle Exterior category.
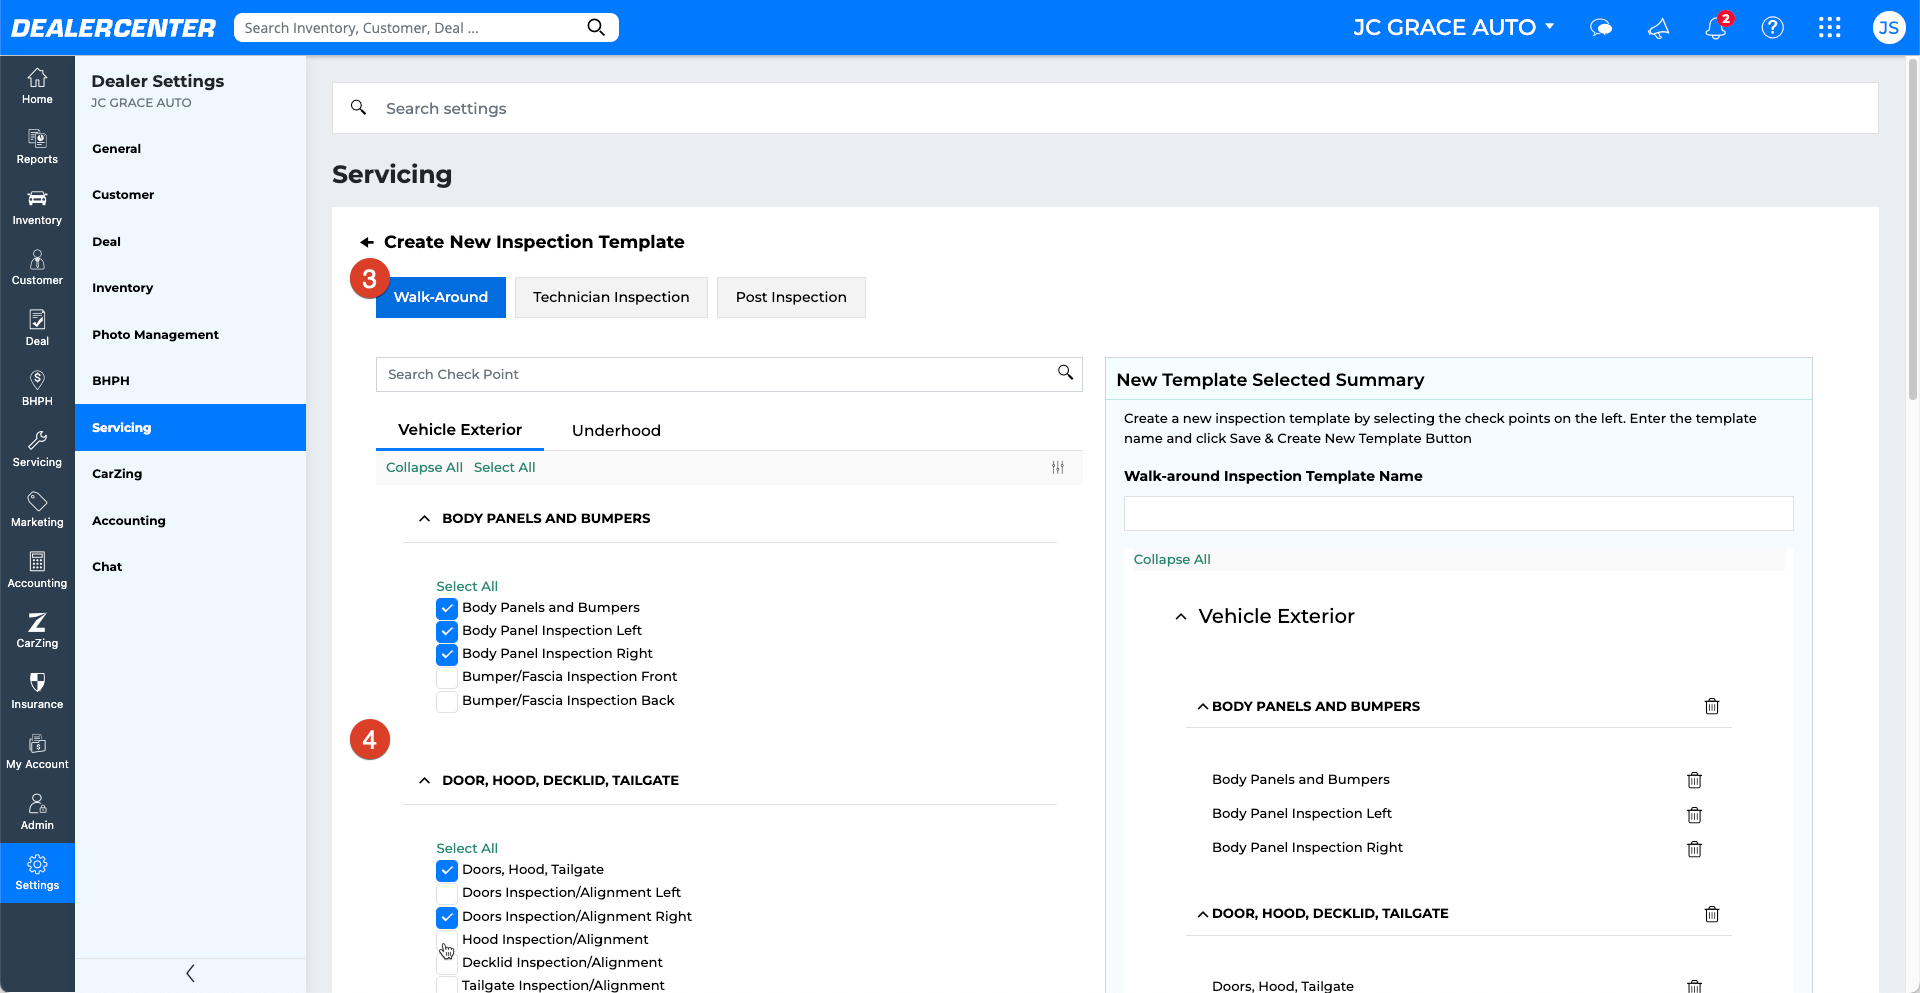
- Give your template a name.
- Click Save & Create New Template.
- After creating a custom inspection template, you can choose which template to use as the default for each inspection type.

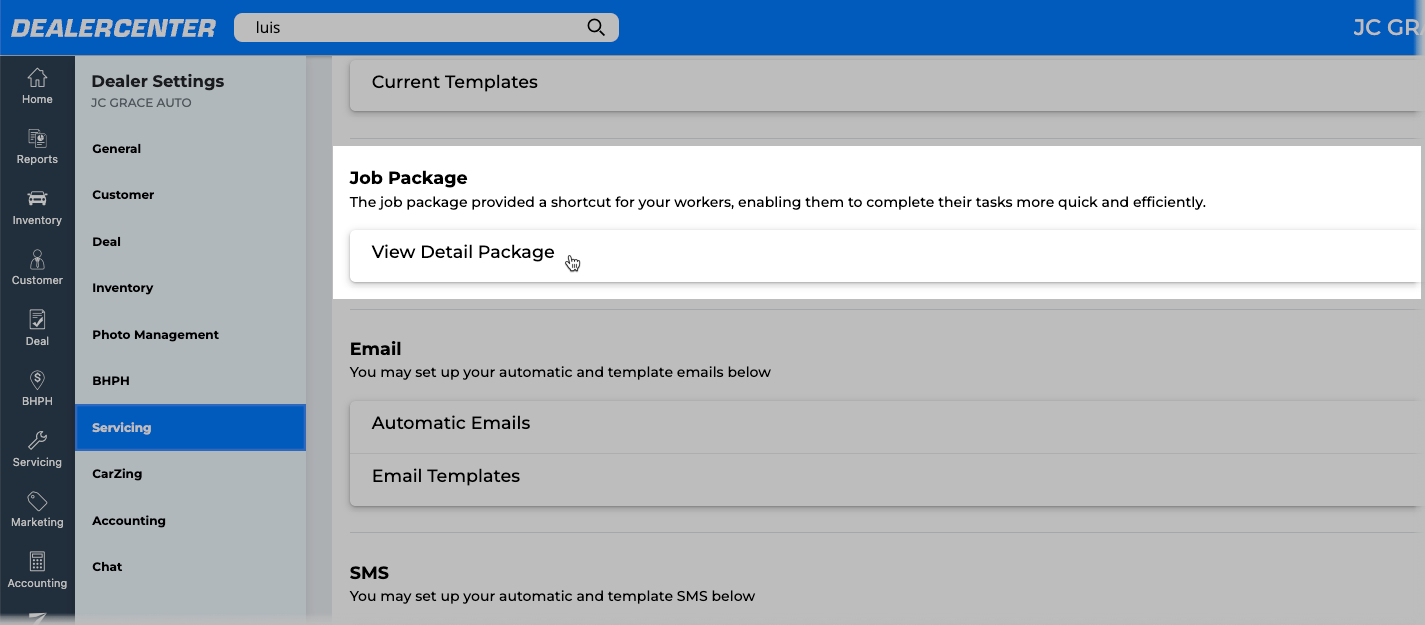
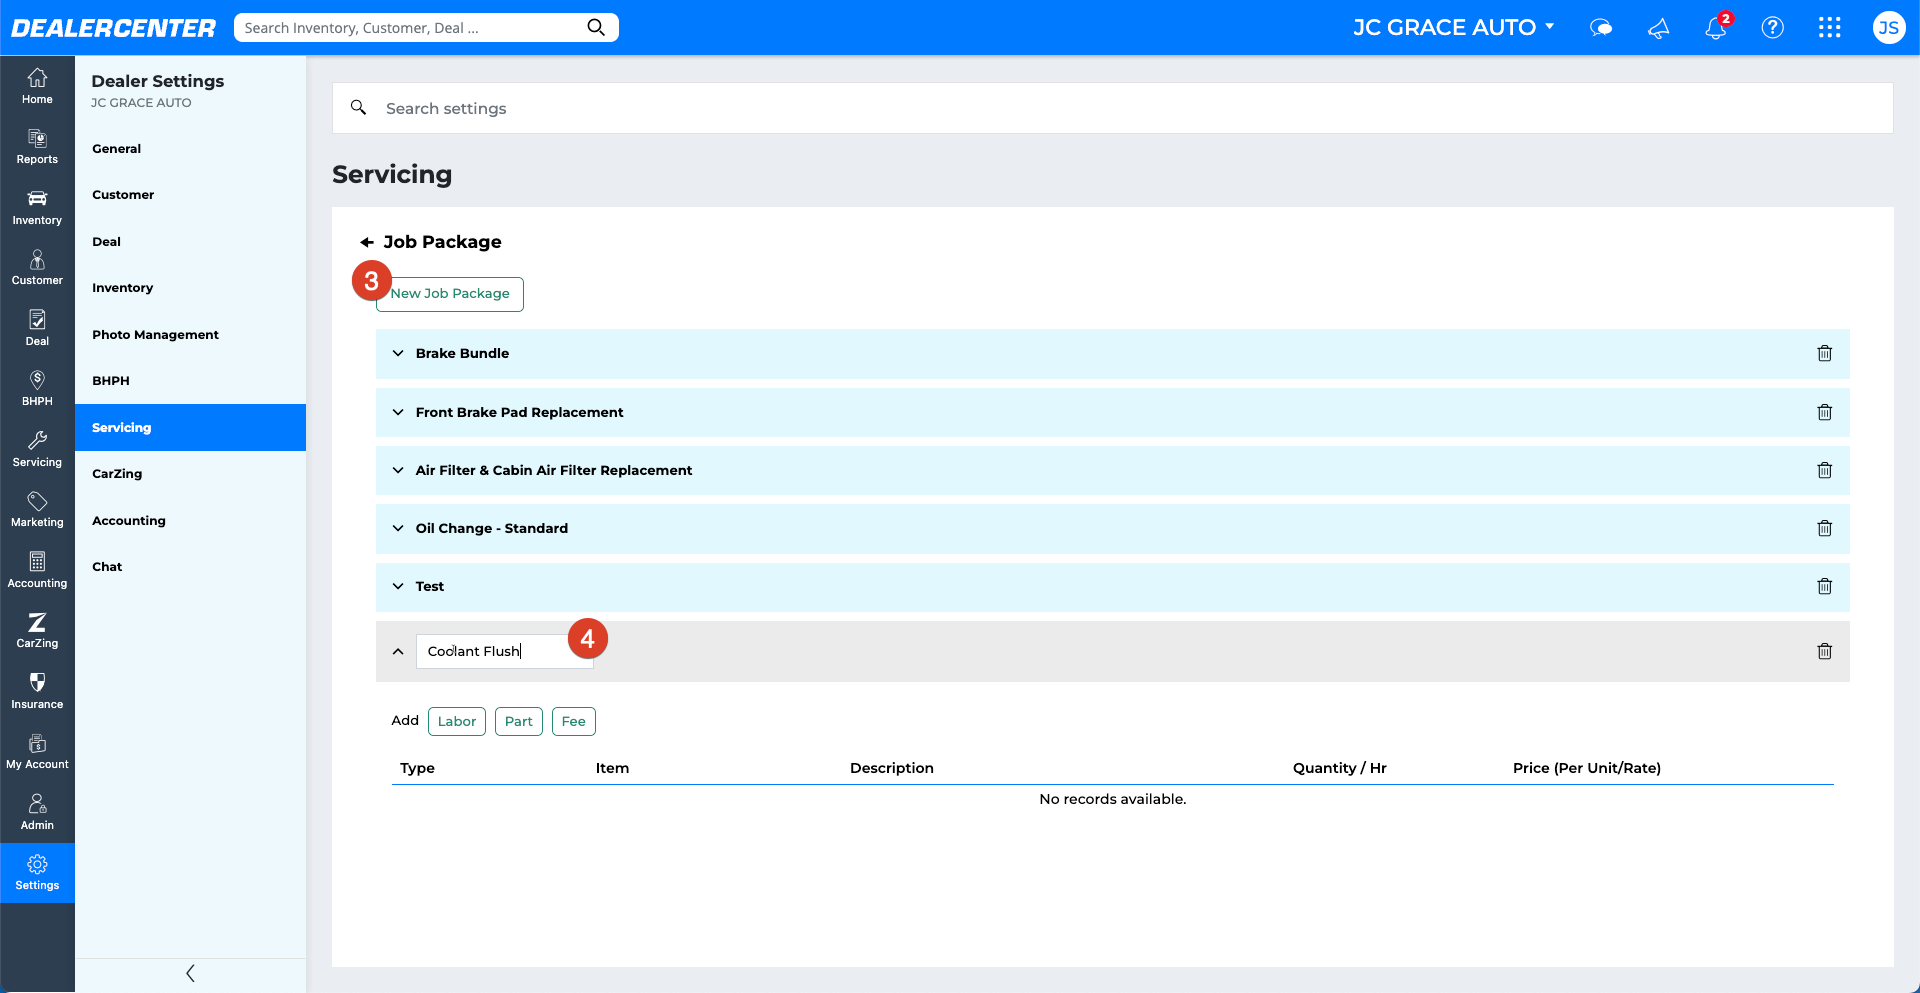
Job Packages
Job Packages let you group common labor and parts into reusable bundles:
- Under Job Packages, click View Detail Package.
- On the Job Packages page click on any pre-existing Package to expand and edit.
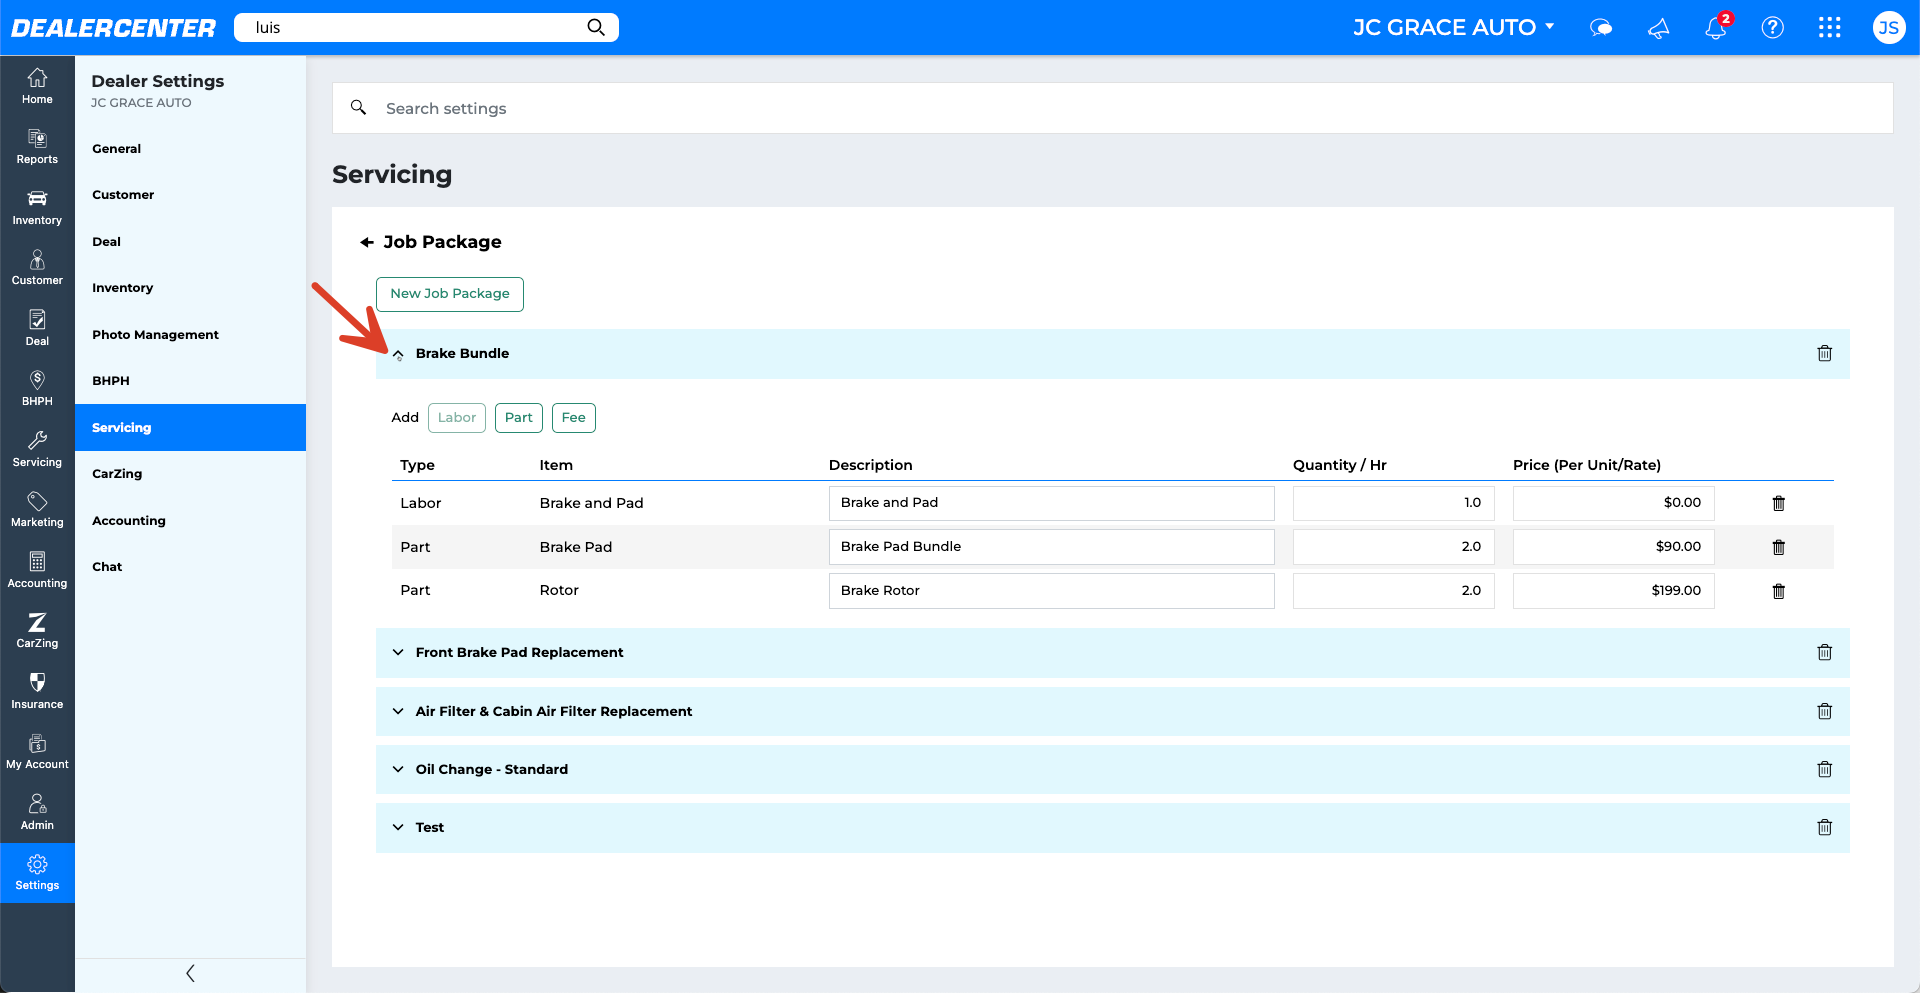
- To create a new Job Package click New Job Package.
- Enter a name for the job package (e.g., “Brake Job”).
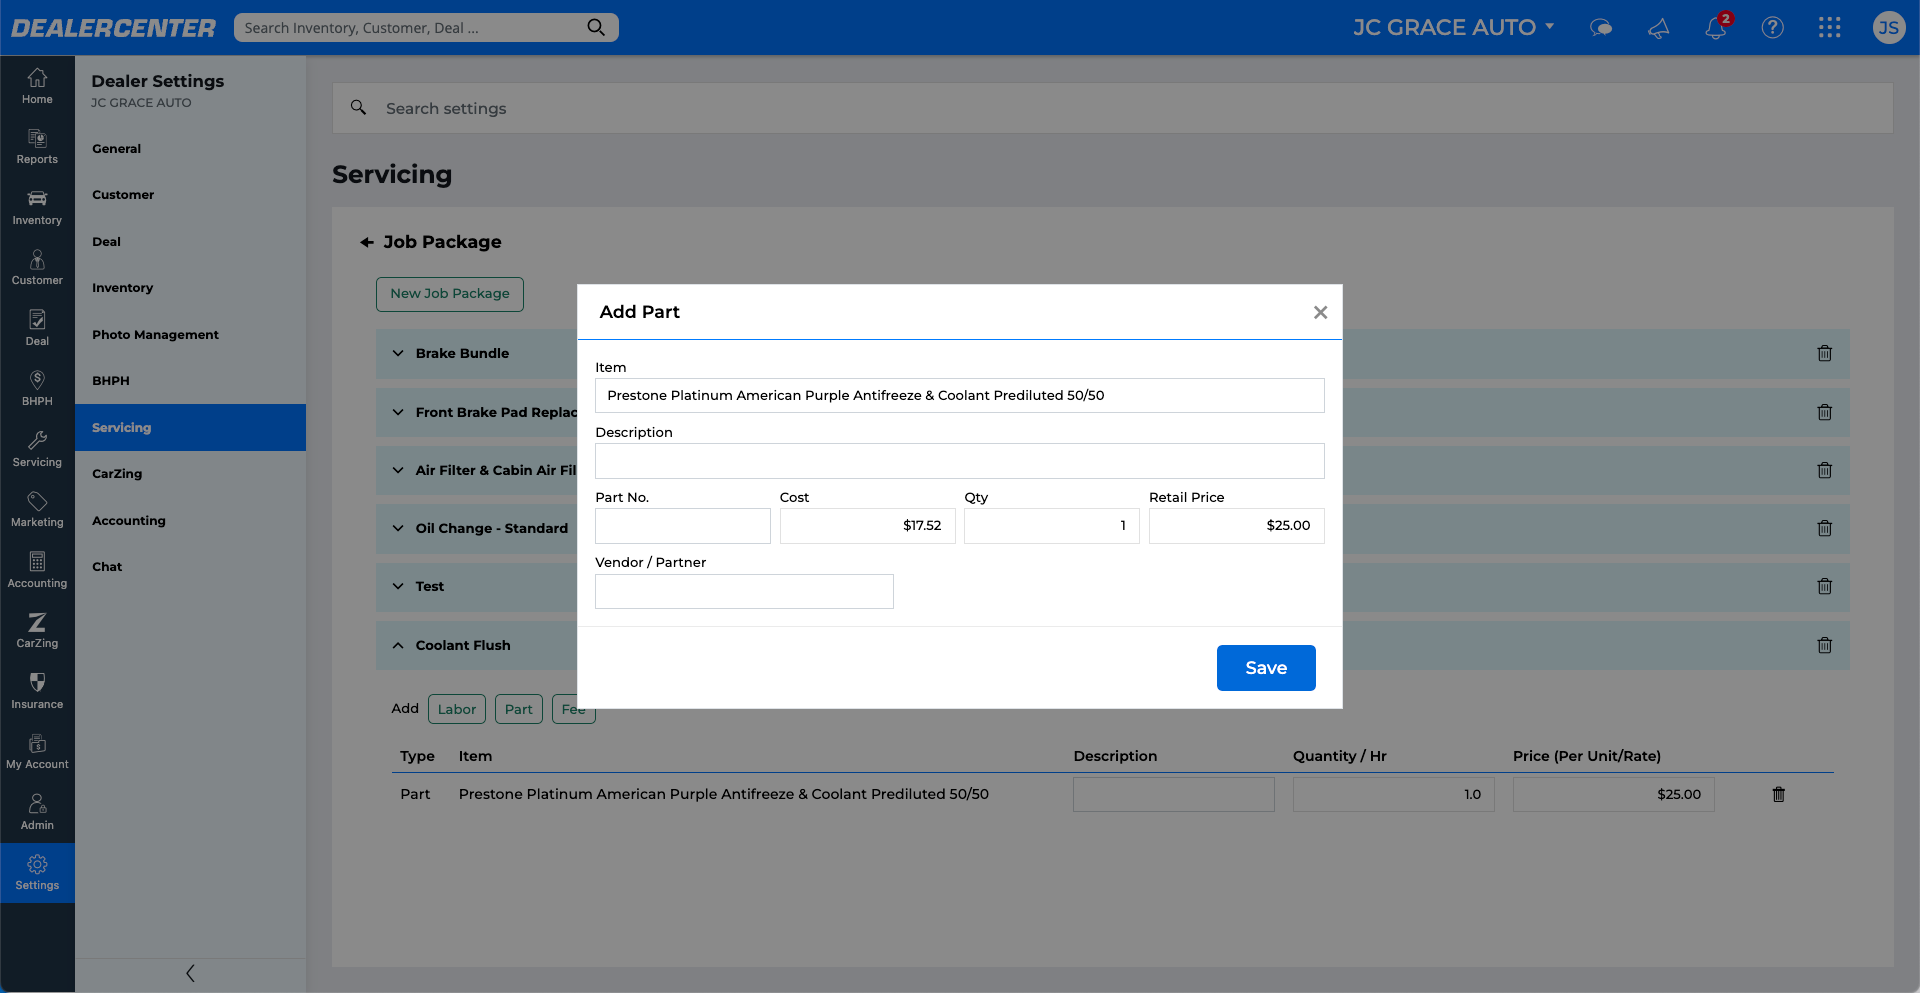
- Click Part to add part(s) and enter item name, part number, quantity, cost, vendor, and delivery date if applicable.
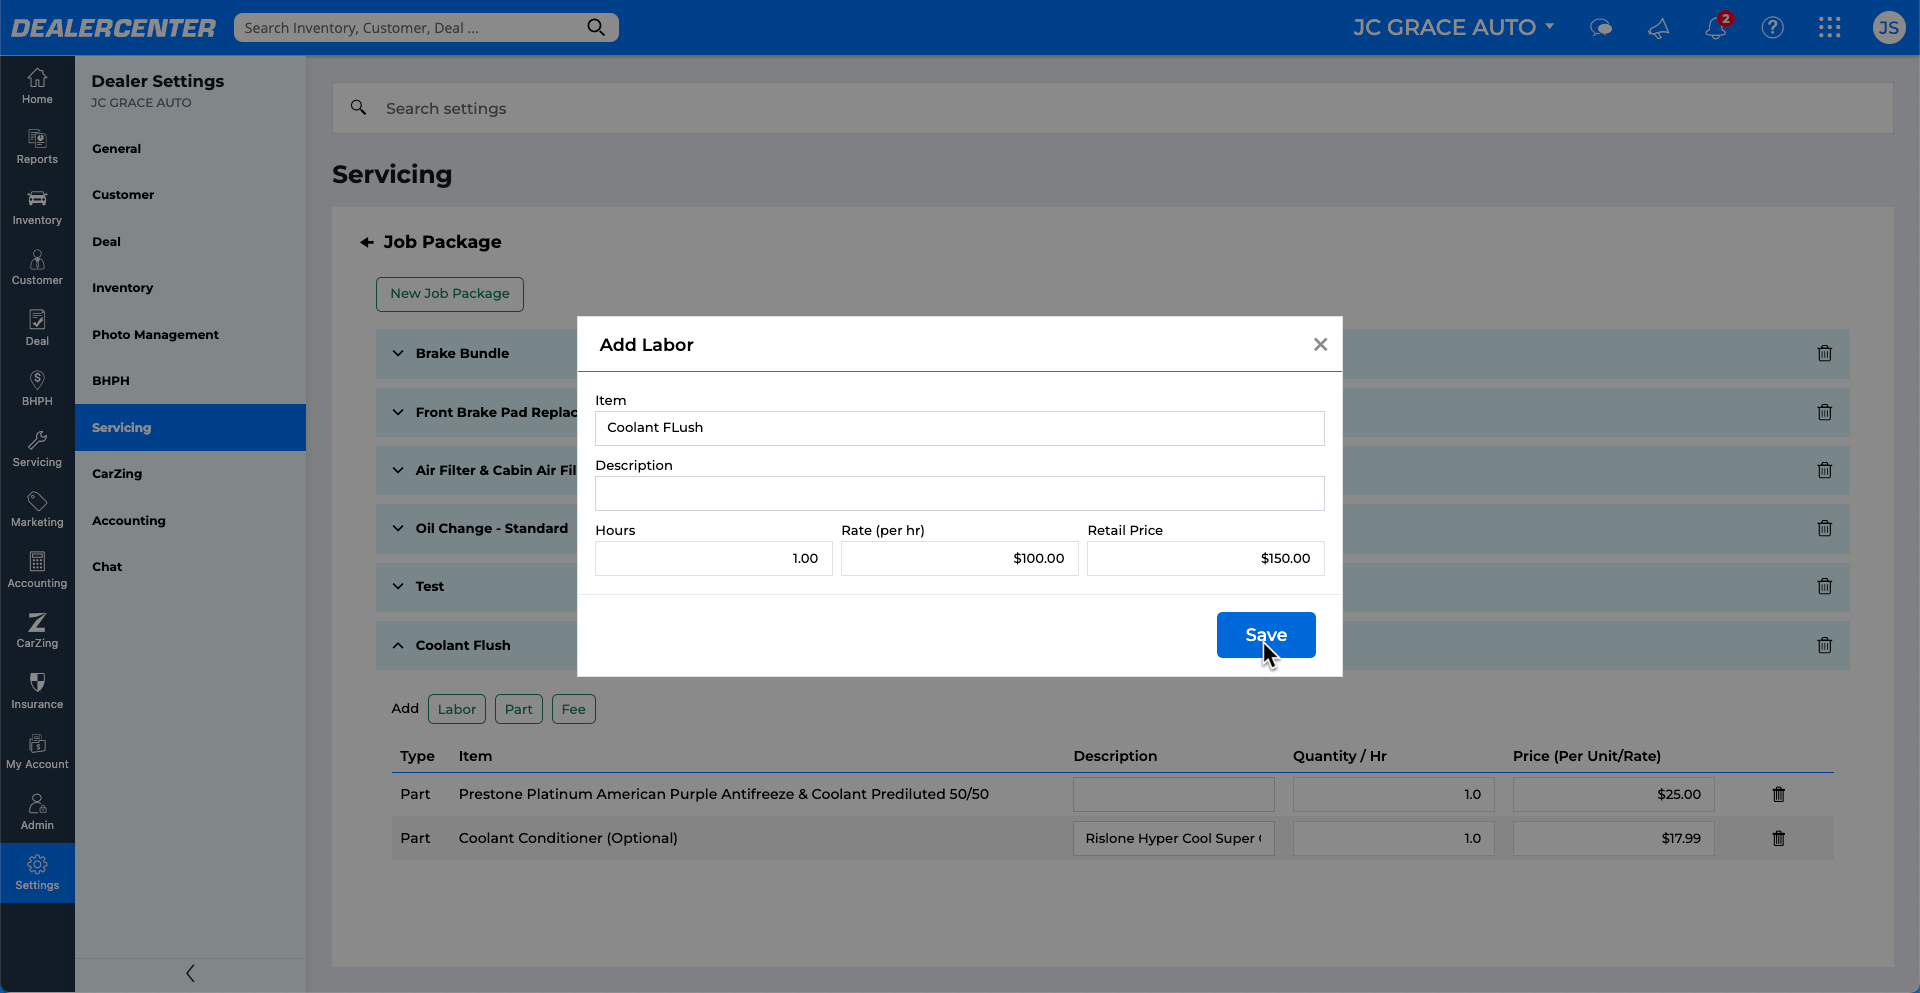
- Click Labor to add labor details like hours and rate.
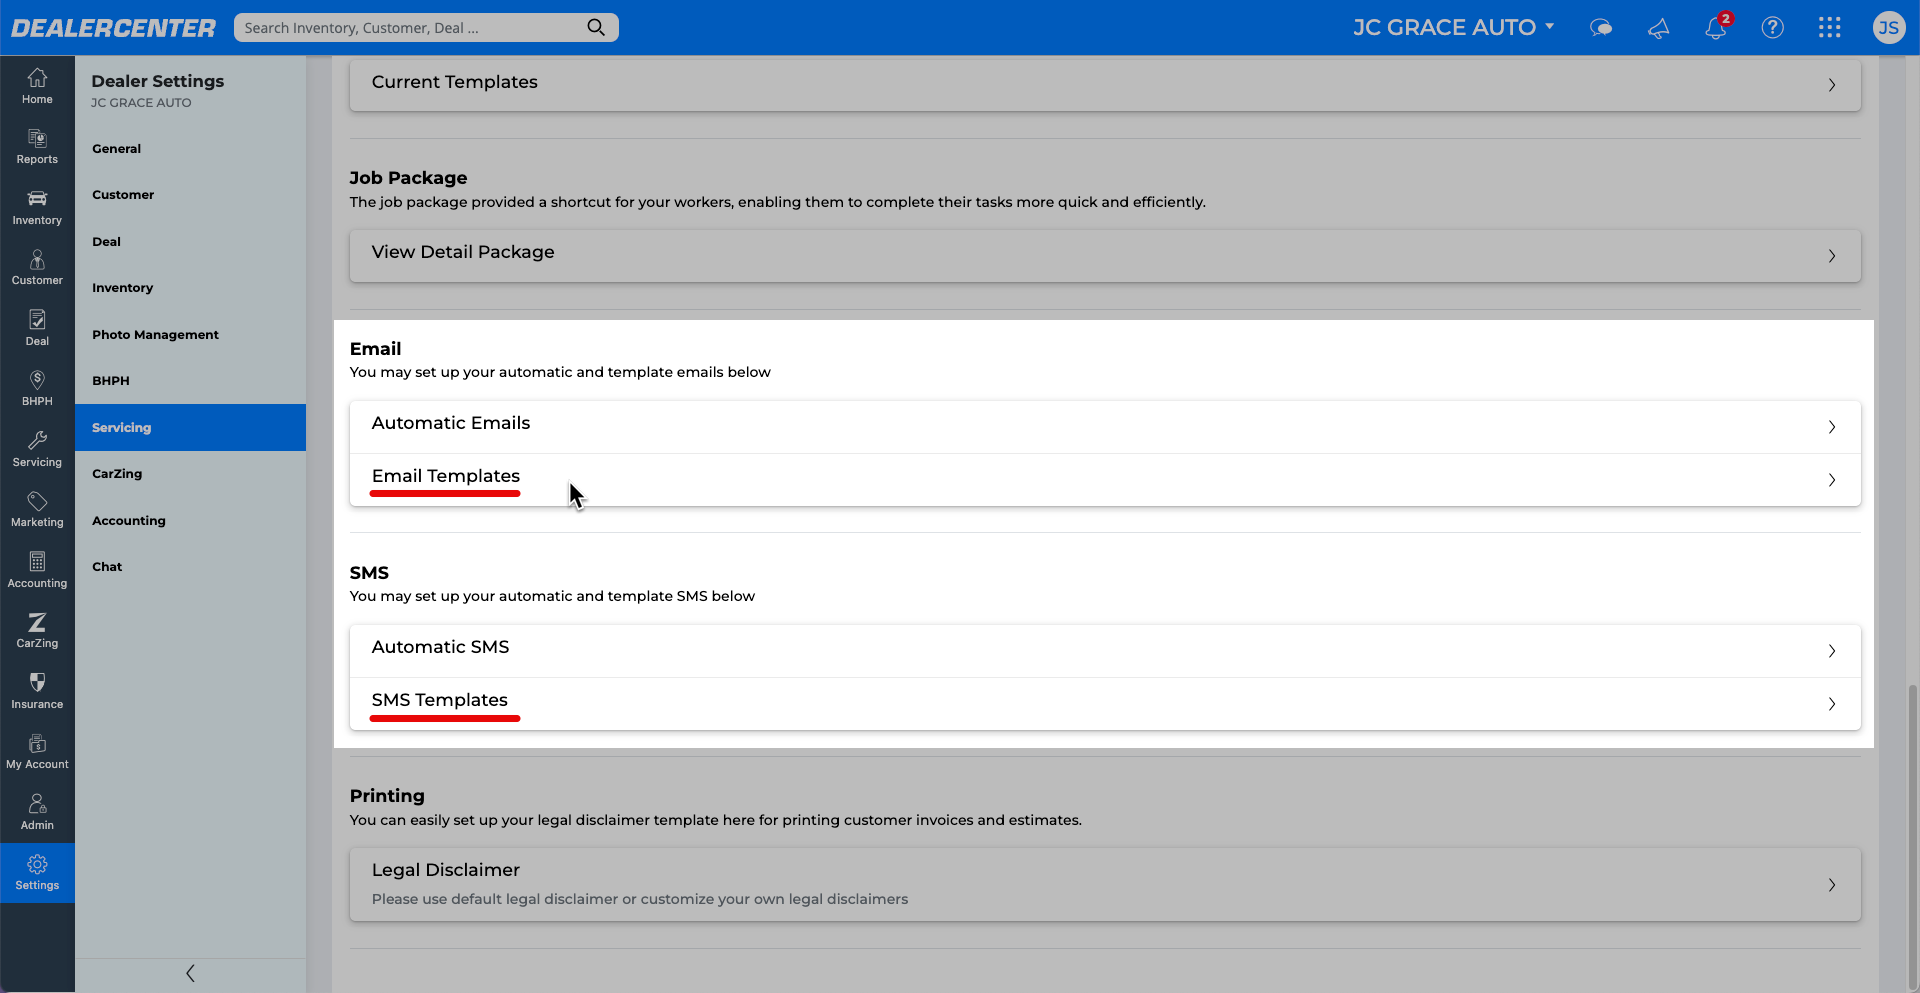
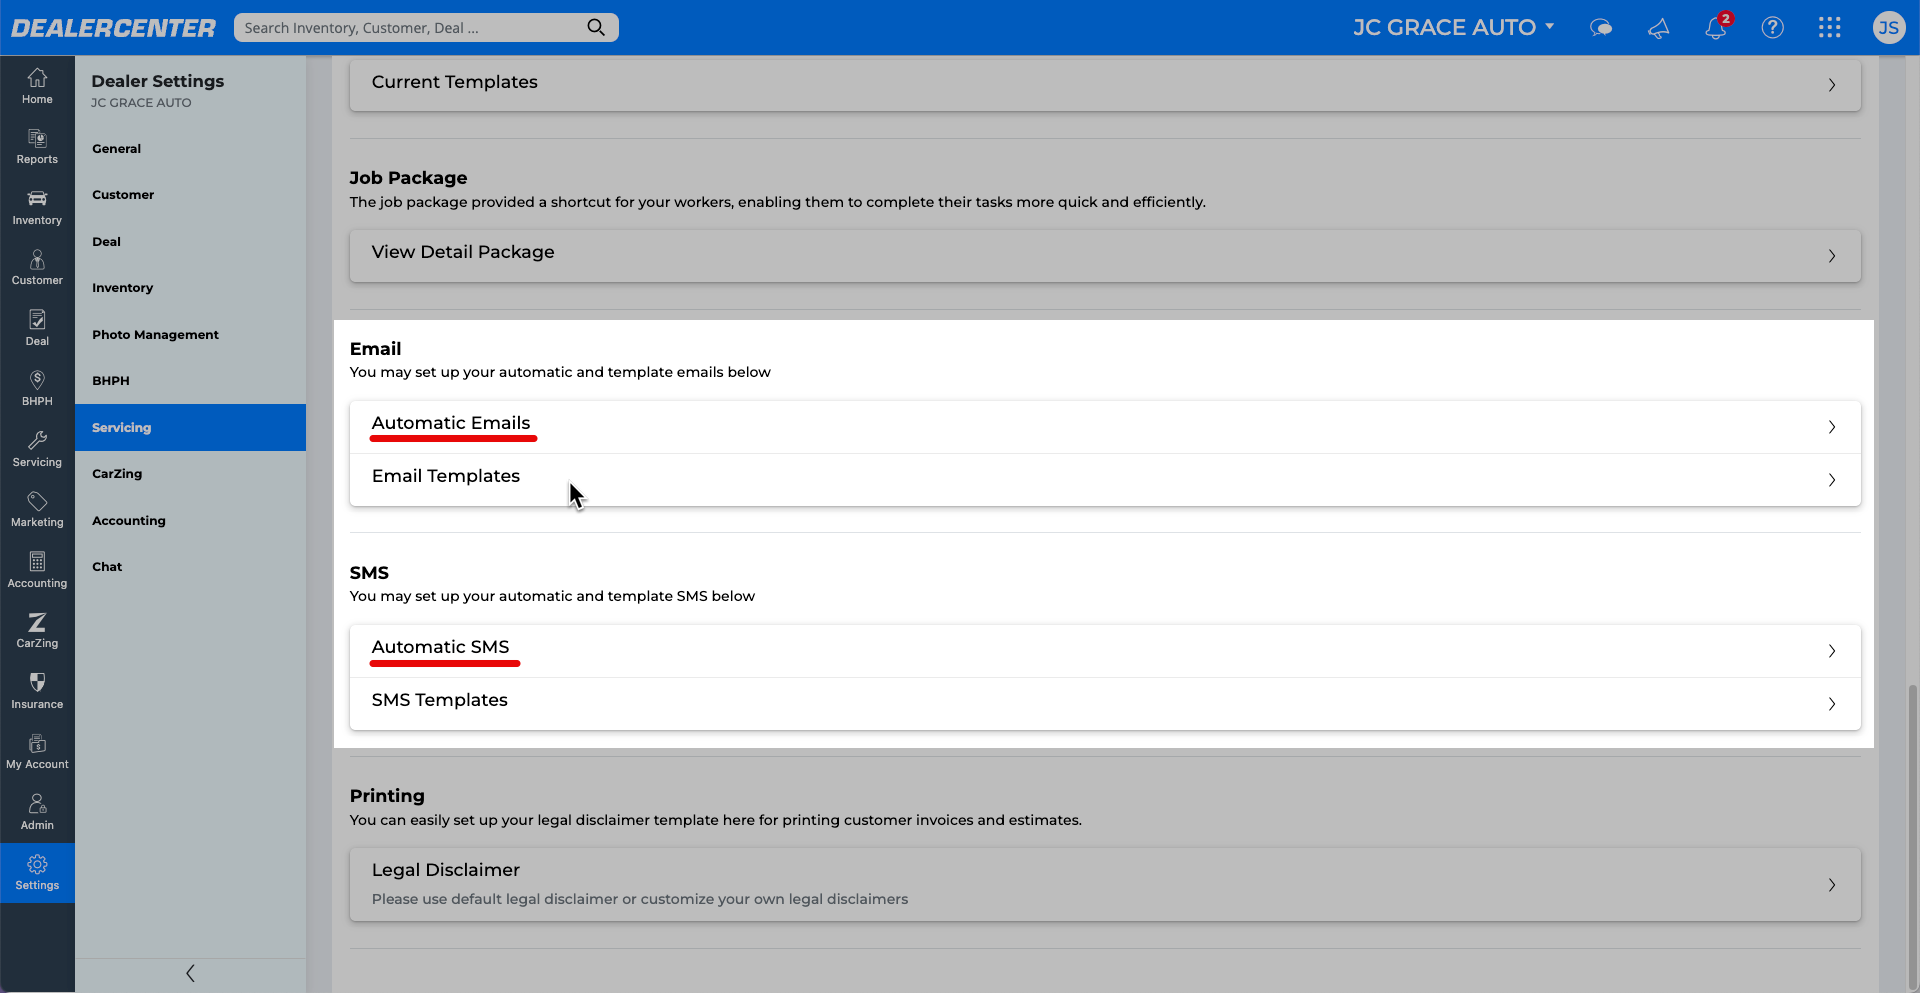
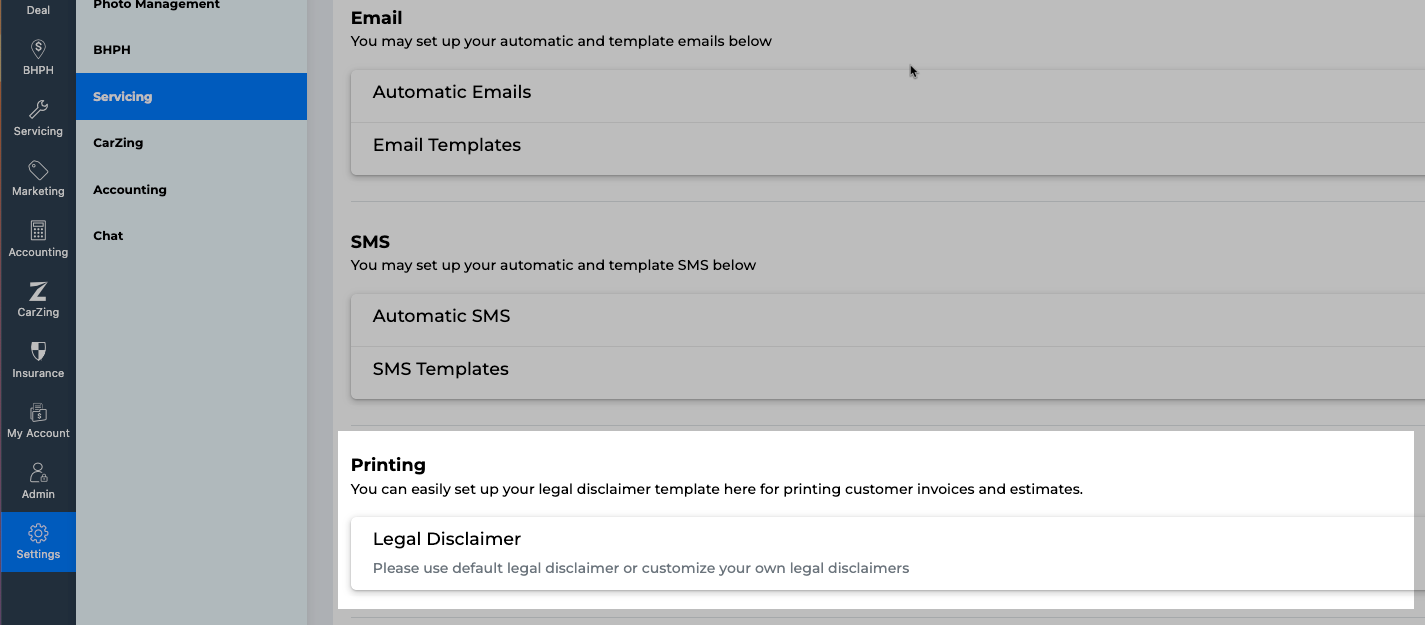
Emails and SMS Templates
Create custom templates for service communications:
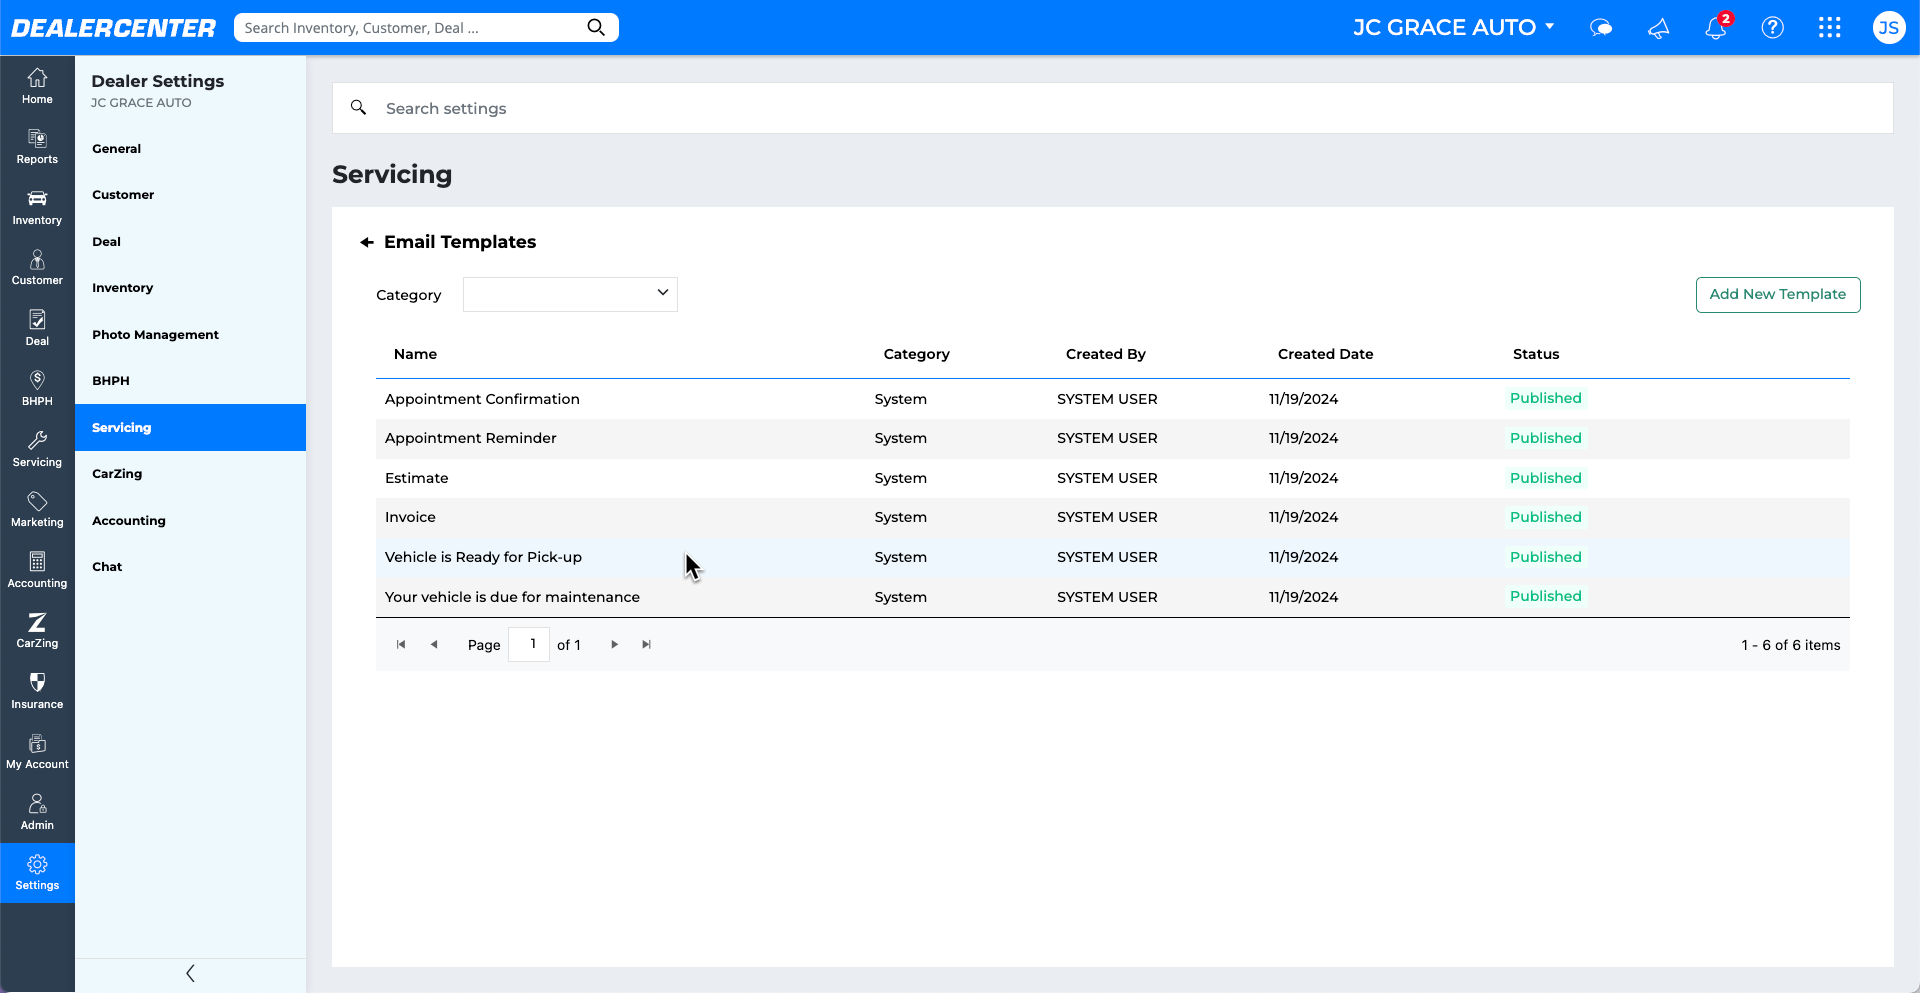
- In the Email Templates or SMS Templates section, review system templates.
- Click a template to preview and edit its contents.
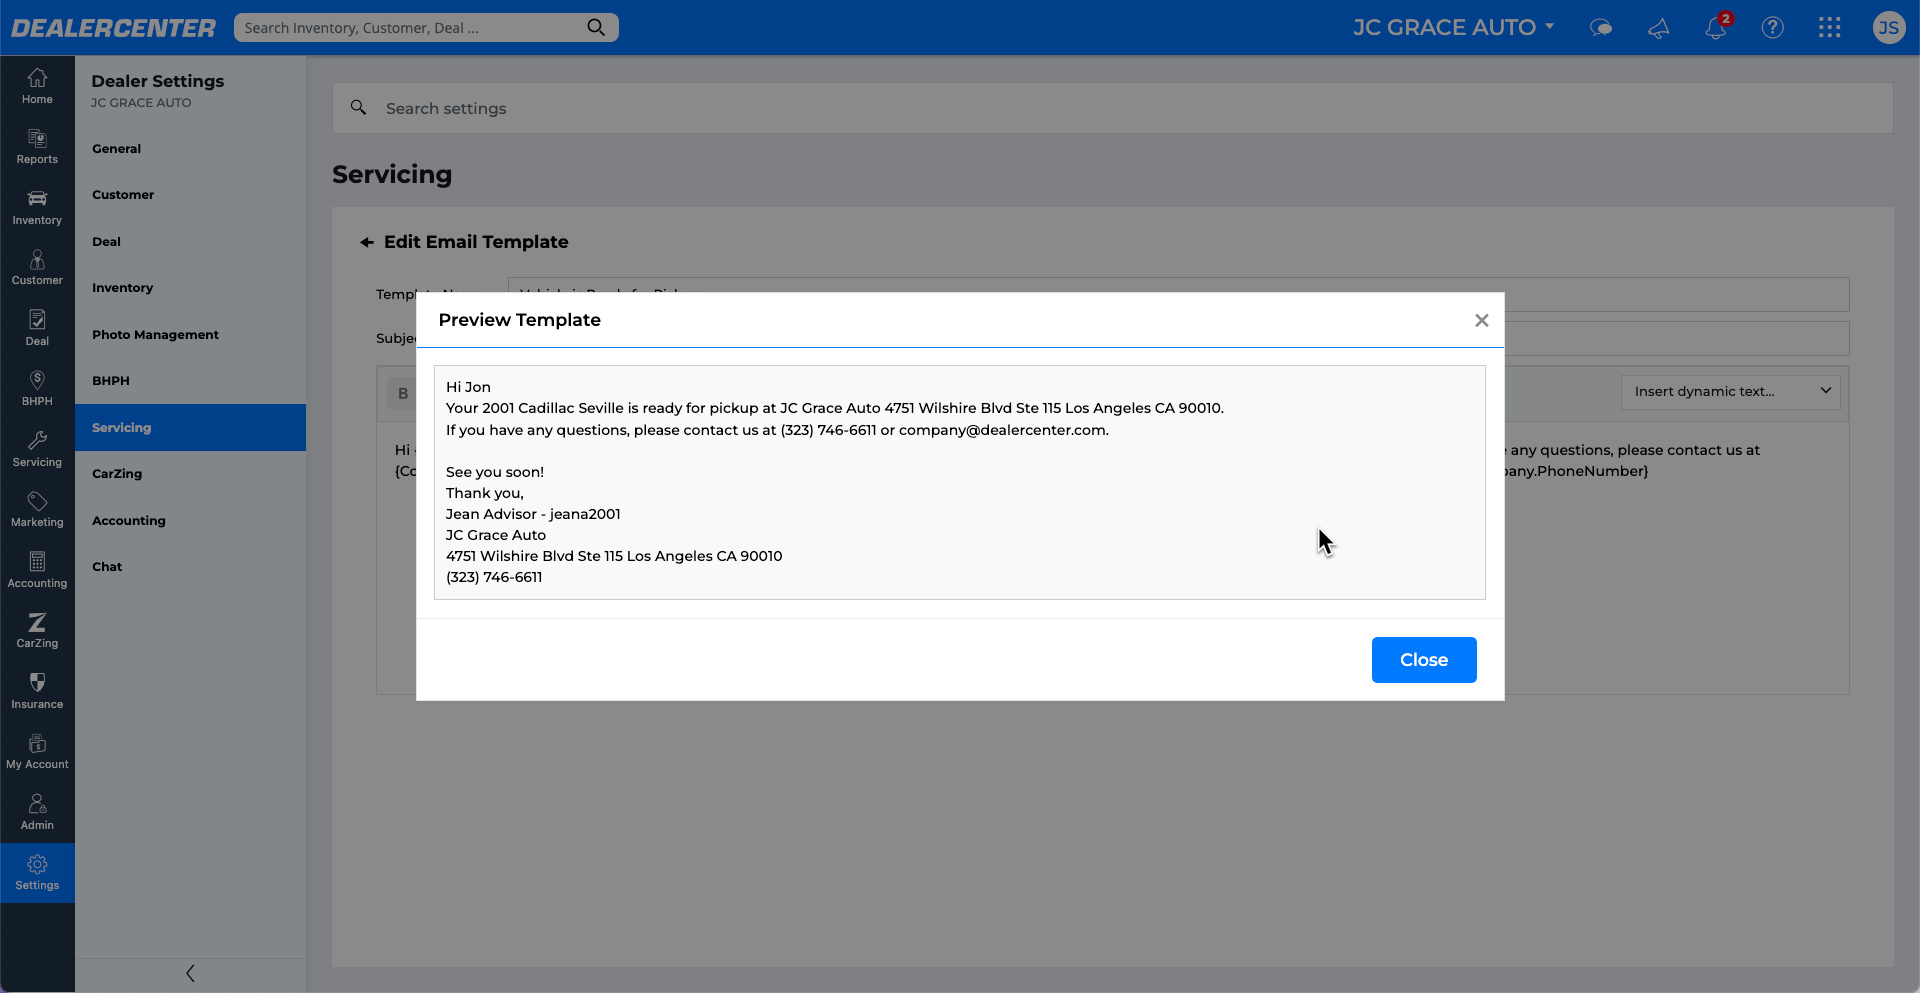
- You can use field tags to pull in dynamic info, like the customer's first name. Click Preview to see how the message will appear.
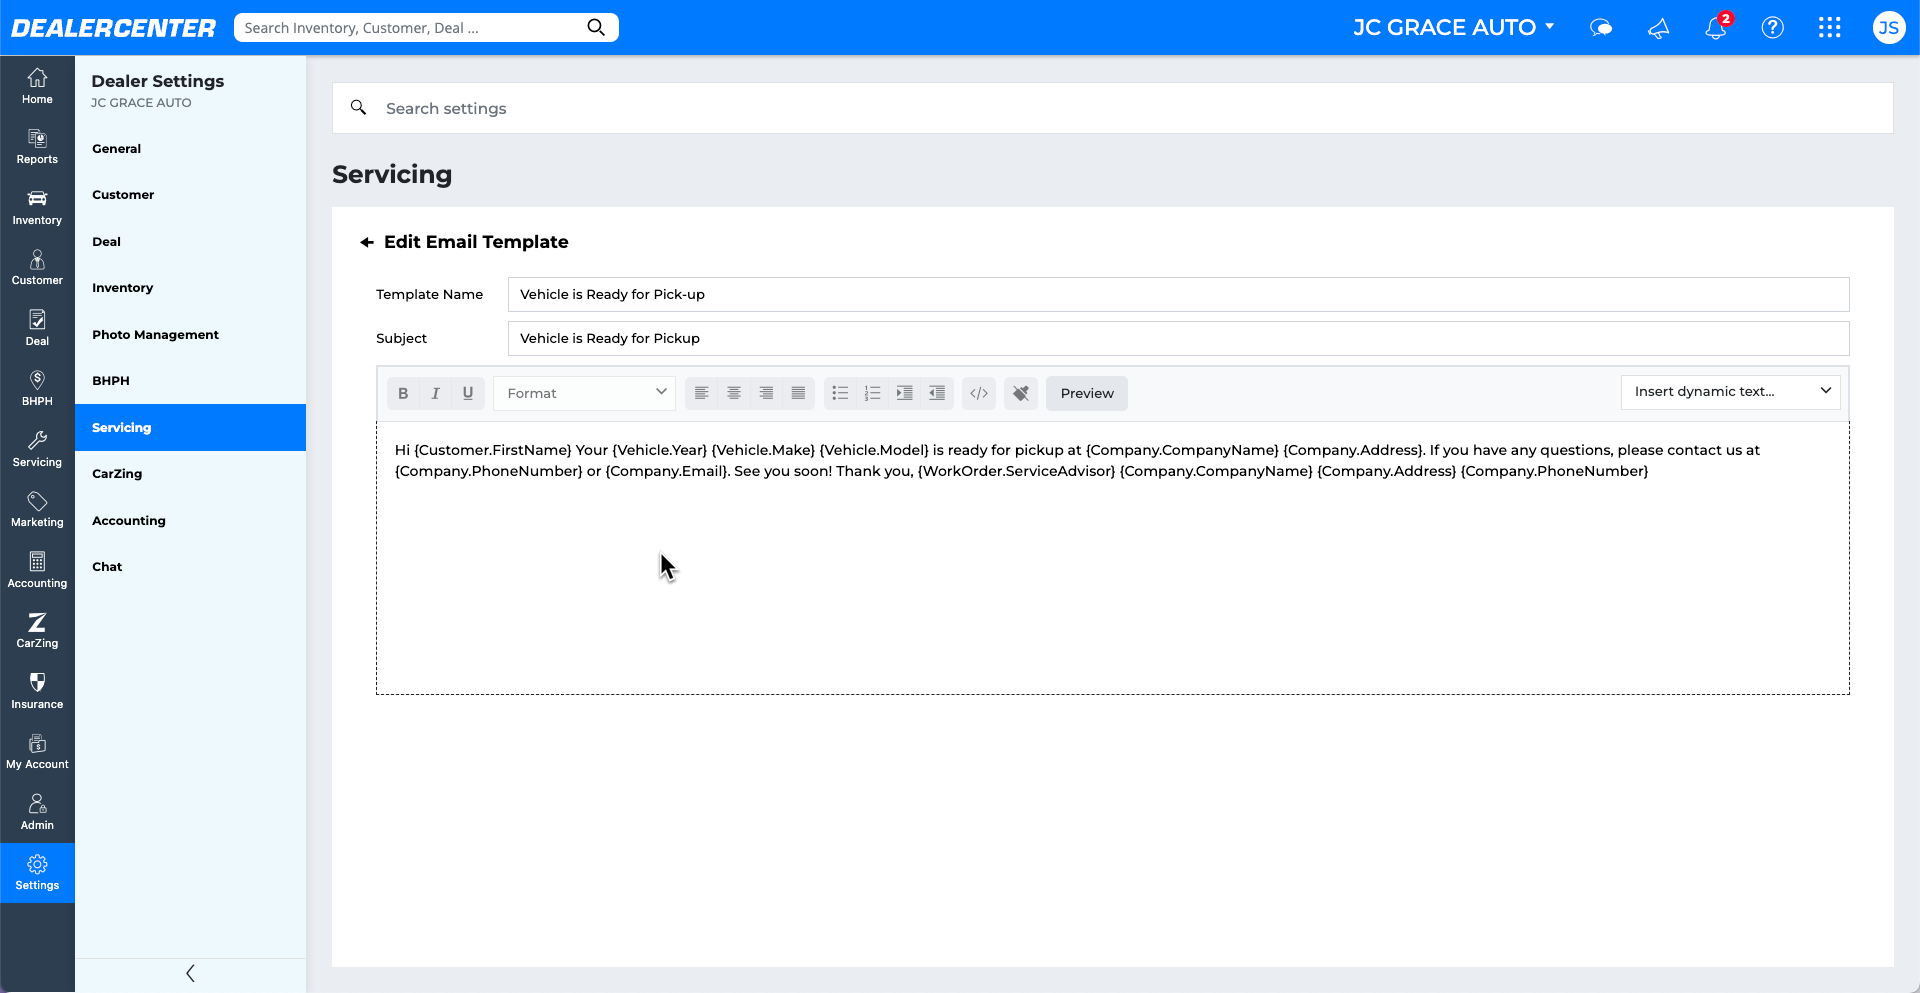
- To create a new message, click Add New Template, customize the content, then click Publish or Save as Draft.

Automated Emails and SMS
Emails and texts can be set up to send automatically based on specific triggers, like appointment times or work order status changes. For example, when a work order moves into the Ready for Pick-up status, a text can be sent to the customer.
- In the Email or SMS section, choose Automate Emails or Automate SMS
- Click the dropdown in the Email or SMS sections to assign default templates to specific service events (e.g., “Appointment Reminder”, “Vehicle Ready for Pick-up”).
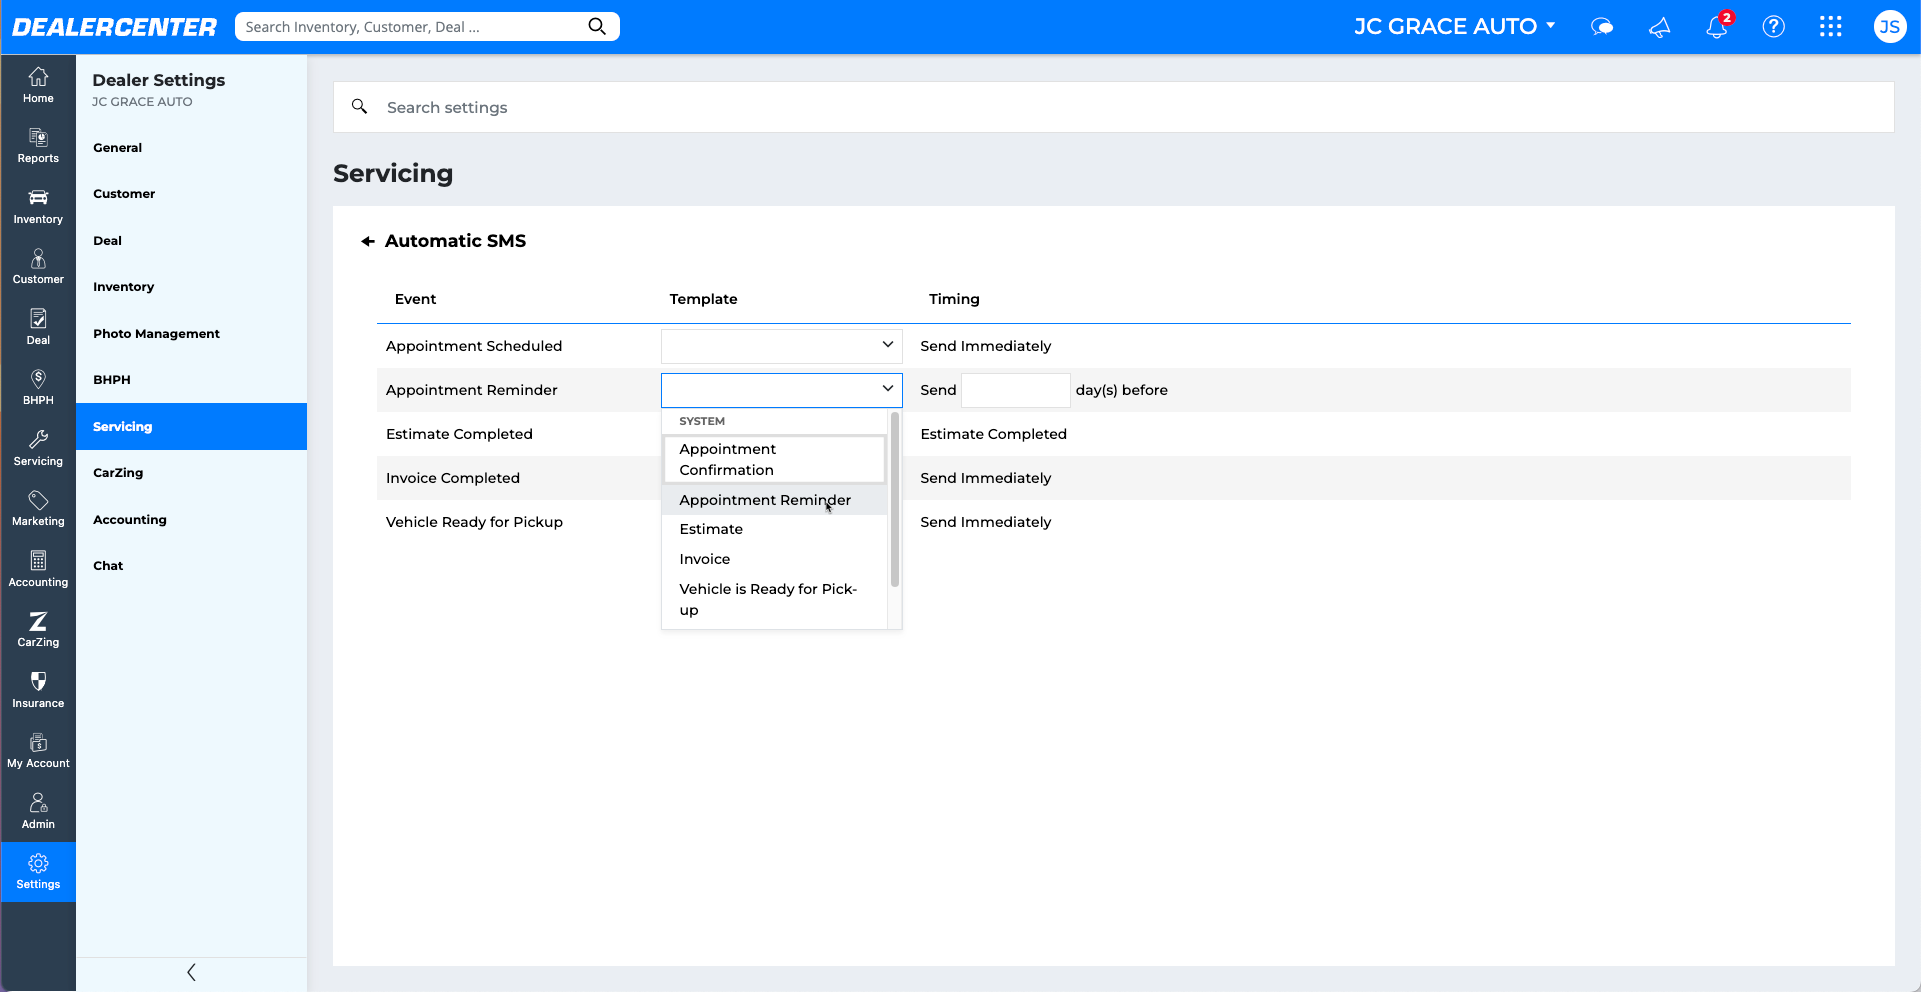
- Templates will automatically send when the trigger condition is met, but you can always send messages manually if needed.
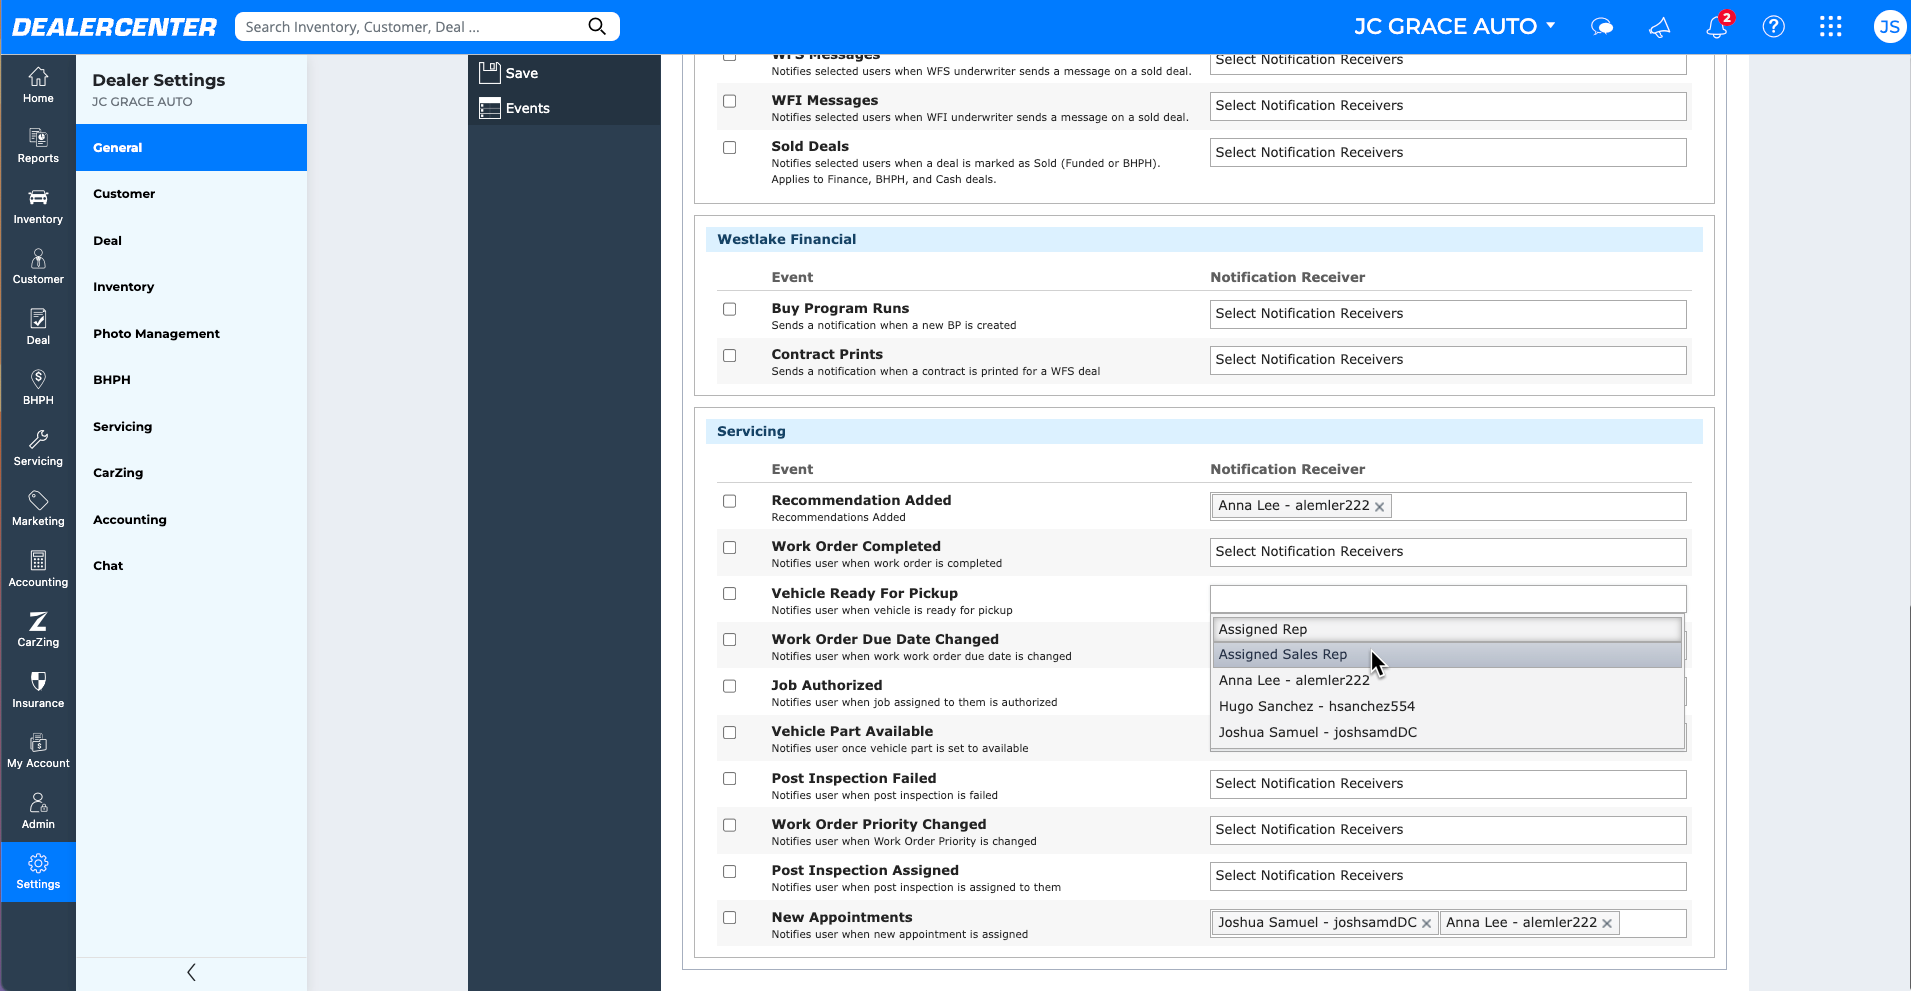
Notifications
Set who should receive alerts for servicing-related events:
- Go to Settings, select General, then open the Notifications tab.
- Scroll to the Servicing section.
- Check the box next to each event you want alerts for (e.g., New Appointment, Vehicle Ready for Pickup).
- Click Select Notification Receivers to assign users who will get alerts via desktop or mobile.
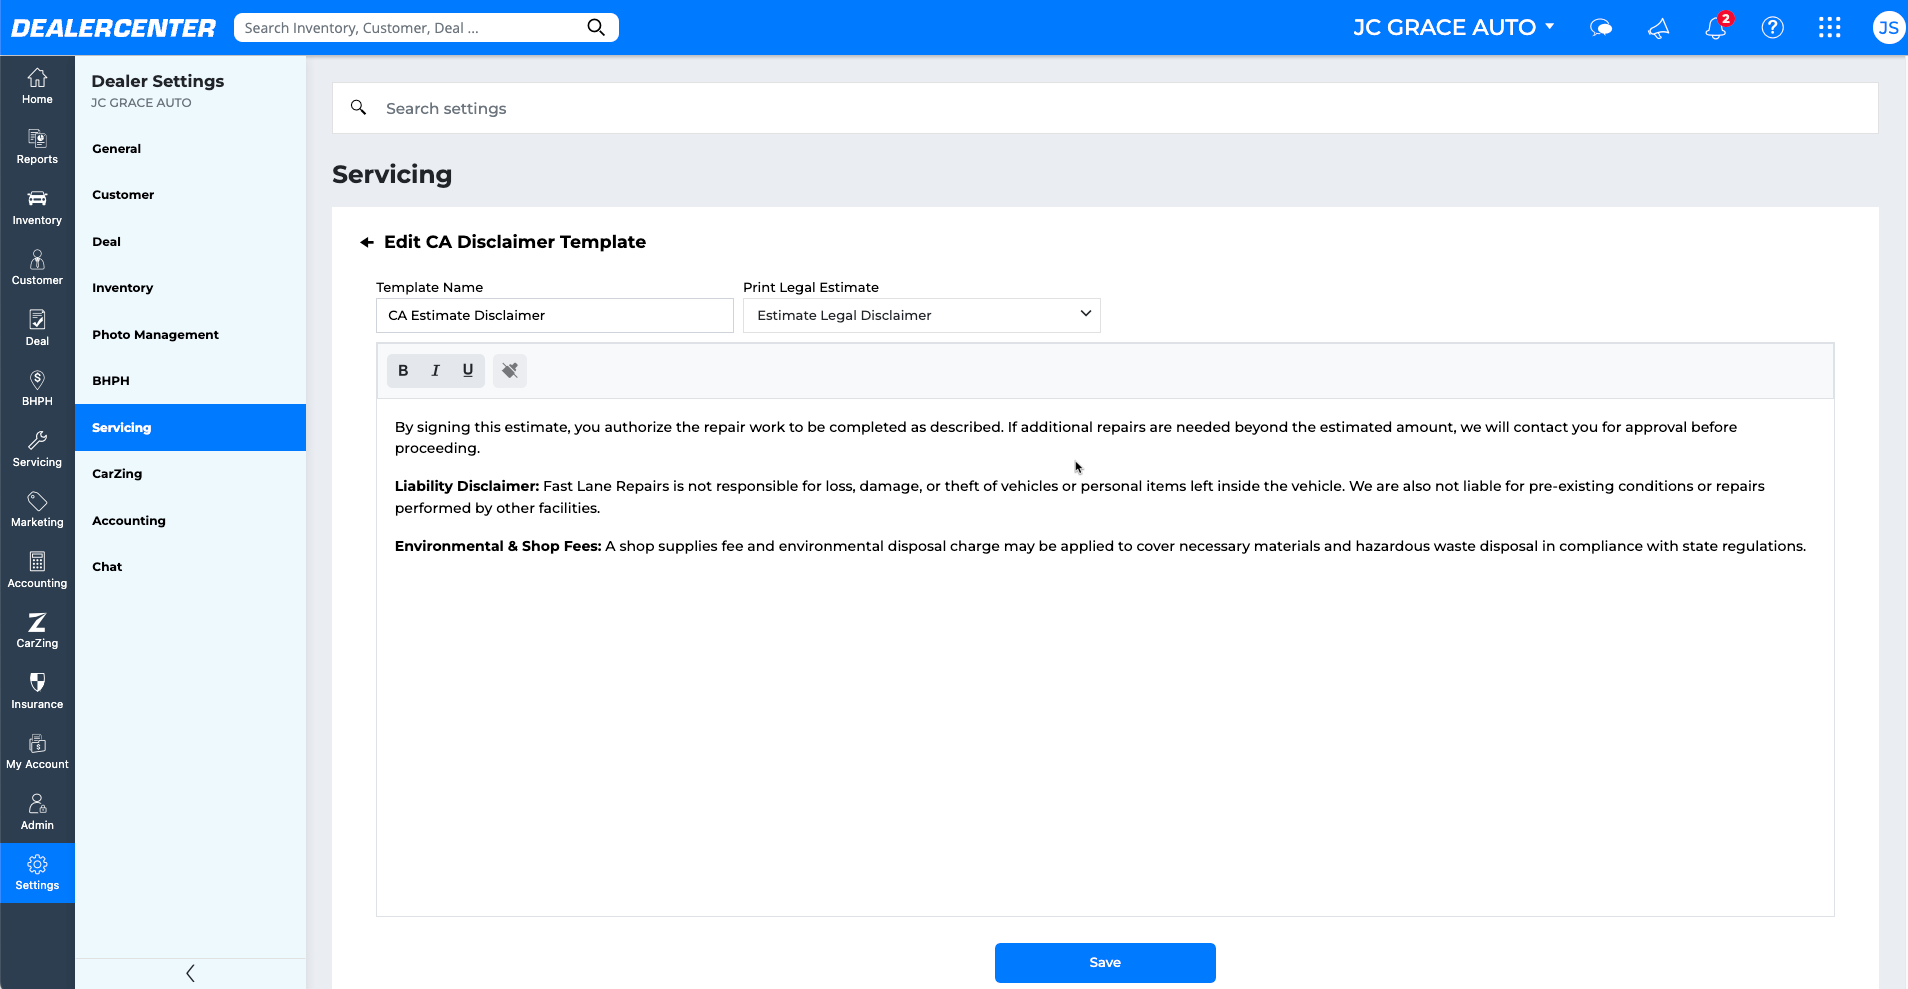
Legal Disclaimer Template
Add state-required disclaimers to estimates and invoices:
- In the Printing section, choose Legal Disclaimer.
- Click on row to open/edit a Disclaimer.
- Click Create New Disclaimer to add new Disclaimer Template.
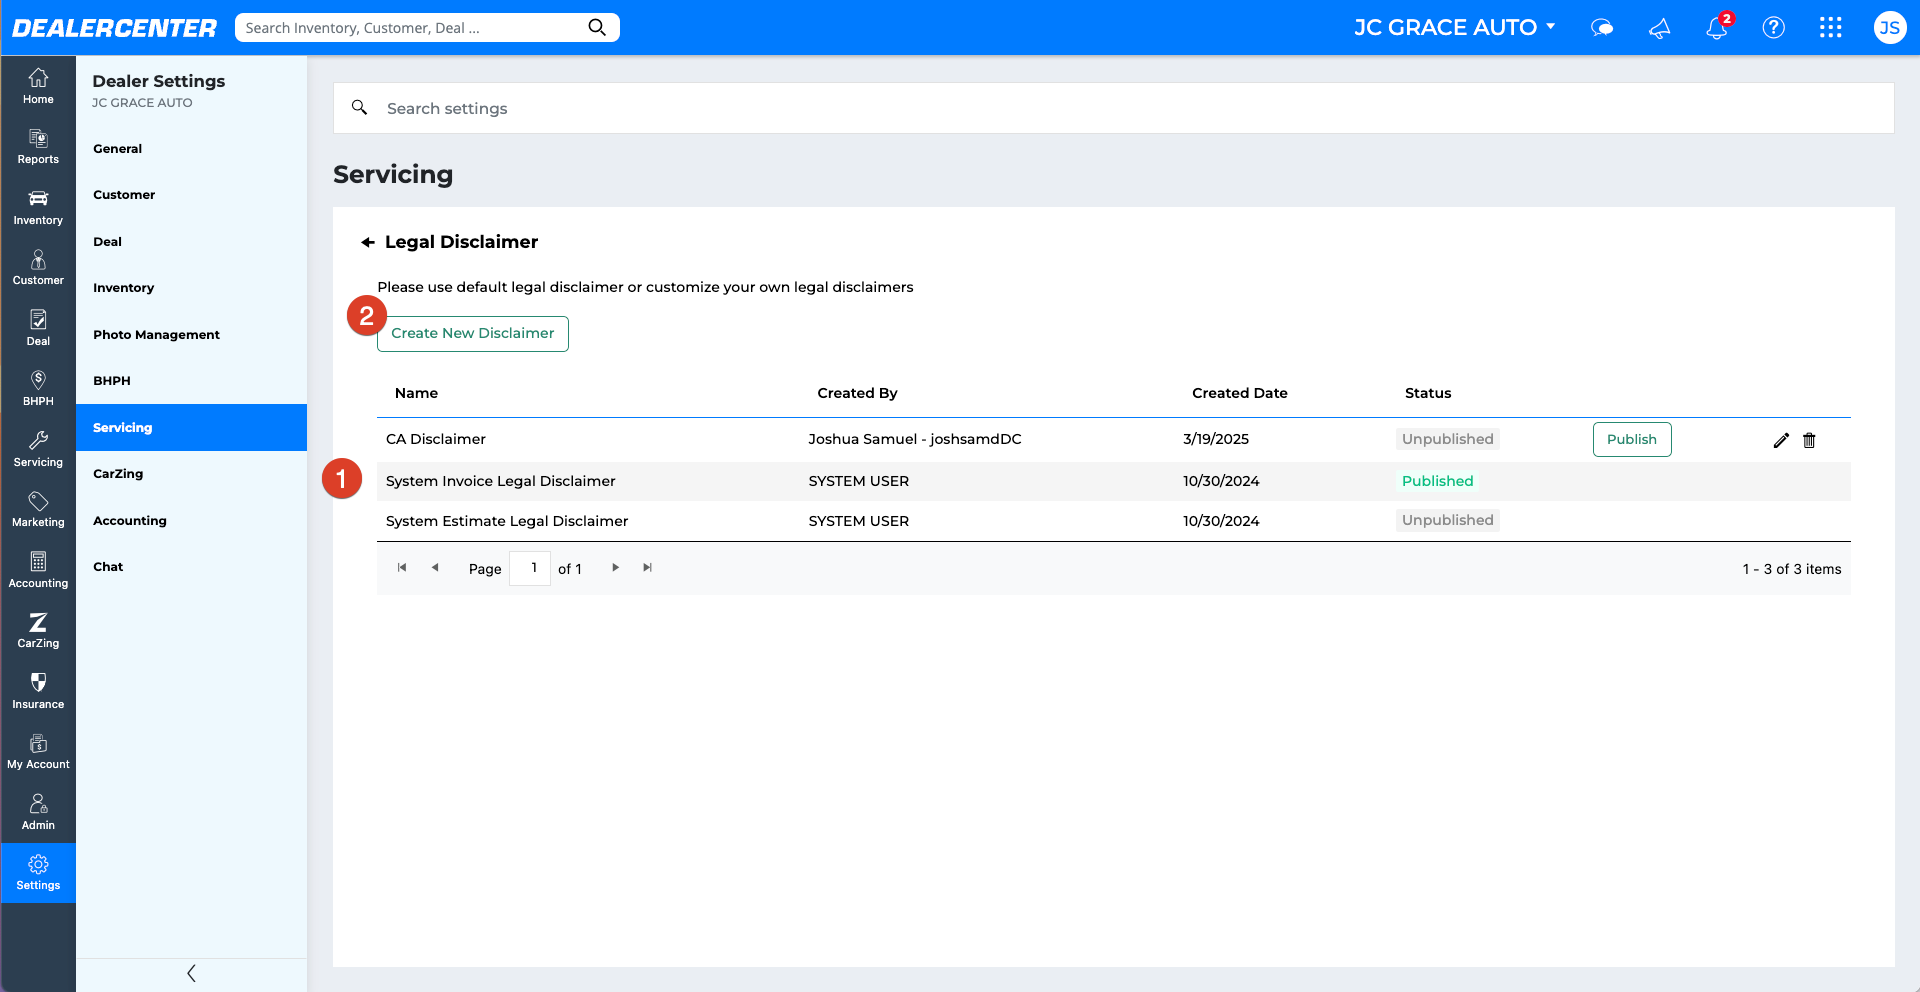
- Choose whether the disclaimer applies to an invoice or estimate.
- Paste in your state-specific legal verbiage.
- Click Save to add the disclaimer to your template list.
Adding Users and Assigning Roles
Assign the correct permissions to your service team:
- Go to Admin in the main menu and click New User.
- Fill in user details and assign a role such as Service Advisor, Technician, Shop Foreman, or Service Manager.
- If the user already exists, simply update their role instead of creating a new account.
- Use the permissions checklist to customize access for each role if needed.
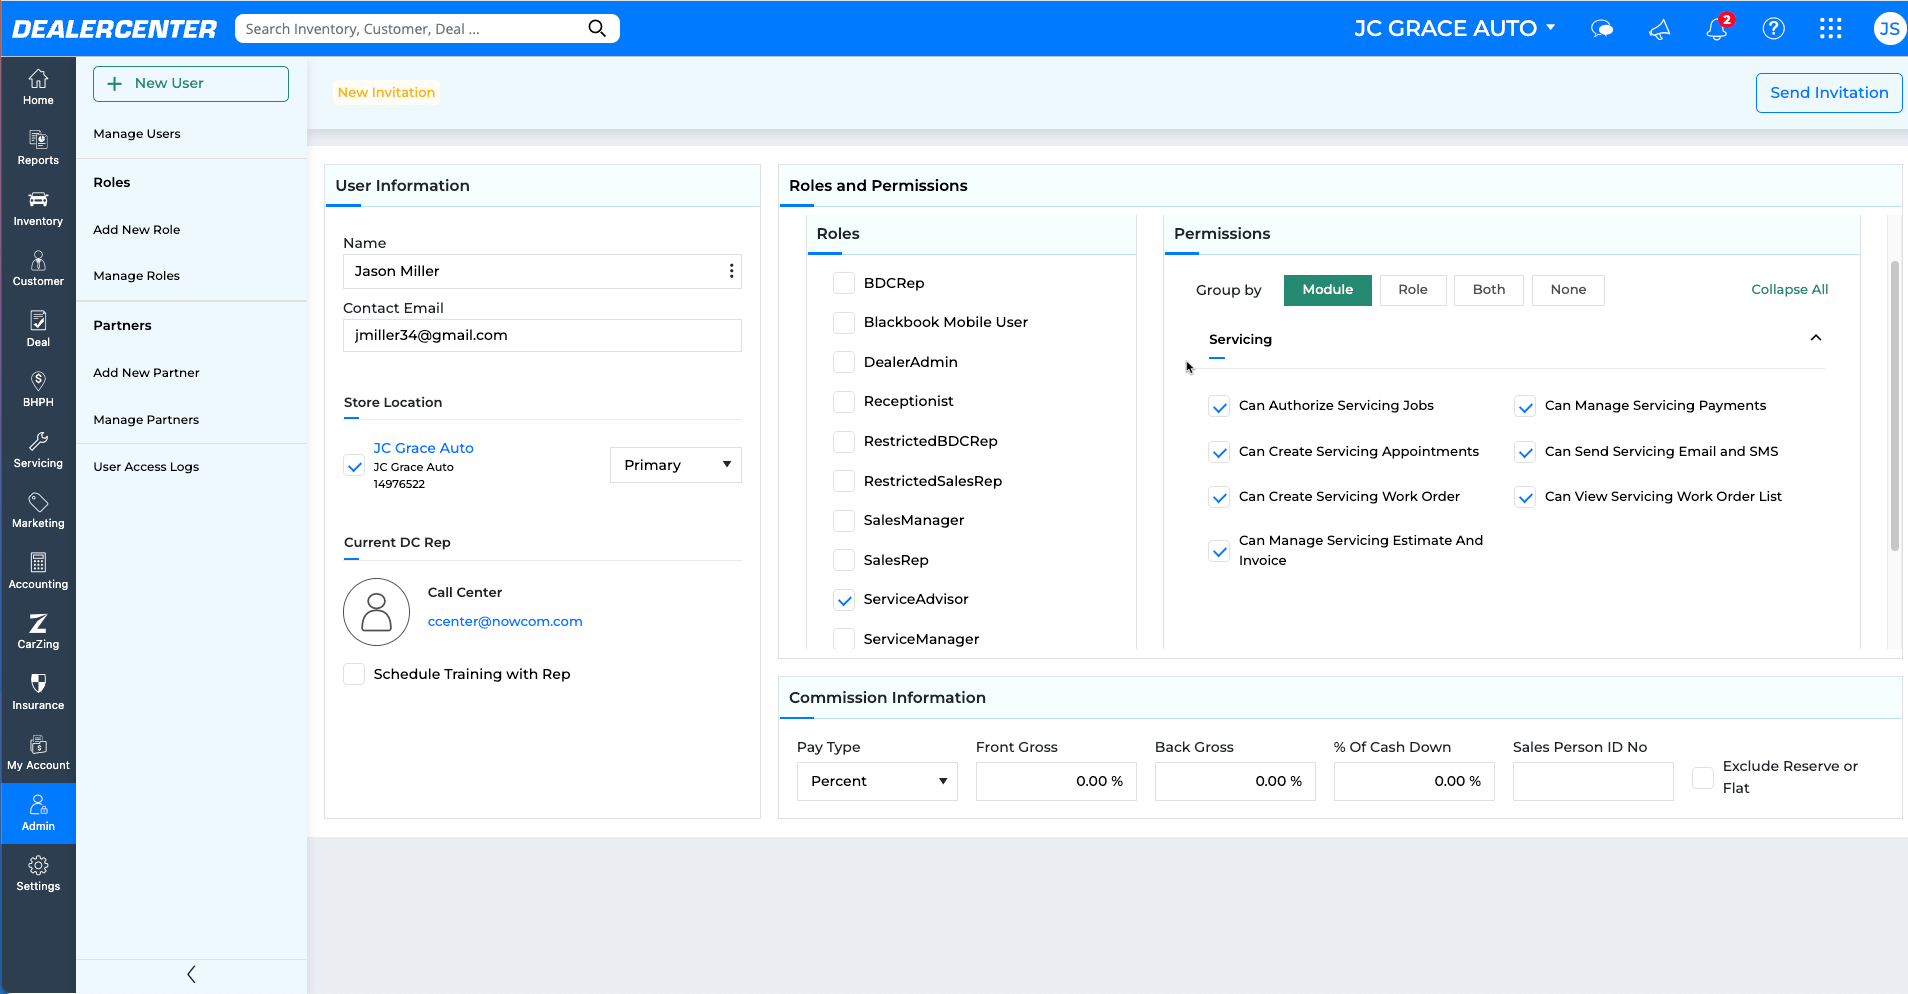
Default permissions follow common industry roles: Service Advisors and Managers can manage jobs and invoices; Technicians can view and complete jobs but not authorize work.